Hi Guys,
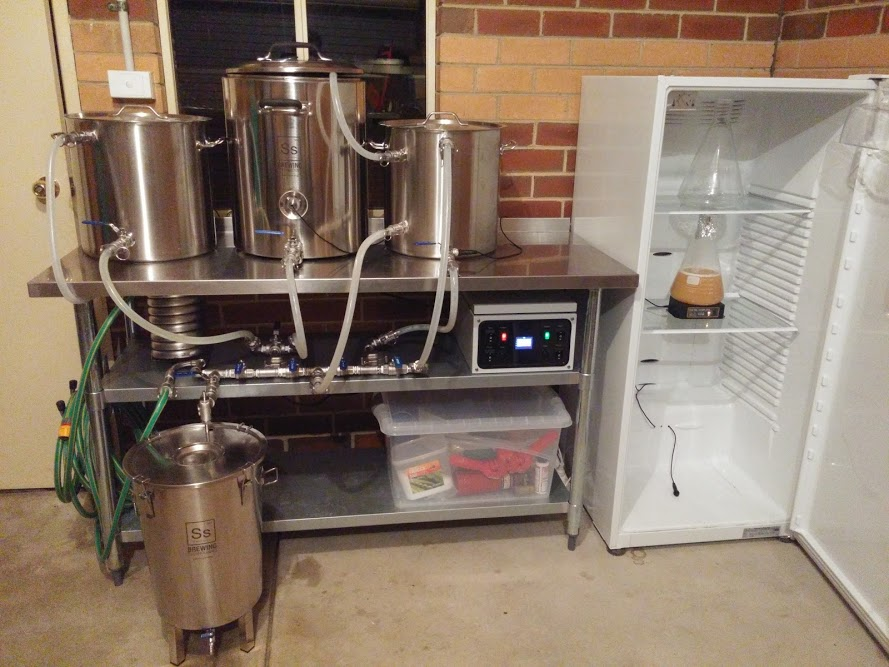
I’ve just finished building my BrewPi controlled brew system (I’ve called it “The Incredible Machine”!).
A few features:
Splash proof control panel. I wanted the panel on the shelf so I can eventually wheel it and brew outside.
Metal control panel for good heat dissipation
Laser cut and etched perspex window to ensure good WiFi signal
Heaters and Pumps can be switched between manual and auto
Because I’m in a rental with 10A 240V power points, and 16A 240V house circuit breakers, the control panel is powered off two separate house circuits (using a long extension cable). Currently has 2200W heating elements, but I’ll upgrade to the 3500W BrewPi elements when I move into my own house.
Microphone connectors for sensors and pumps for water proof-ness. But I would go for RJ12 connectors if I did it again. Soldering was a pain!
Will remove the Raspberri Pi when WiFi is supported on the Spark.
Low watt density heating belt hidden in the air flow/distribution panel at the back of the fridge
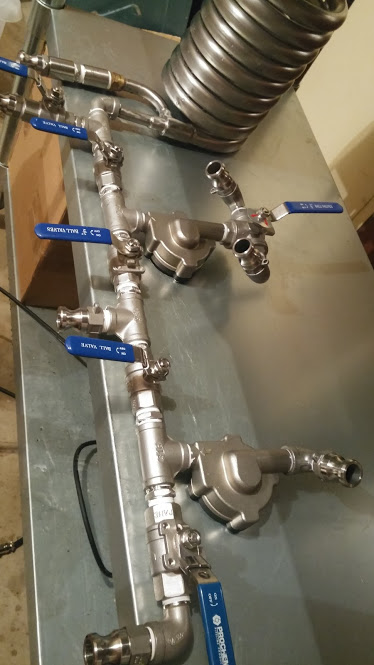
Inline oxygenation in the tee just before it drains into the fermenter. Tee is quick disconnect for easy sterilisation.
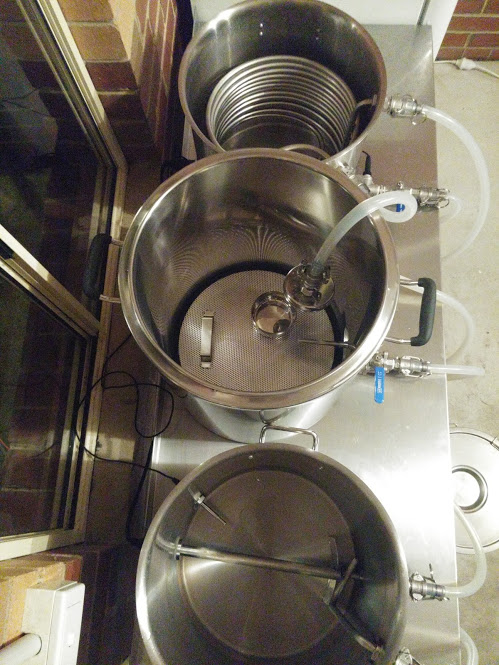
Terribly inefficient counter flow chiller…but easy to clean.
Still need to mount the home made sparge “shower head” onto a quick-disconnect arm which will come from a side inlet. Then I can recirculate with the lid on, minimise heat loss and therefore the difference between the HLT temp and the Mash temp. Theory being that this will tighten the distribution of temperatures that the conversion enzymes are exposed to. Giving me better control over the beer body. Completely over kill.
New BrewPi pumps with speed controllers
Will write a script to easily switch between HERMS and fridge configurations (until the new software with multiple chamber support is ready).
Thanks @Elco and others for all the hard work on the software dev and quality products!
Dave
Do you have any close up pictures of your “shower head” sparge attachment? I’ve been trying to find something I can use for recirculating during mashing. I want it to come in through the lid and have the height adjustable for different batch sizes, so it sits just above the wort level. I really like the SS Brewtech version http://www.ssbrewtech.com/collections/accessories/products/sparge-arm-for-10-gal-infussion-mash-tun but I only want the head.
Have you done any brews with this setup yet? How do you find the pumps?
I’m also pretty keen for the wifi on the Photon to be implemented. I have an arduino based fridge but would like to share 1 Raspberry Pi for my mashing controller and fridge controller.
Yes, I’ve done several water tests so far and they primed straight away with no issues. I was going to mount them as per the pictures of your build, however I noticed the pump instructions said mounting them vertically was OK, so I went with this option since the wires are now hidden underneath the shelf, and drilling a circular hole was easier.
@Dan, I also got my CFC from Aliexpress, however I think yours will be more efficient being copper. If you are recirculating with a pump, and not doing a single pass of your wort using gravity, then you can just slow the water down to make it more water efficient (but therefore less time efficient).
Only tested with water so far, but the pumps are awesome. It’s very satisfying “reving” their speed with the pots . The big test will be how good the trub cone is with my maiden brew tomorrow (an IPA). However the whirlpool is quite decent with the pumps on max, and with the wide high-flow BrewPi camlocks, so I think it will be fine.
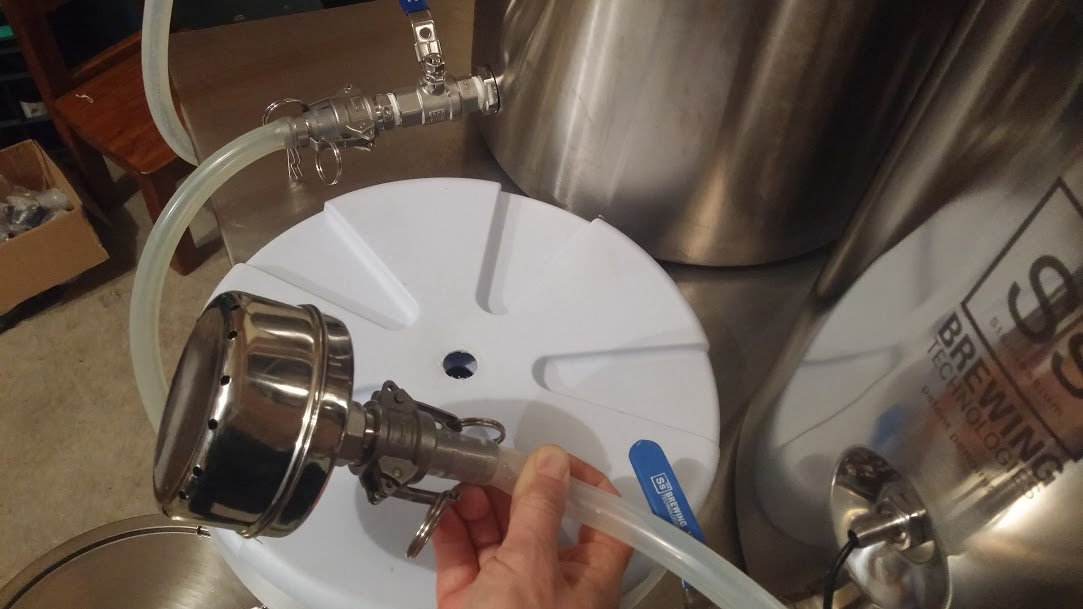
The sparge shower head is just one of these, with some holes drilled around the wall bottom so it sprays out wards. I used it previously through the lid of the rubber maid (pictured). For a variable height sprayer, hanging from the lid, you could also use something like this. I actually tried one of these first, but it did not disperse the wort wide enough at HERMS flow rates. To be honest the shower head does not spray that wide either…something wider would be good.
@Dan, my maiden brew went great thanks! Held within 0.1 degree of the mash temp for the entire hour (using the recommended mash settings). The pumps worked great and are incredibly quiet (I’ve put rubber trim around the hole edges to stop vibrations against the metal shelf). I was very relaxed by the waterfall-like trickle of the returning wort…but that could also have been the celebratory beer I was consuming at the time!
Cleaning was also easy as I had about 10L of water left in the HLT after the sparge. After tipping the grain out, I used this for a PBW rinse/clean in place, then followed this with a starsan rinse (using warm water I captured during chilling). Chilling with the 4m long SS CFC chiller took about 20min with ambient water temp around 12 degrees. It will be good to upgrade to more powerful elements eventually, as the heat times were a little slow, and not powerful enough to do a stepped mash with a 1deg/min rise.
I was planing to recirculate with the lid on to minimise heat loss (with a side inlet to the mash tun). However, since I’ll be upgrading to larger heating elements, heat loss during a stepped mash won’t be an issue. So I think I’ll end up buying the SS Brewtech sparge arm.
Hi Dave, This looks like an awesome set up. I am new to HERMS but would like to build my own. Do you have a schematic diagram of your set up that you could share? If not can you explain how it works? Thanks in advance,
Joe


 . The big test will be how good the trub cone is with my maiden brew tomorrow (an IPA). However the whirlpool is quite decent with the pumps on max, and with the wide high-flow BrewPi camlocks, so I think it will be fine.