Hello fellow BrewPi users!
This forum has been a massive source of inspiration to me. I finally finished my fridge build and wanted to share my design and build pictures.
A big cheers to Elco for such as awesome bit of kit too. Can’t wait for the next phase to build my HERMS!
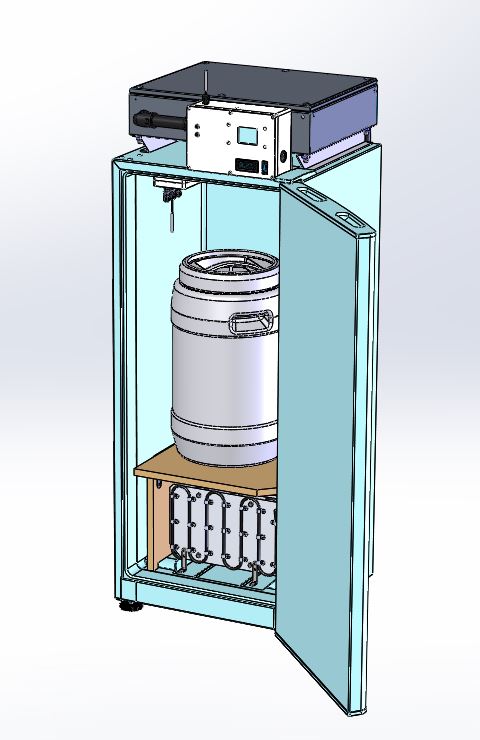
Fridge designed in Solidworks 2016. Barrel type fermenter shown in original design
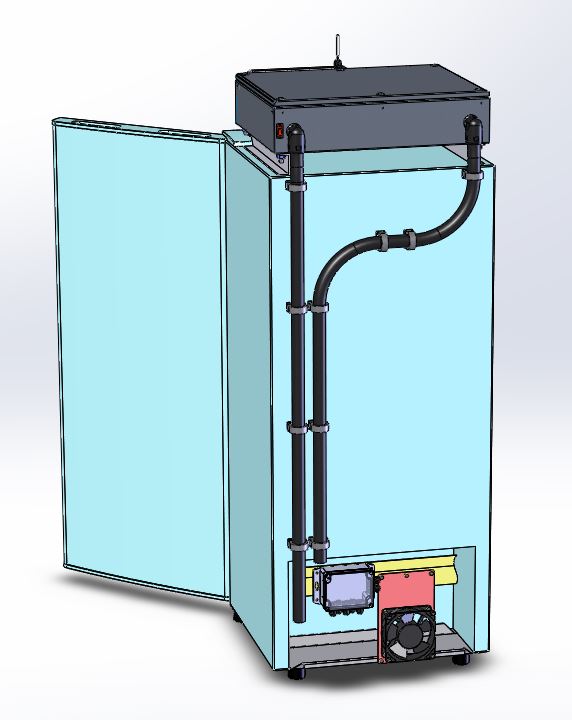
Design of rear reticulation and additional fridge compressor cooling
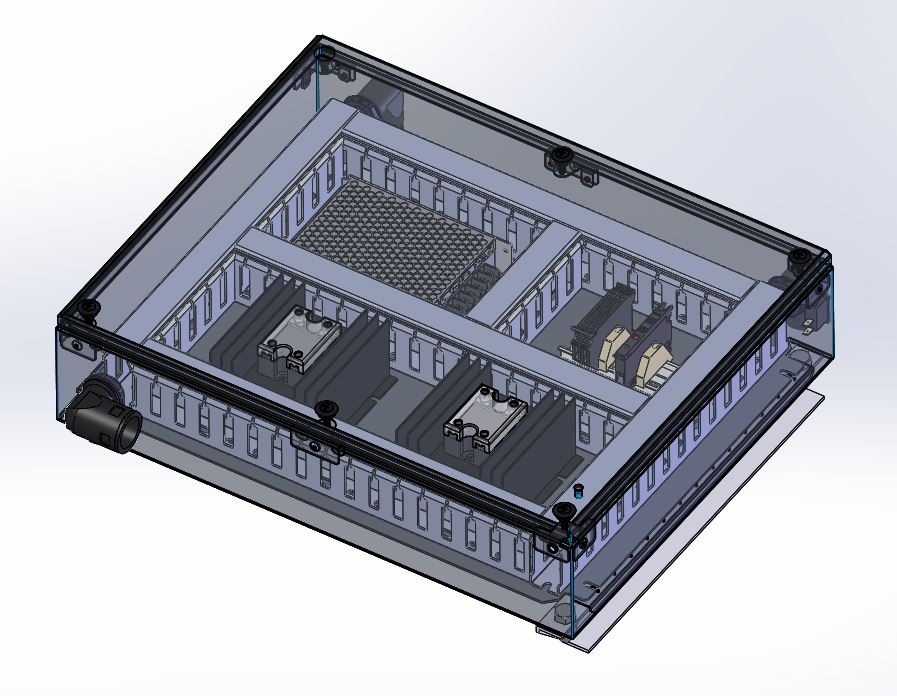
240VAC electrical enclosure housing fuse holders, solid state relays for switching heater and fridge compressor, and a switch mode power supply with 12VDC & 5VDC outputs
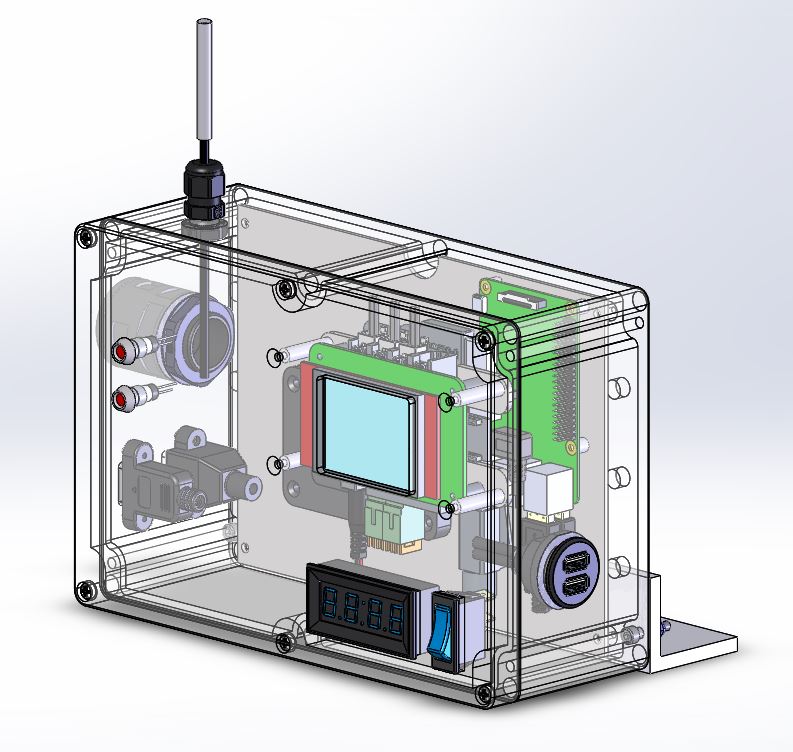
12VDC controls enclosure. Houses a Brewpi temp controller, Raspberry Pi, LEDs, switch and tacho (totally unnecessary!) for the chamber fan. Also has panel mounted HDMI, RJ45 and dual USB ports for hardwired connections to the Raspberry Pi

Electrical circuit diagram. I’m not an electrician, so the symbols are probably out of date/wrong, but it makes sense to me
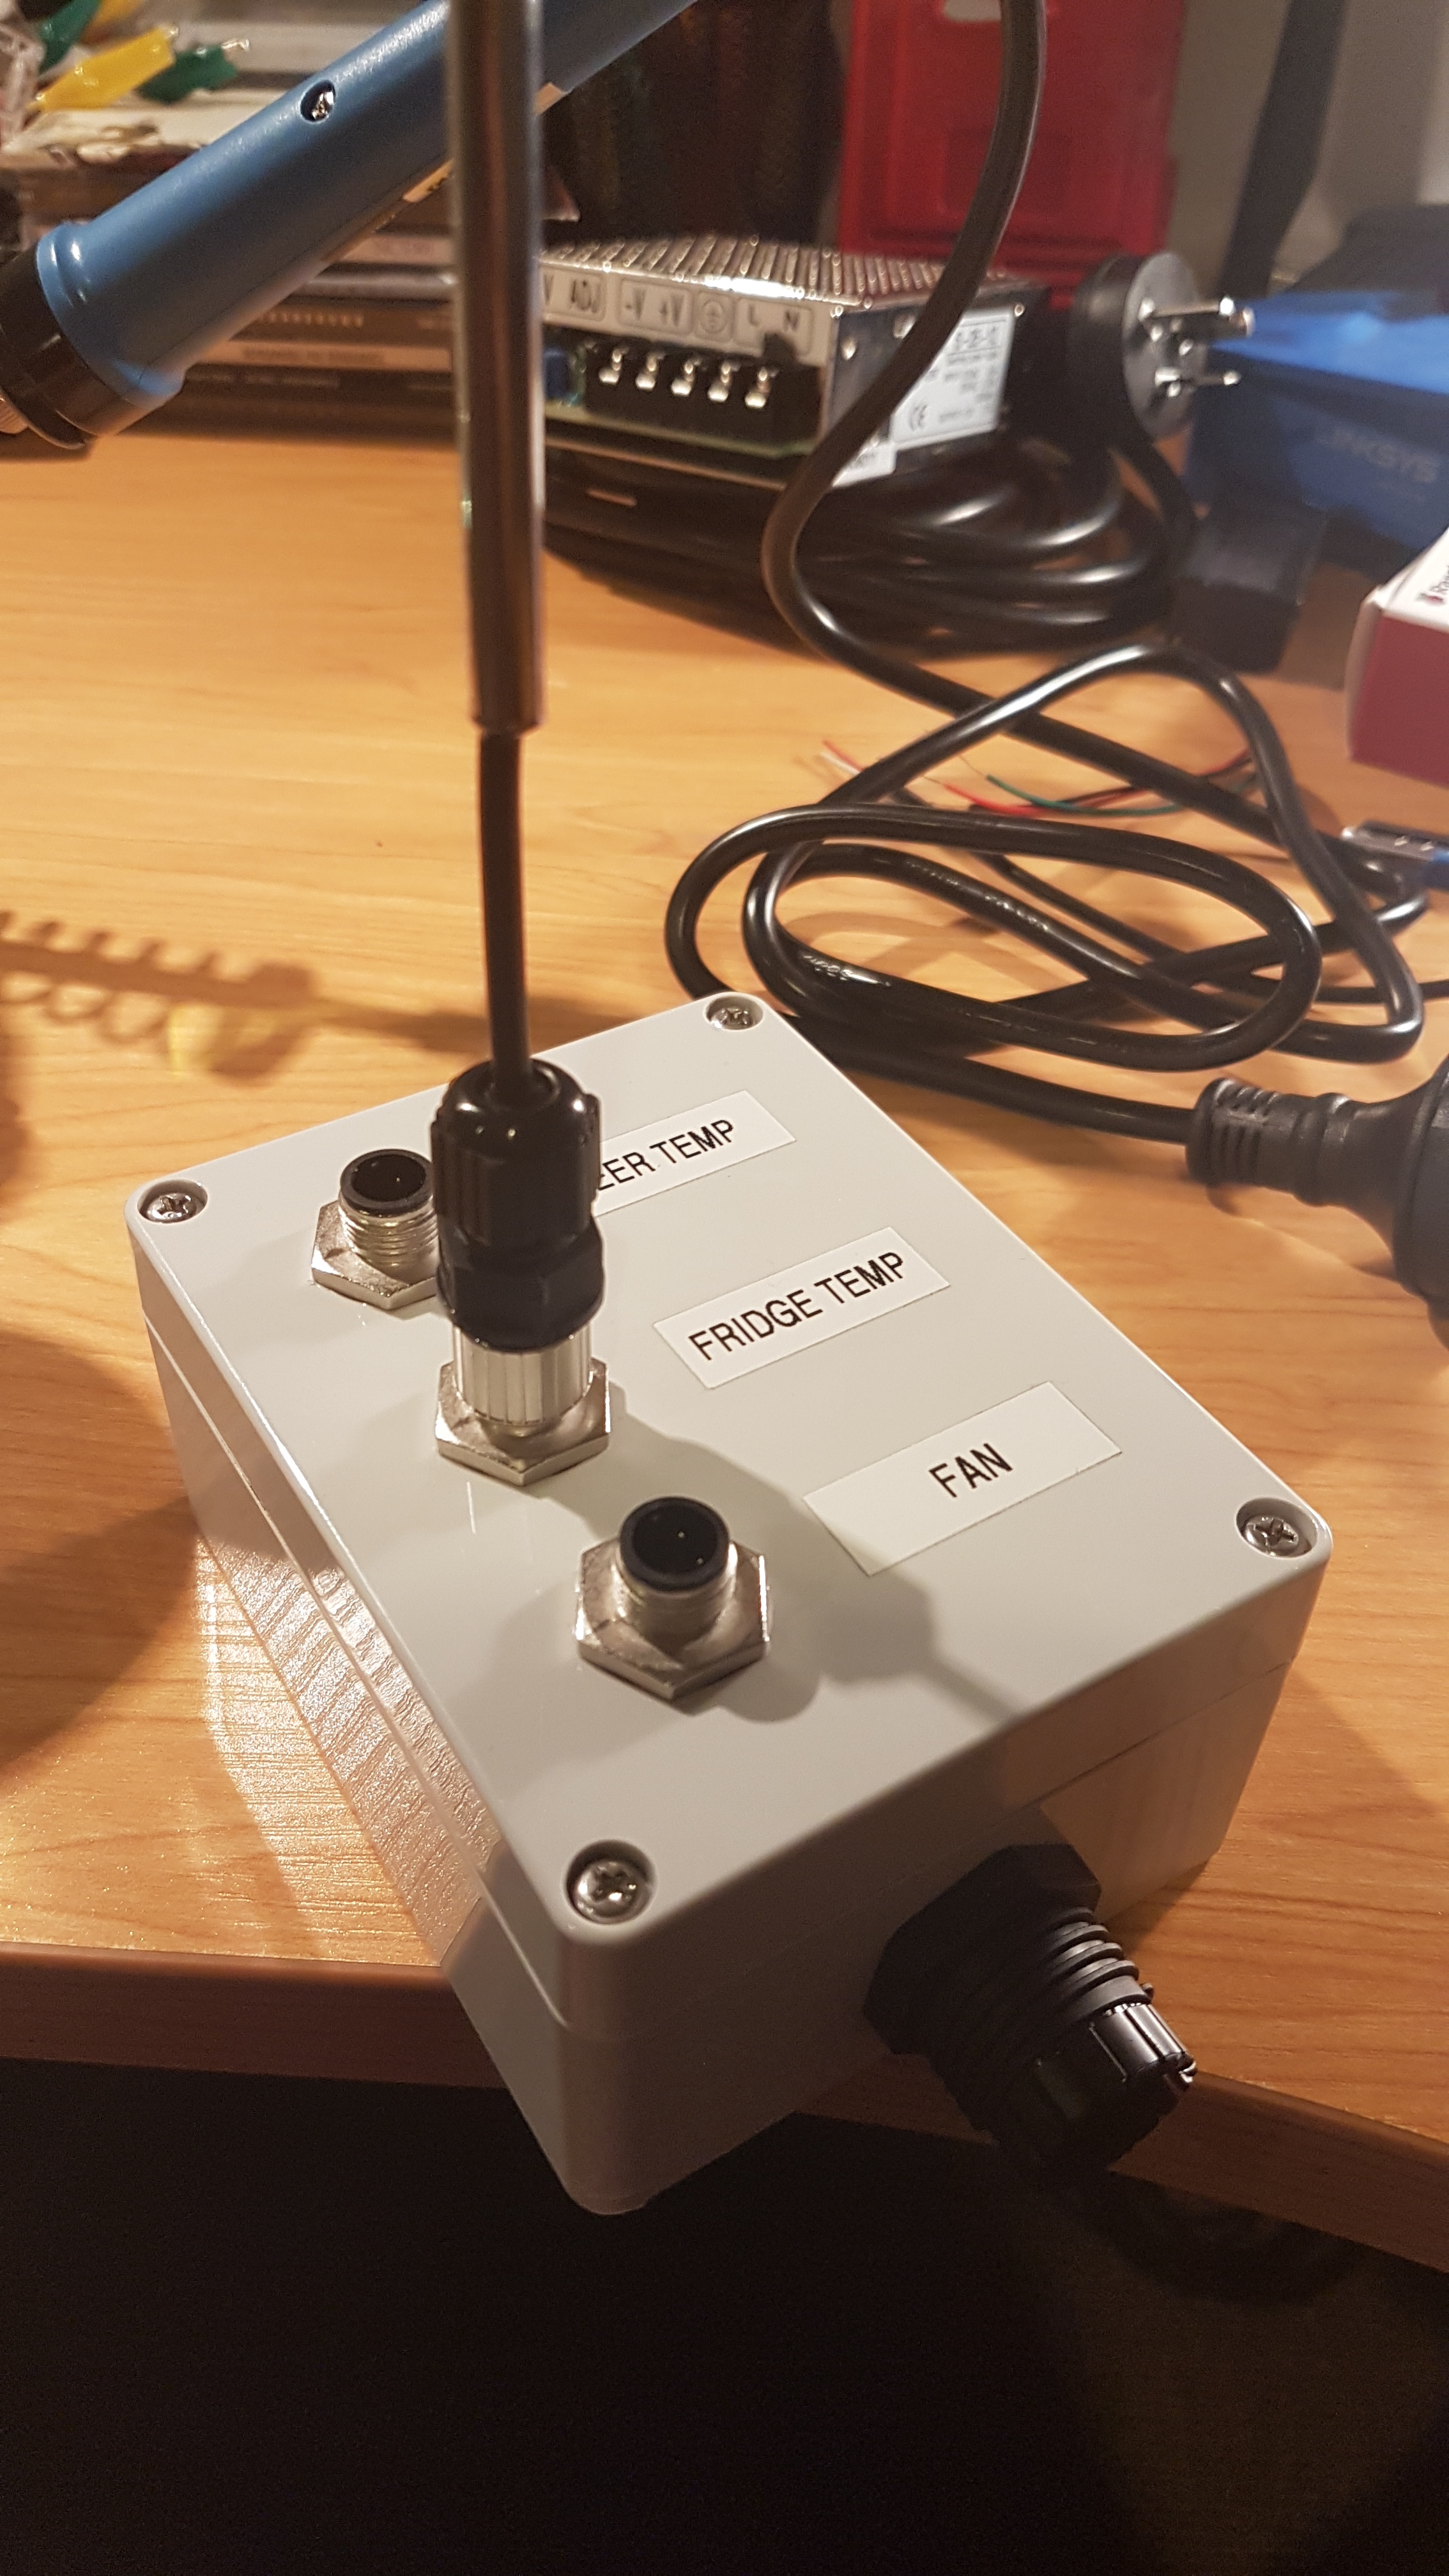
Chamber junction box for temp sensors and 12VDC chamber fan power supply
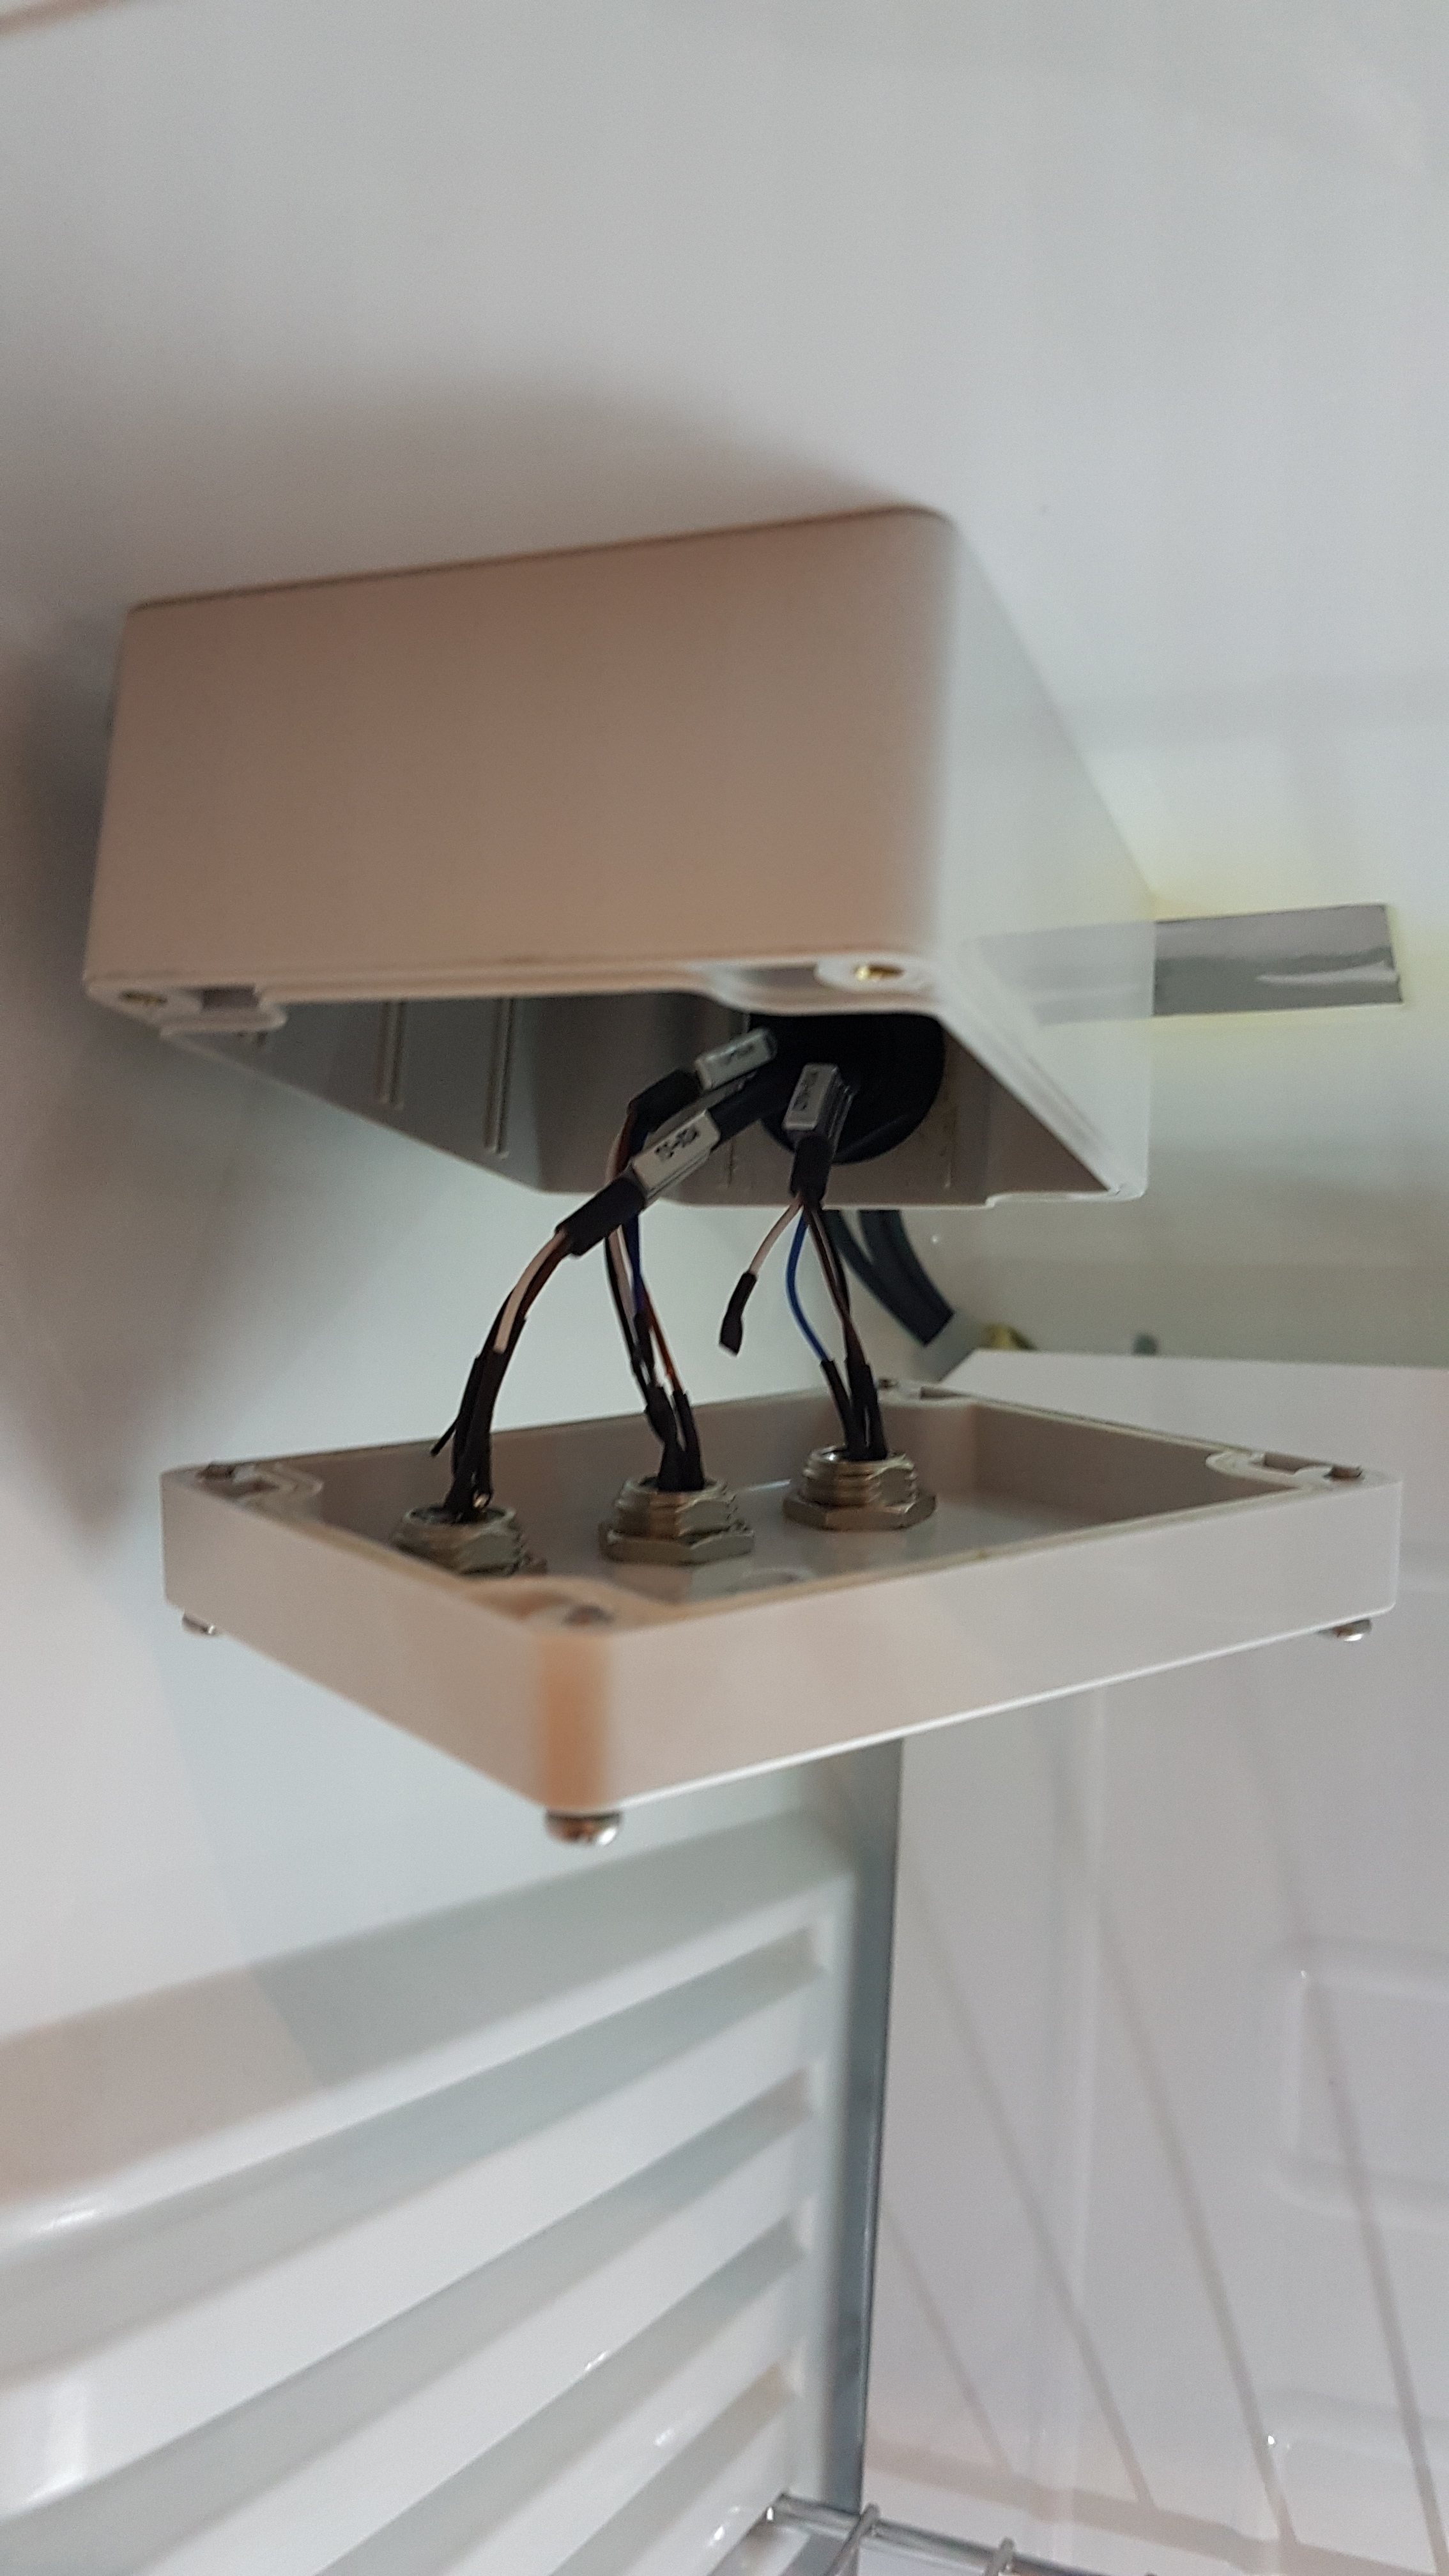
Wiring the chamber junction box plugs
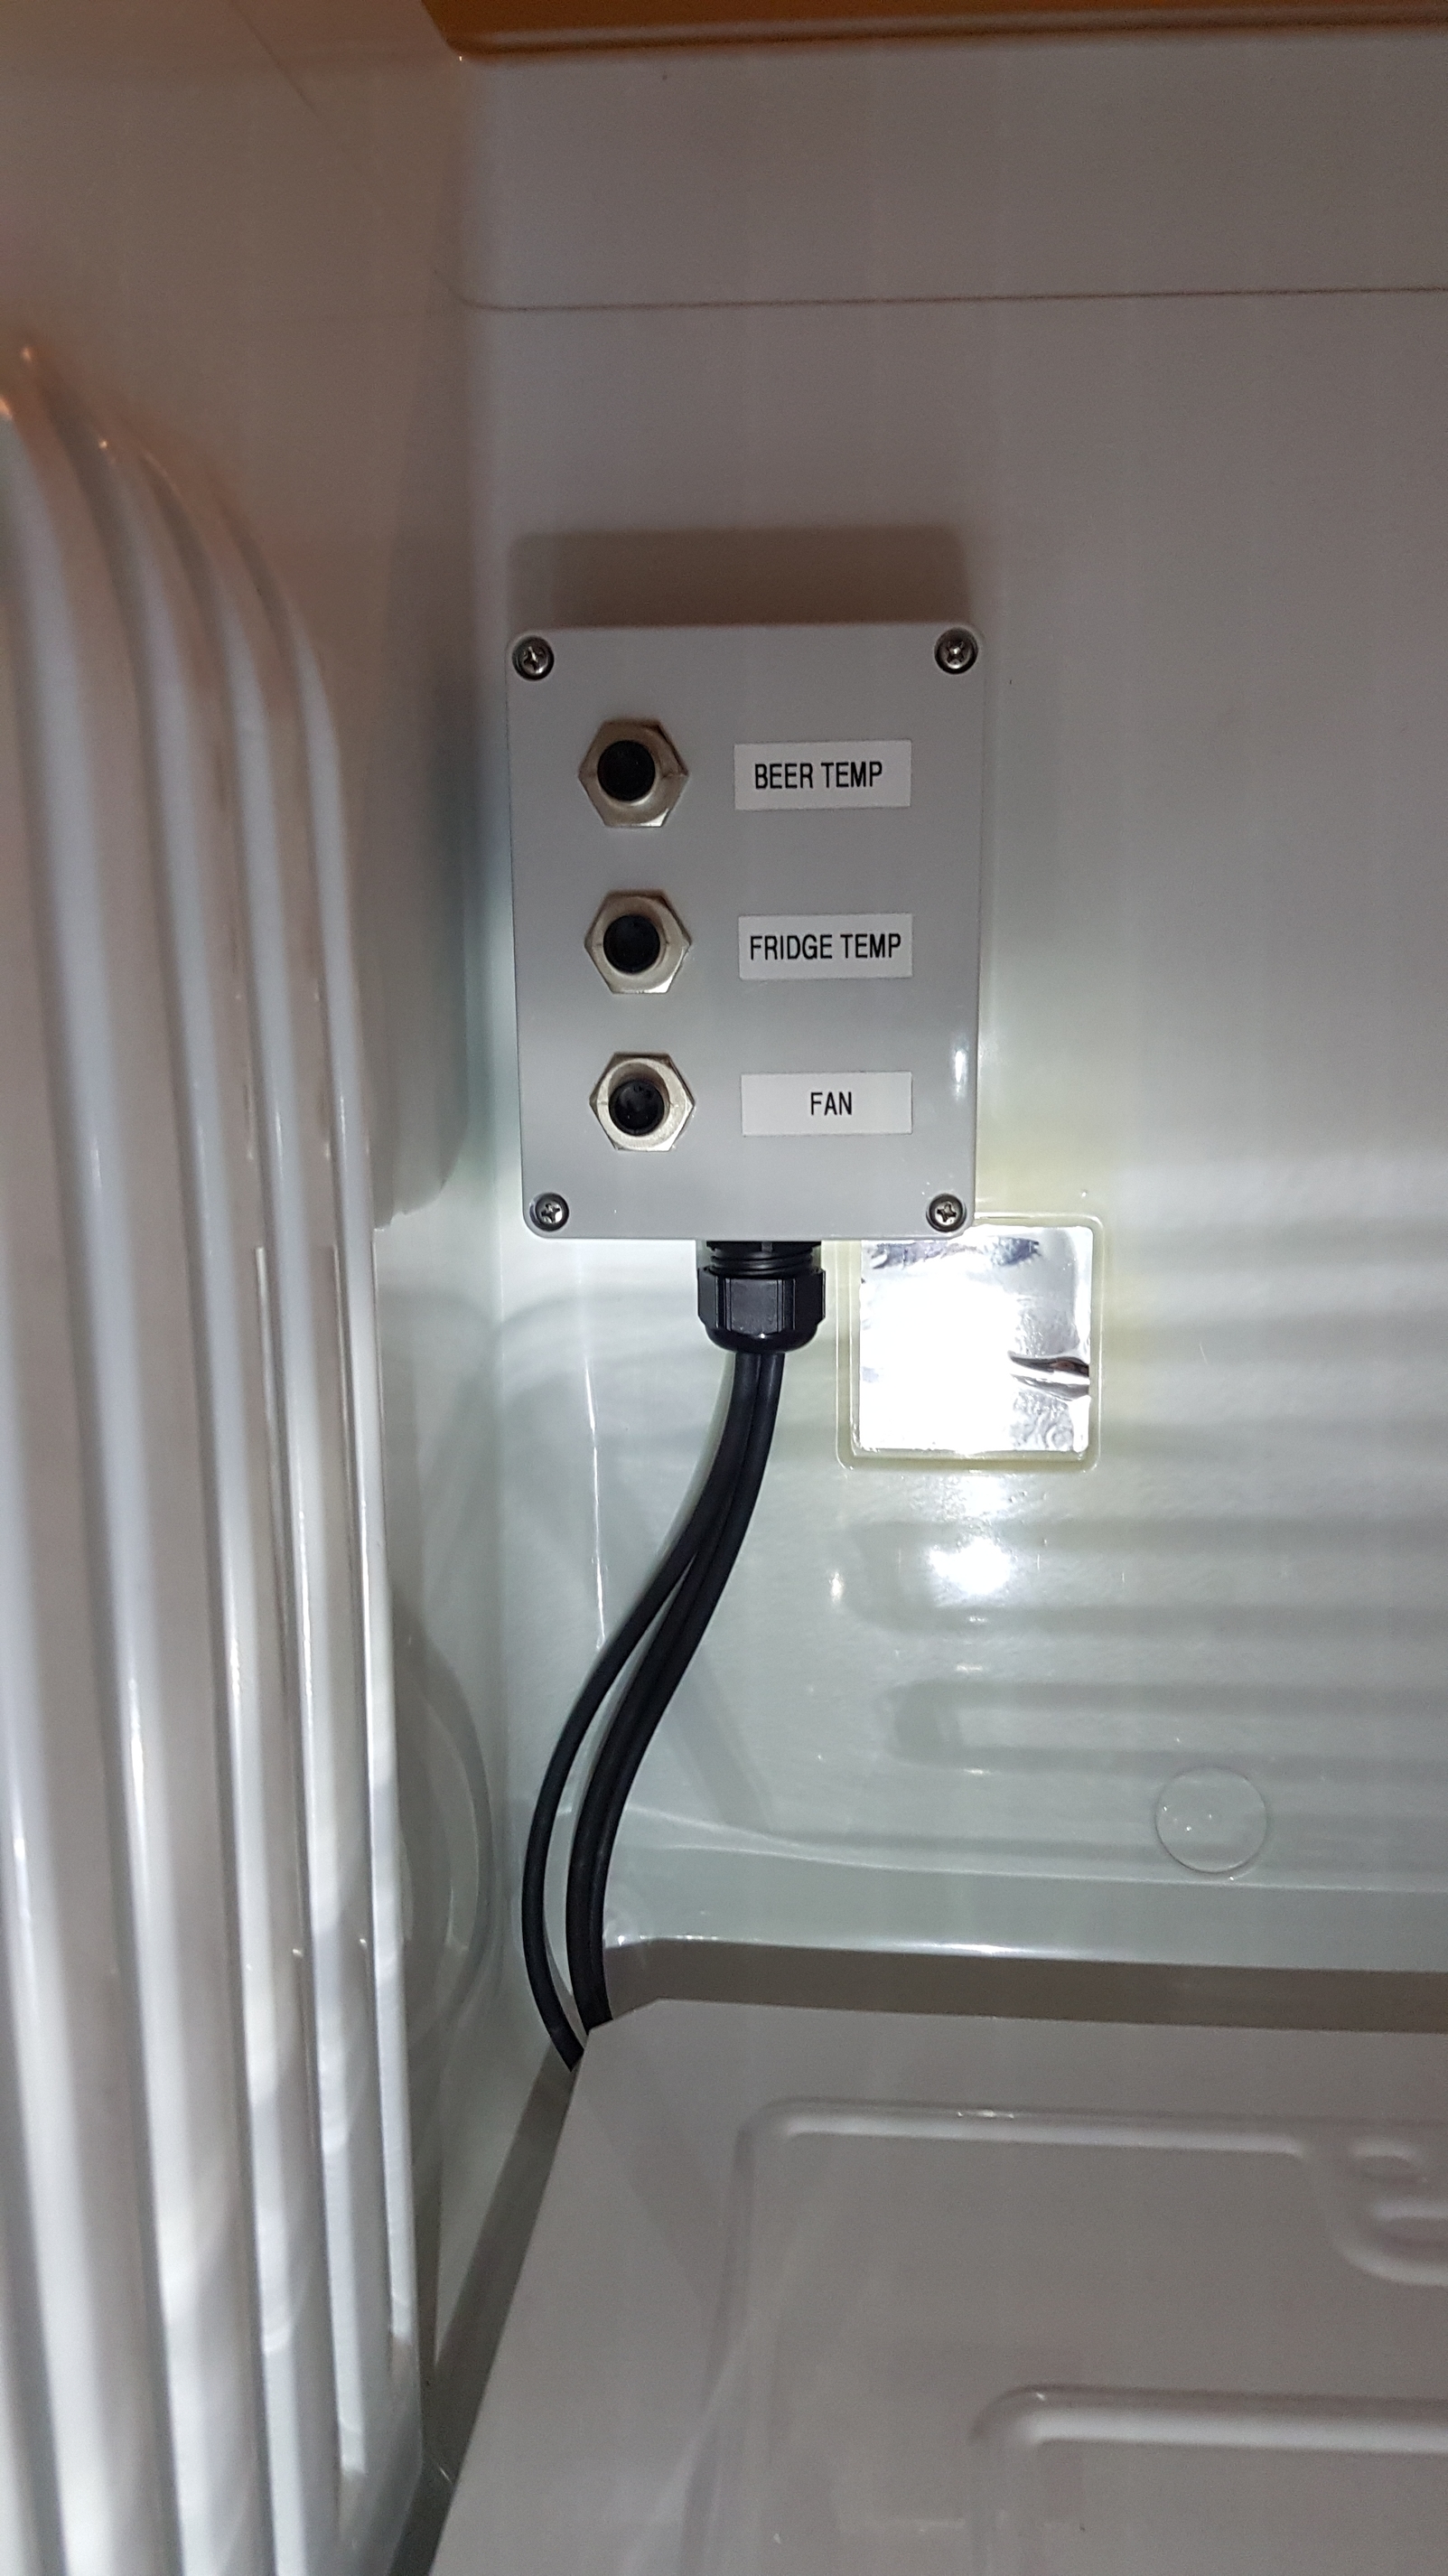
Chamber junction box in place on the ceiling of the fridge

Brewpi temp controller mounted to custom made base plate
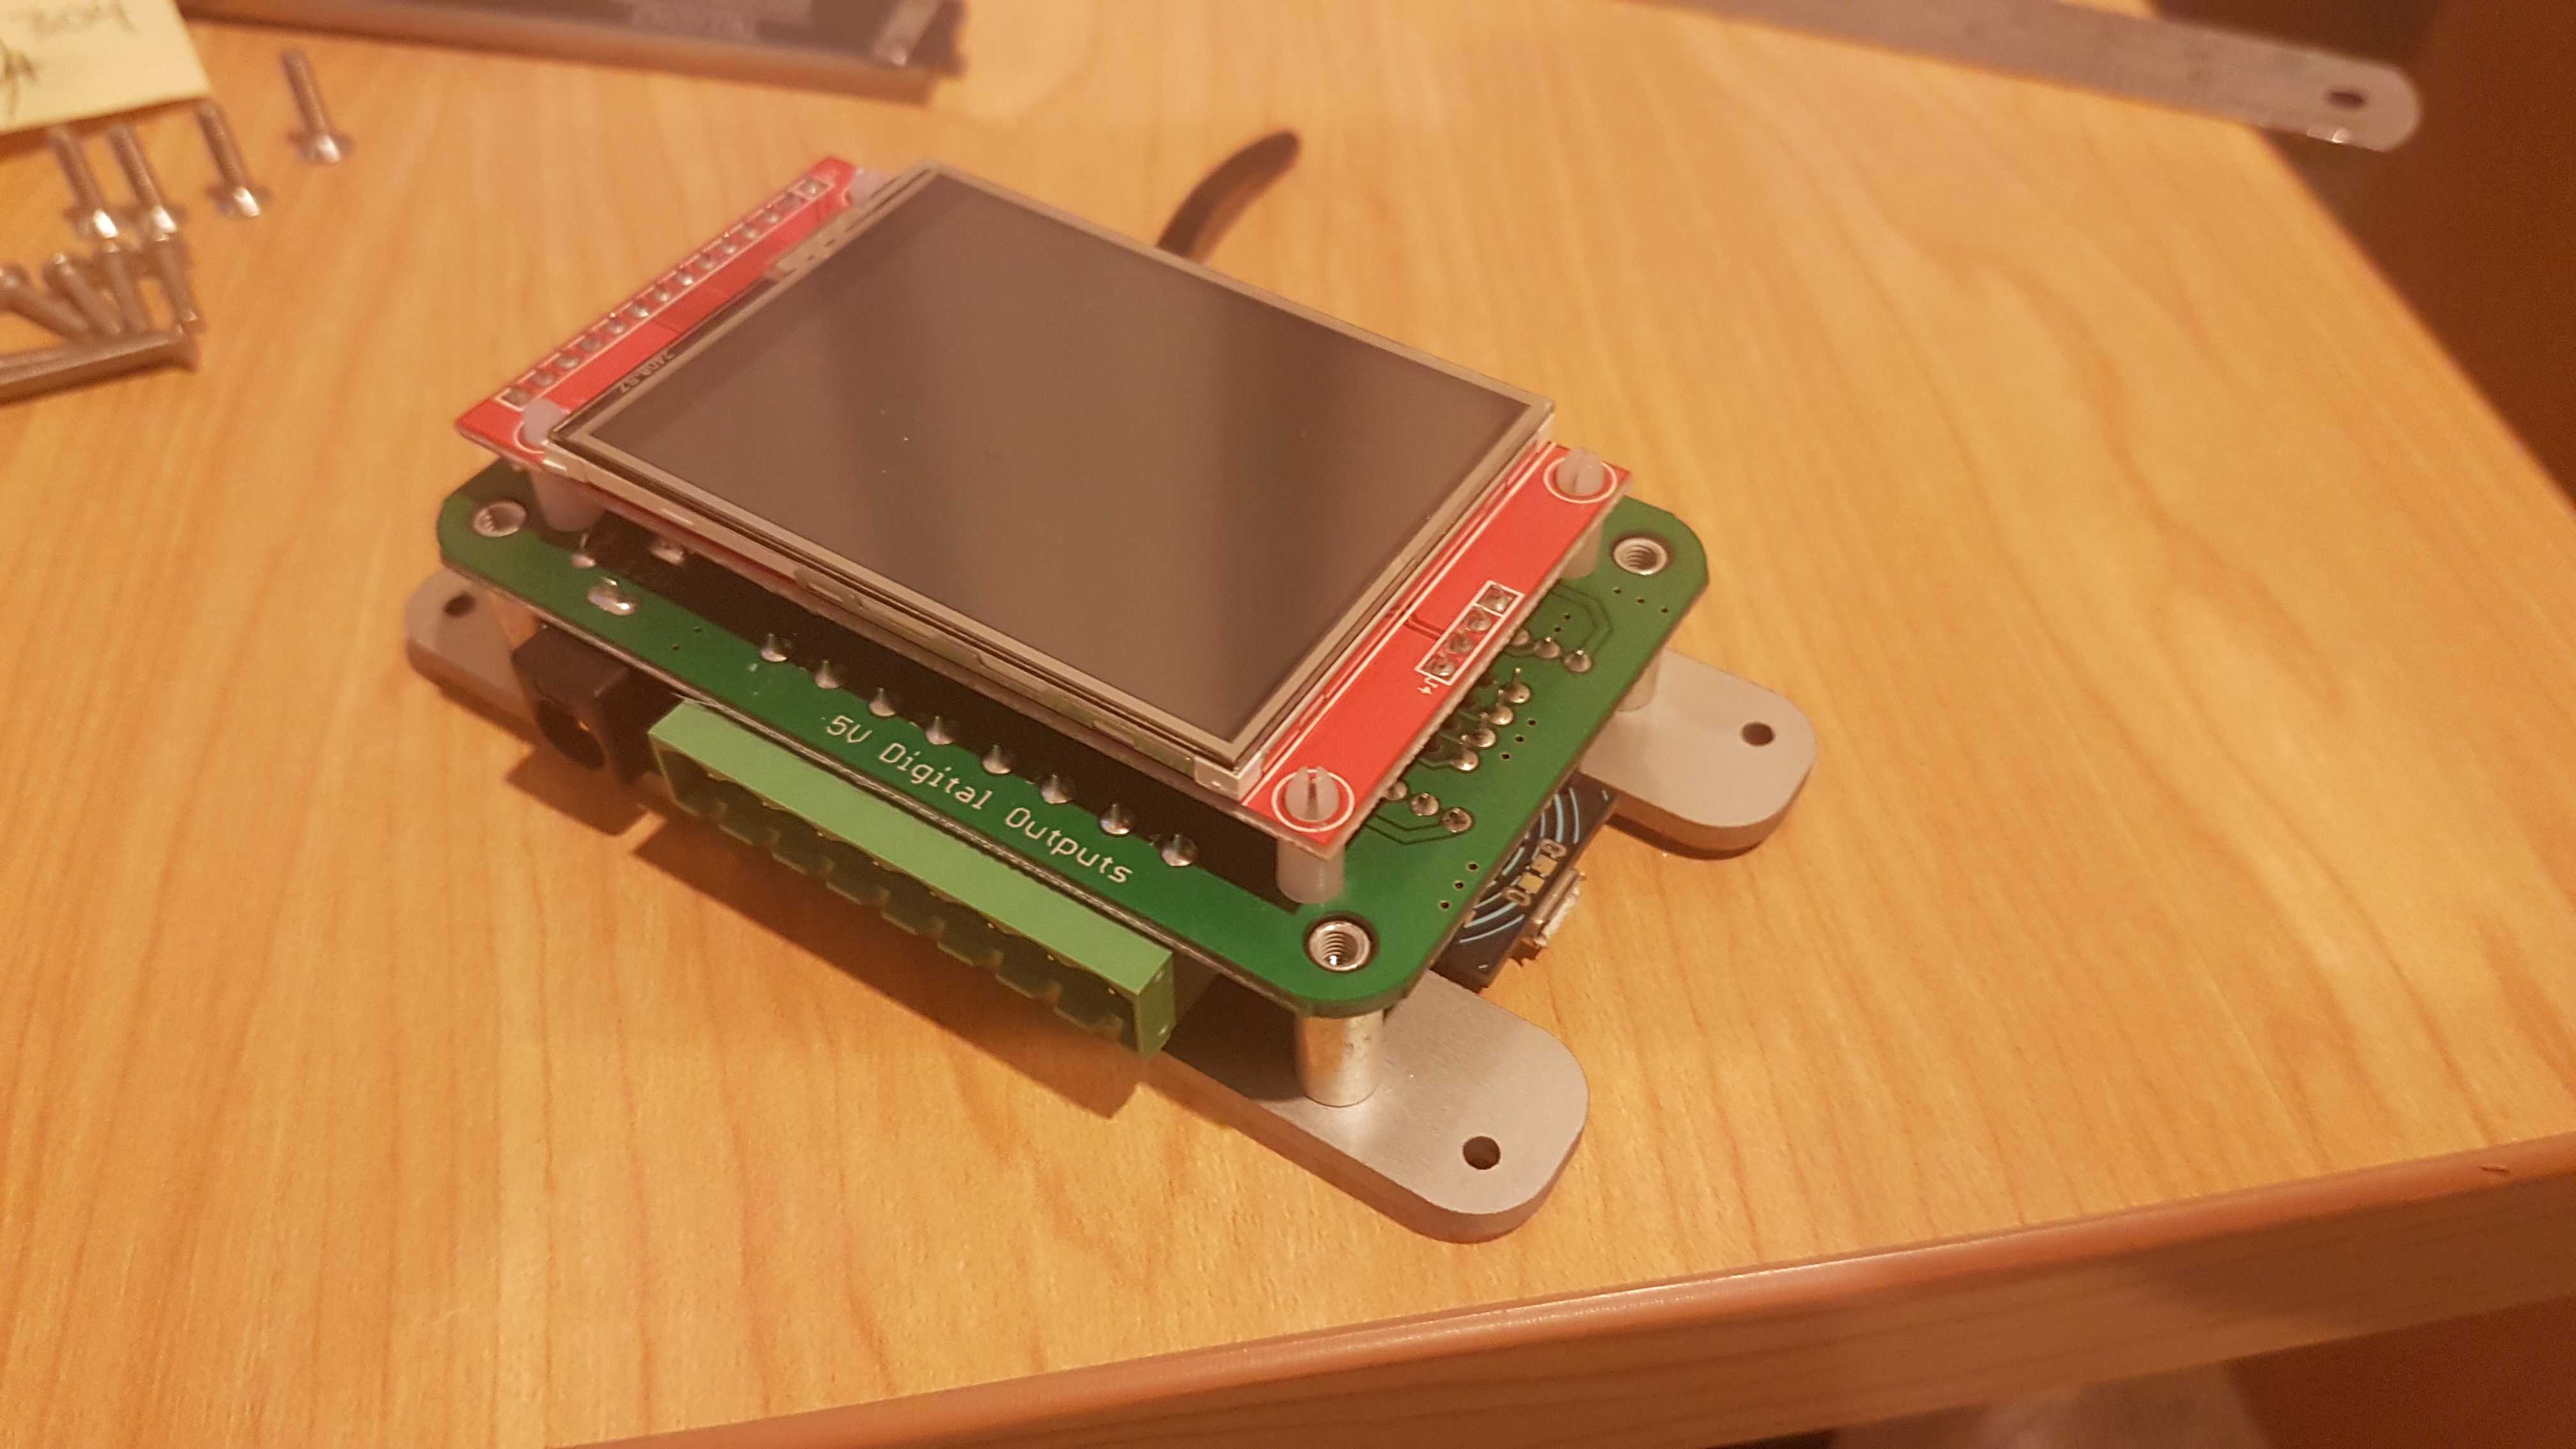
Brewpi and base plate
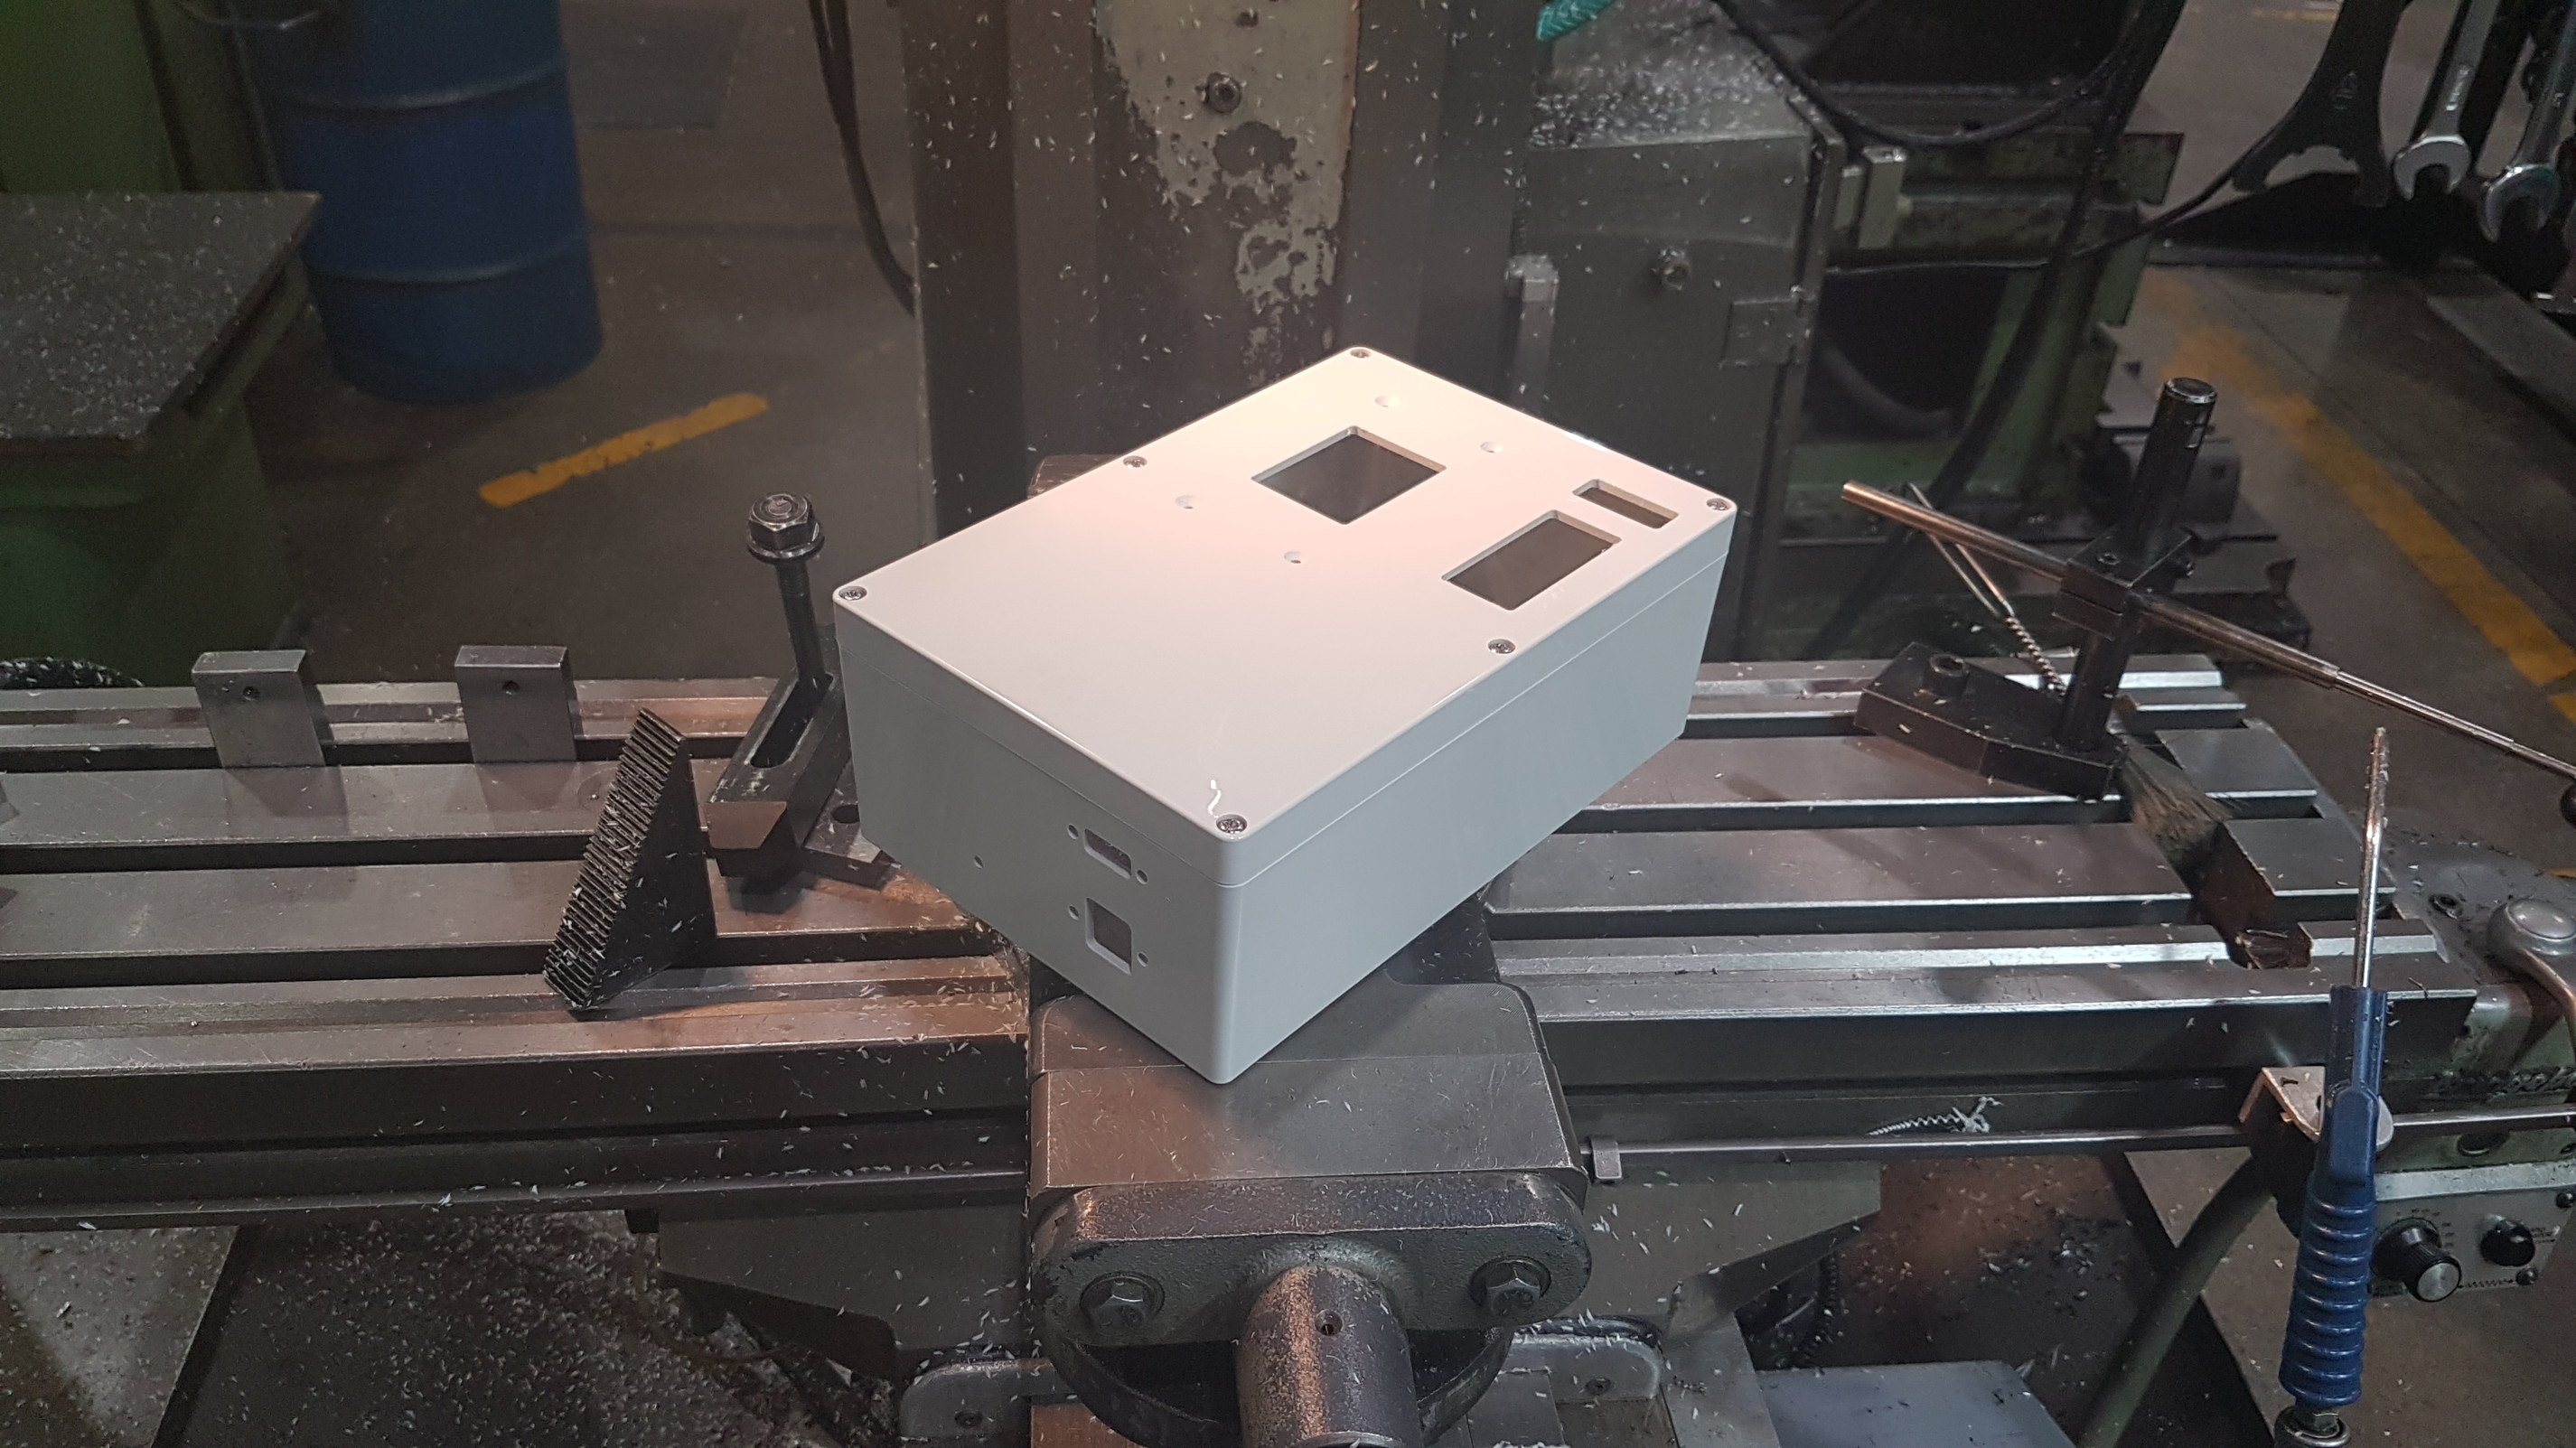
Milling the square holes in the controls enclosure at work
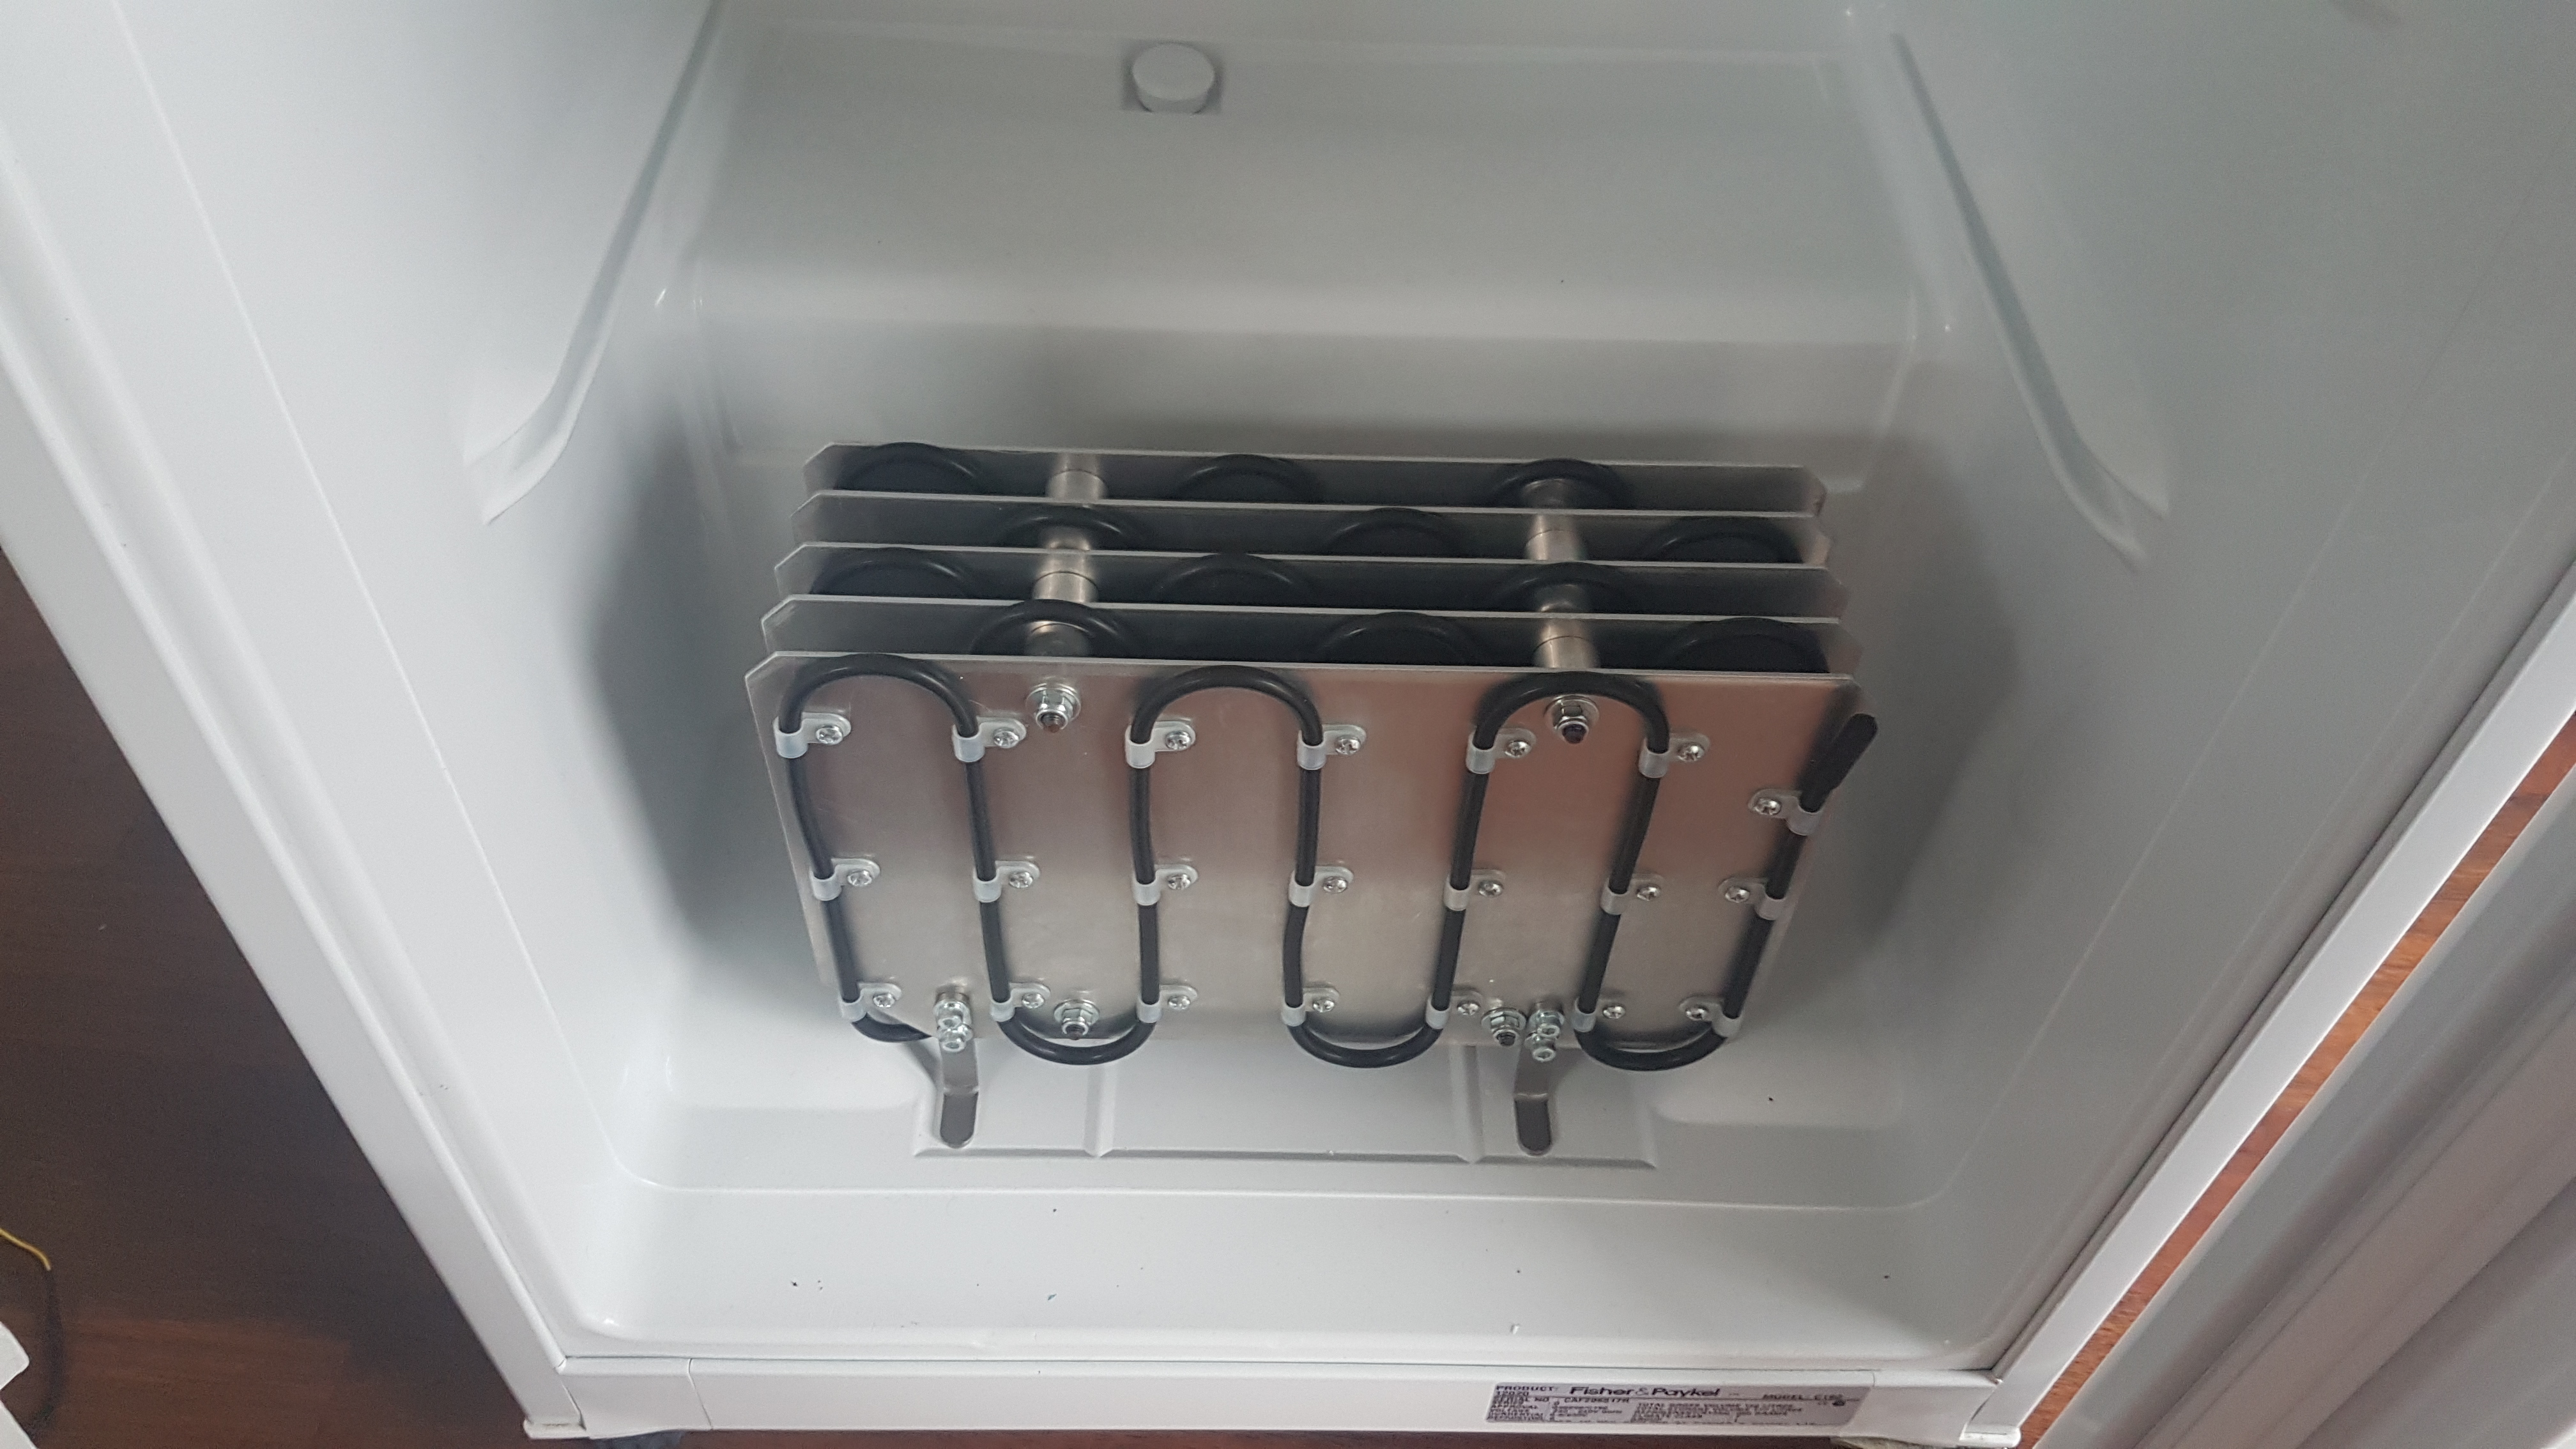
Bespoke 60Watt heater. Made from aluminium fins and a reptile terrarium heater cable. If I’d made another fridge I make this simpler
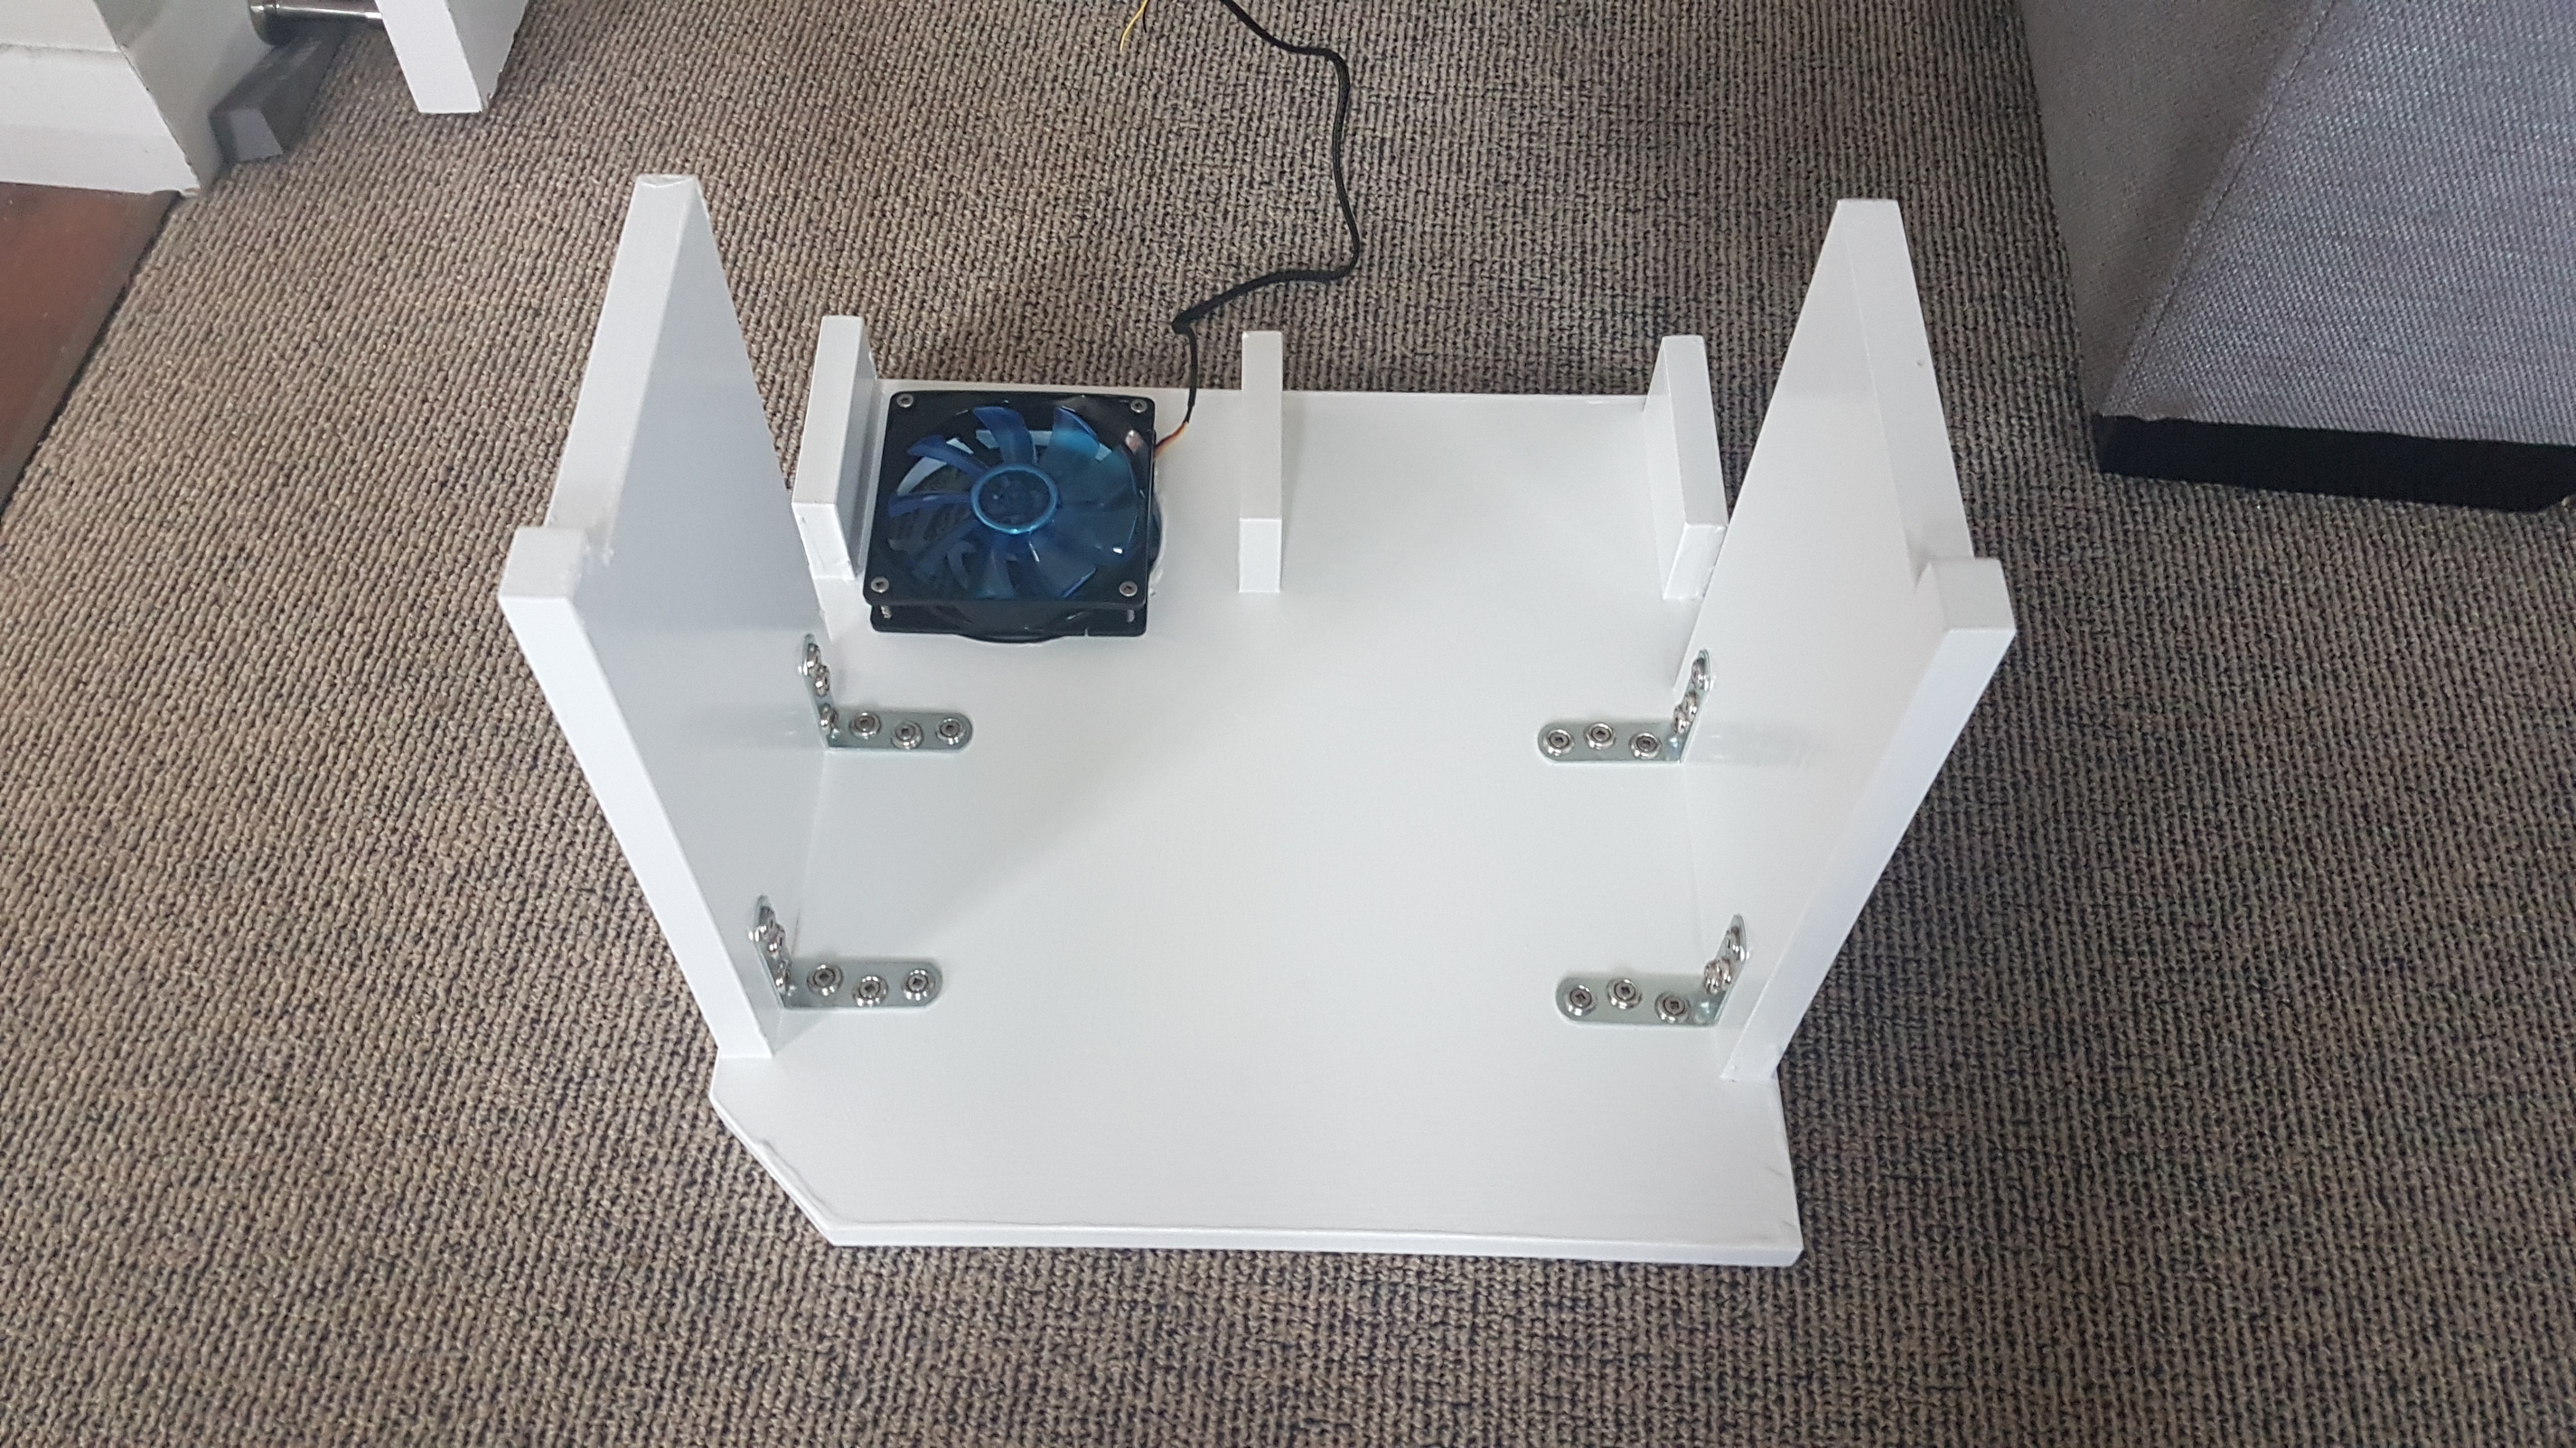
Underside of fermenter shelf with 12VDC computer fan mounted to it to circulate air and keep the temperature uniform within the chamber

Top of the fermenter shelf with beefy fan guard to take the weight of the fermenter leg
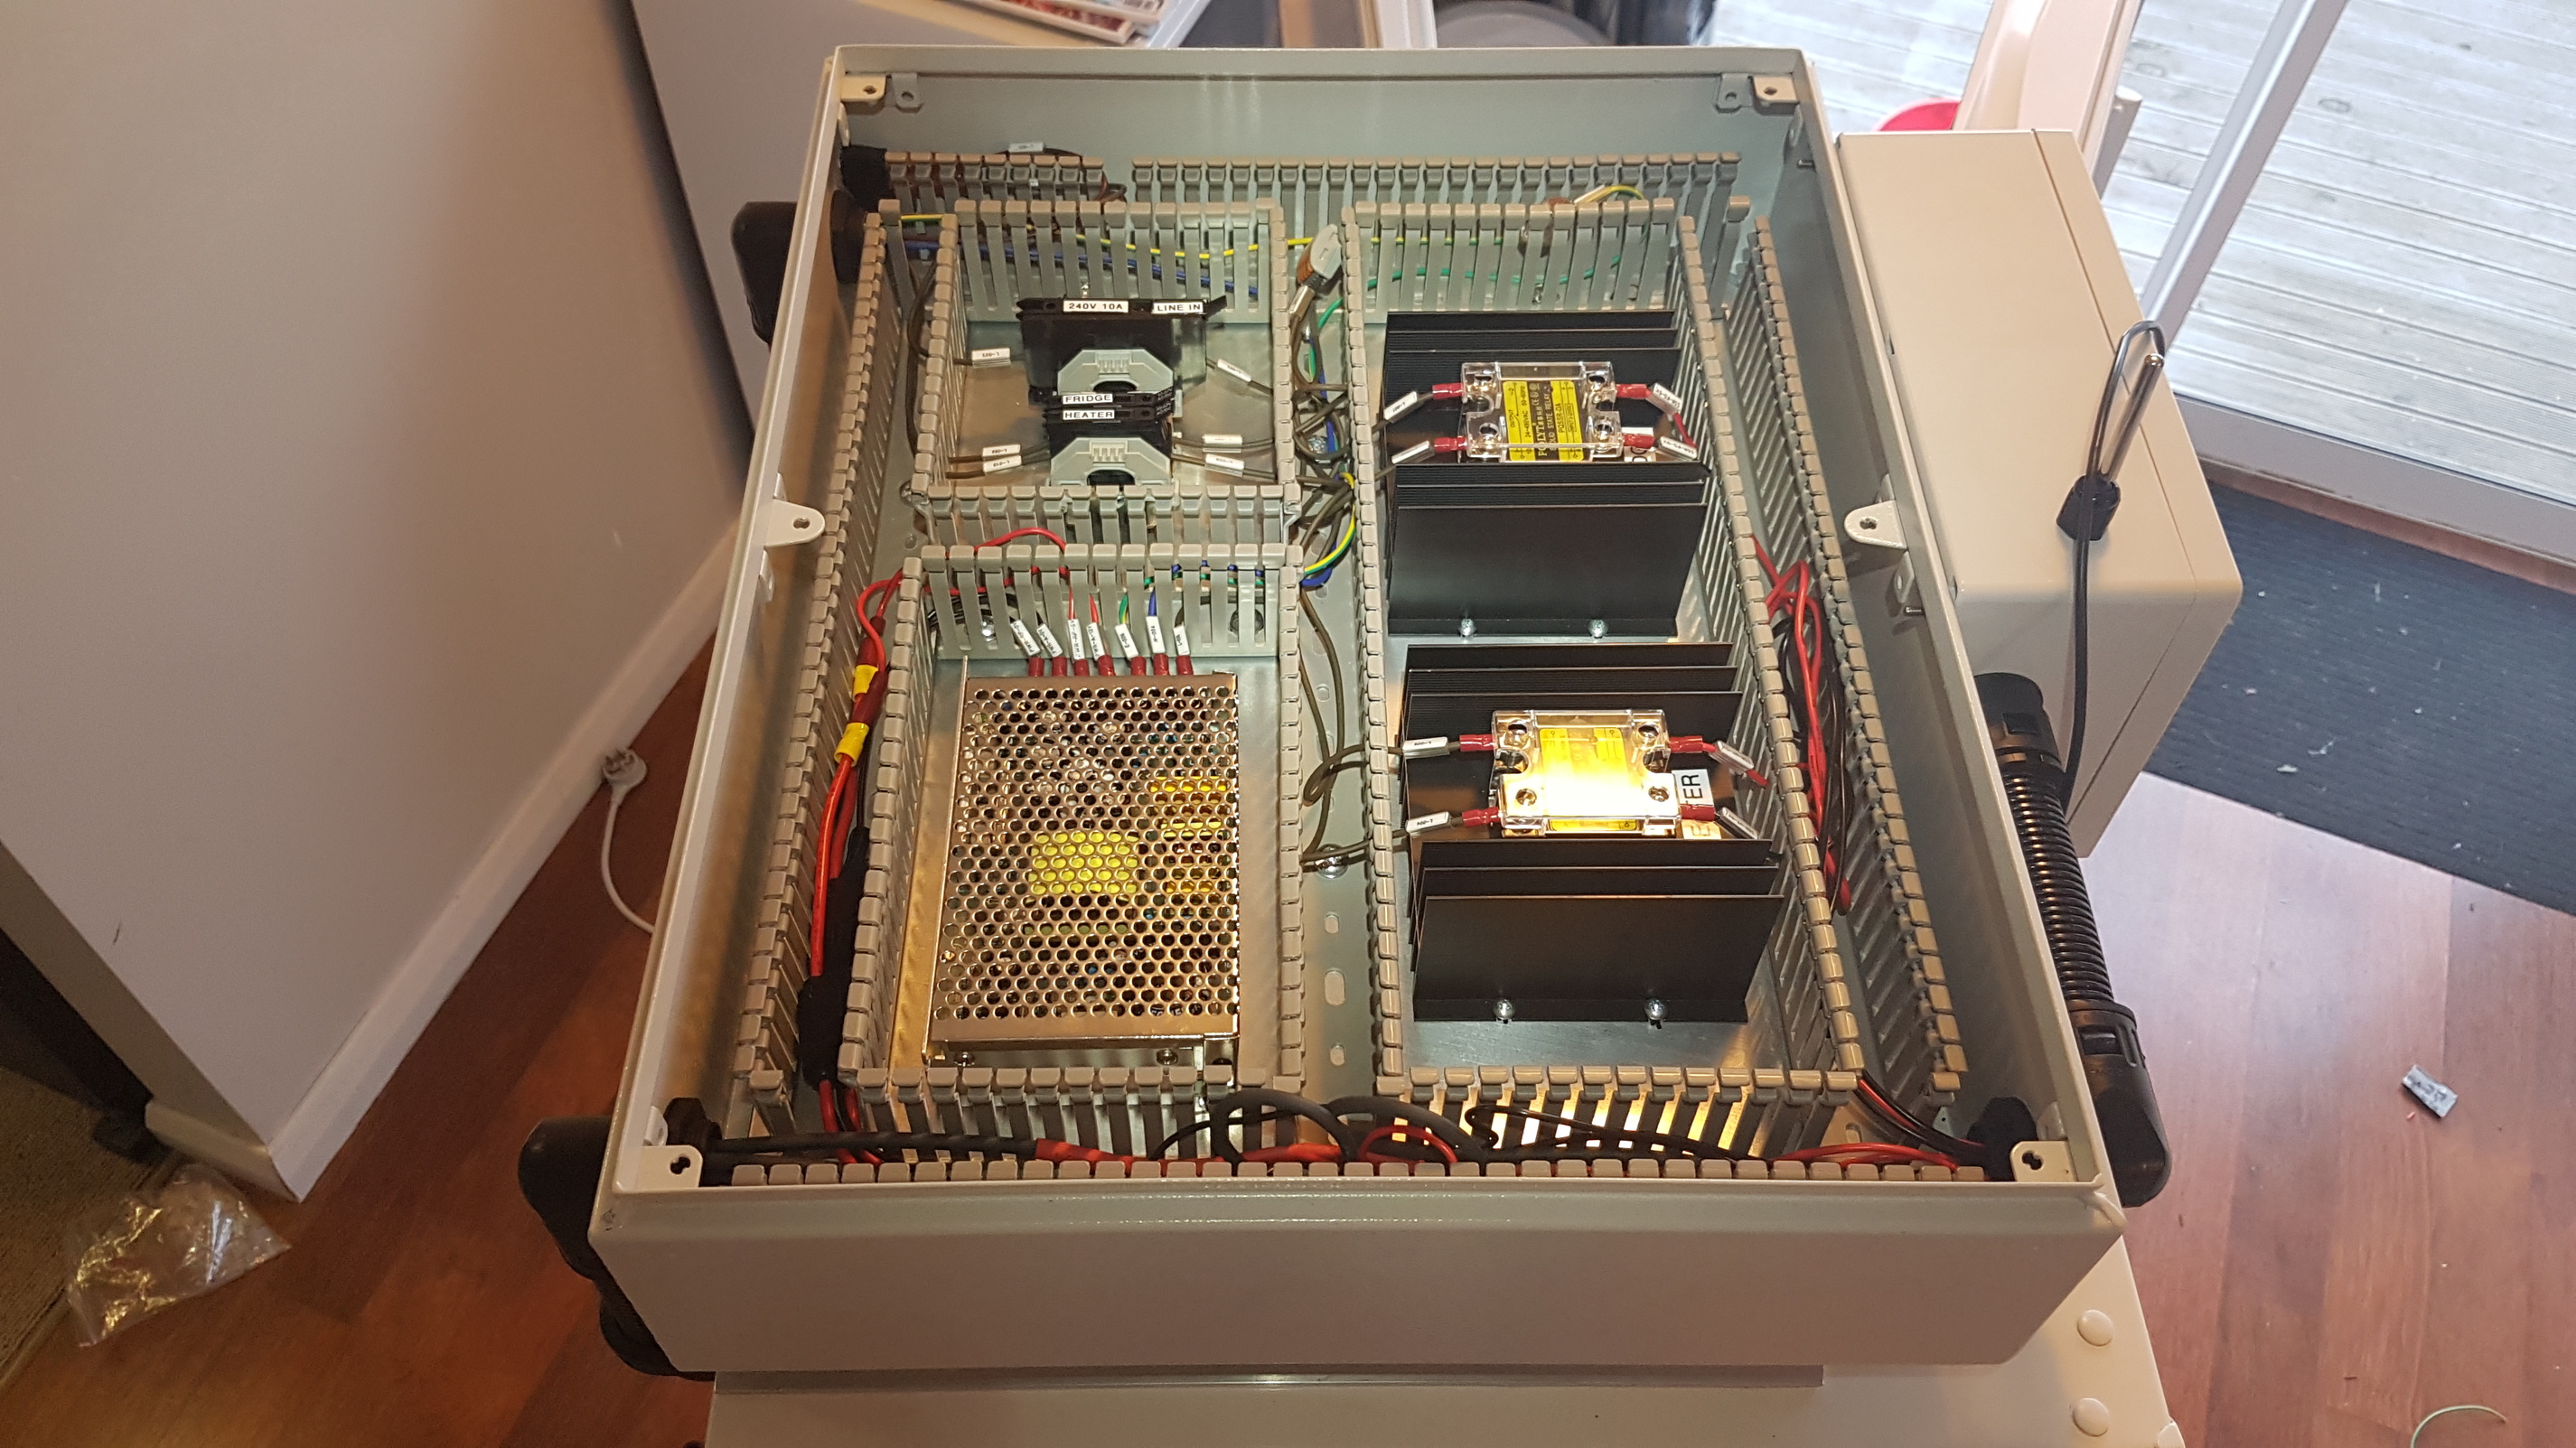
Wiring the 240VAC electrical enclosure. The cable labels came in very handy!

Electrical enclosure
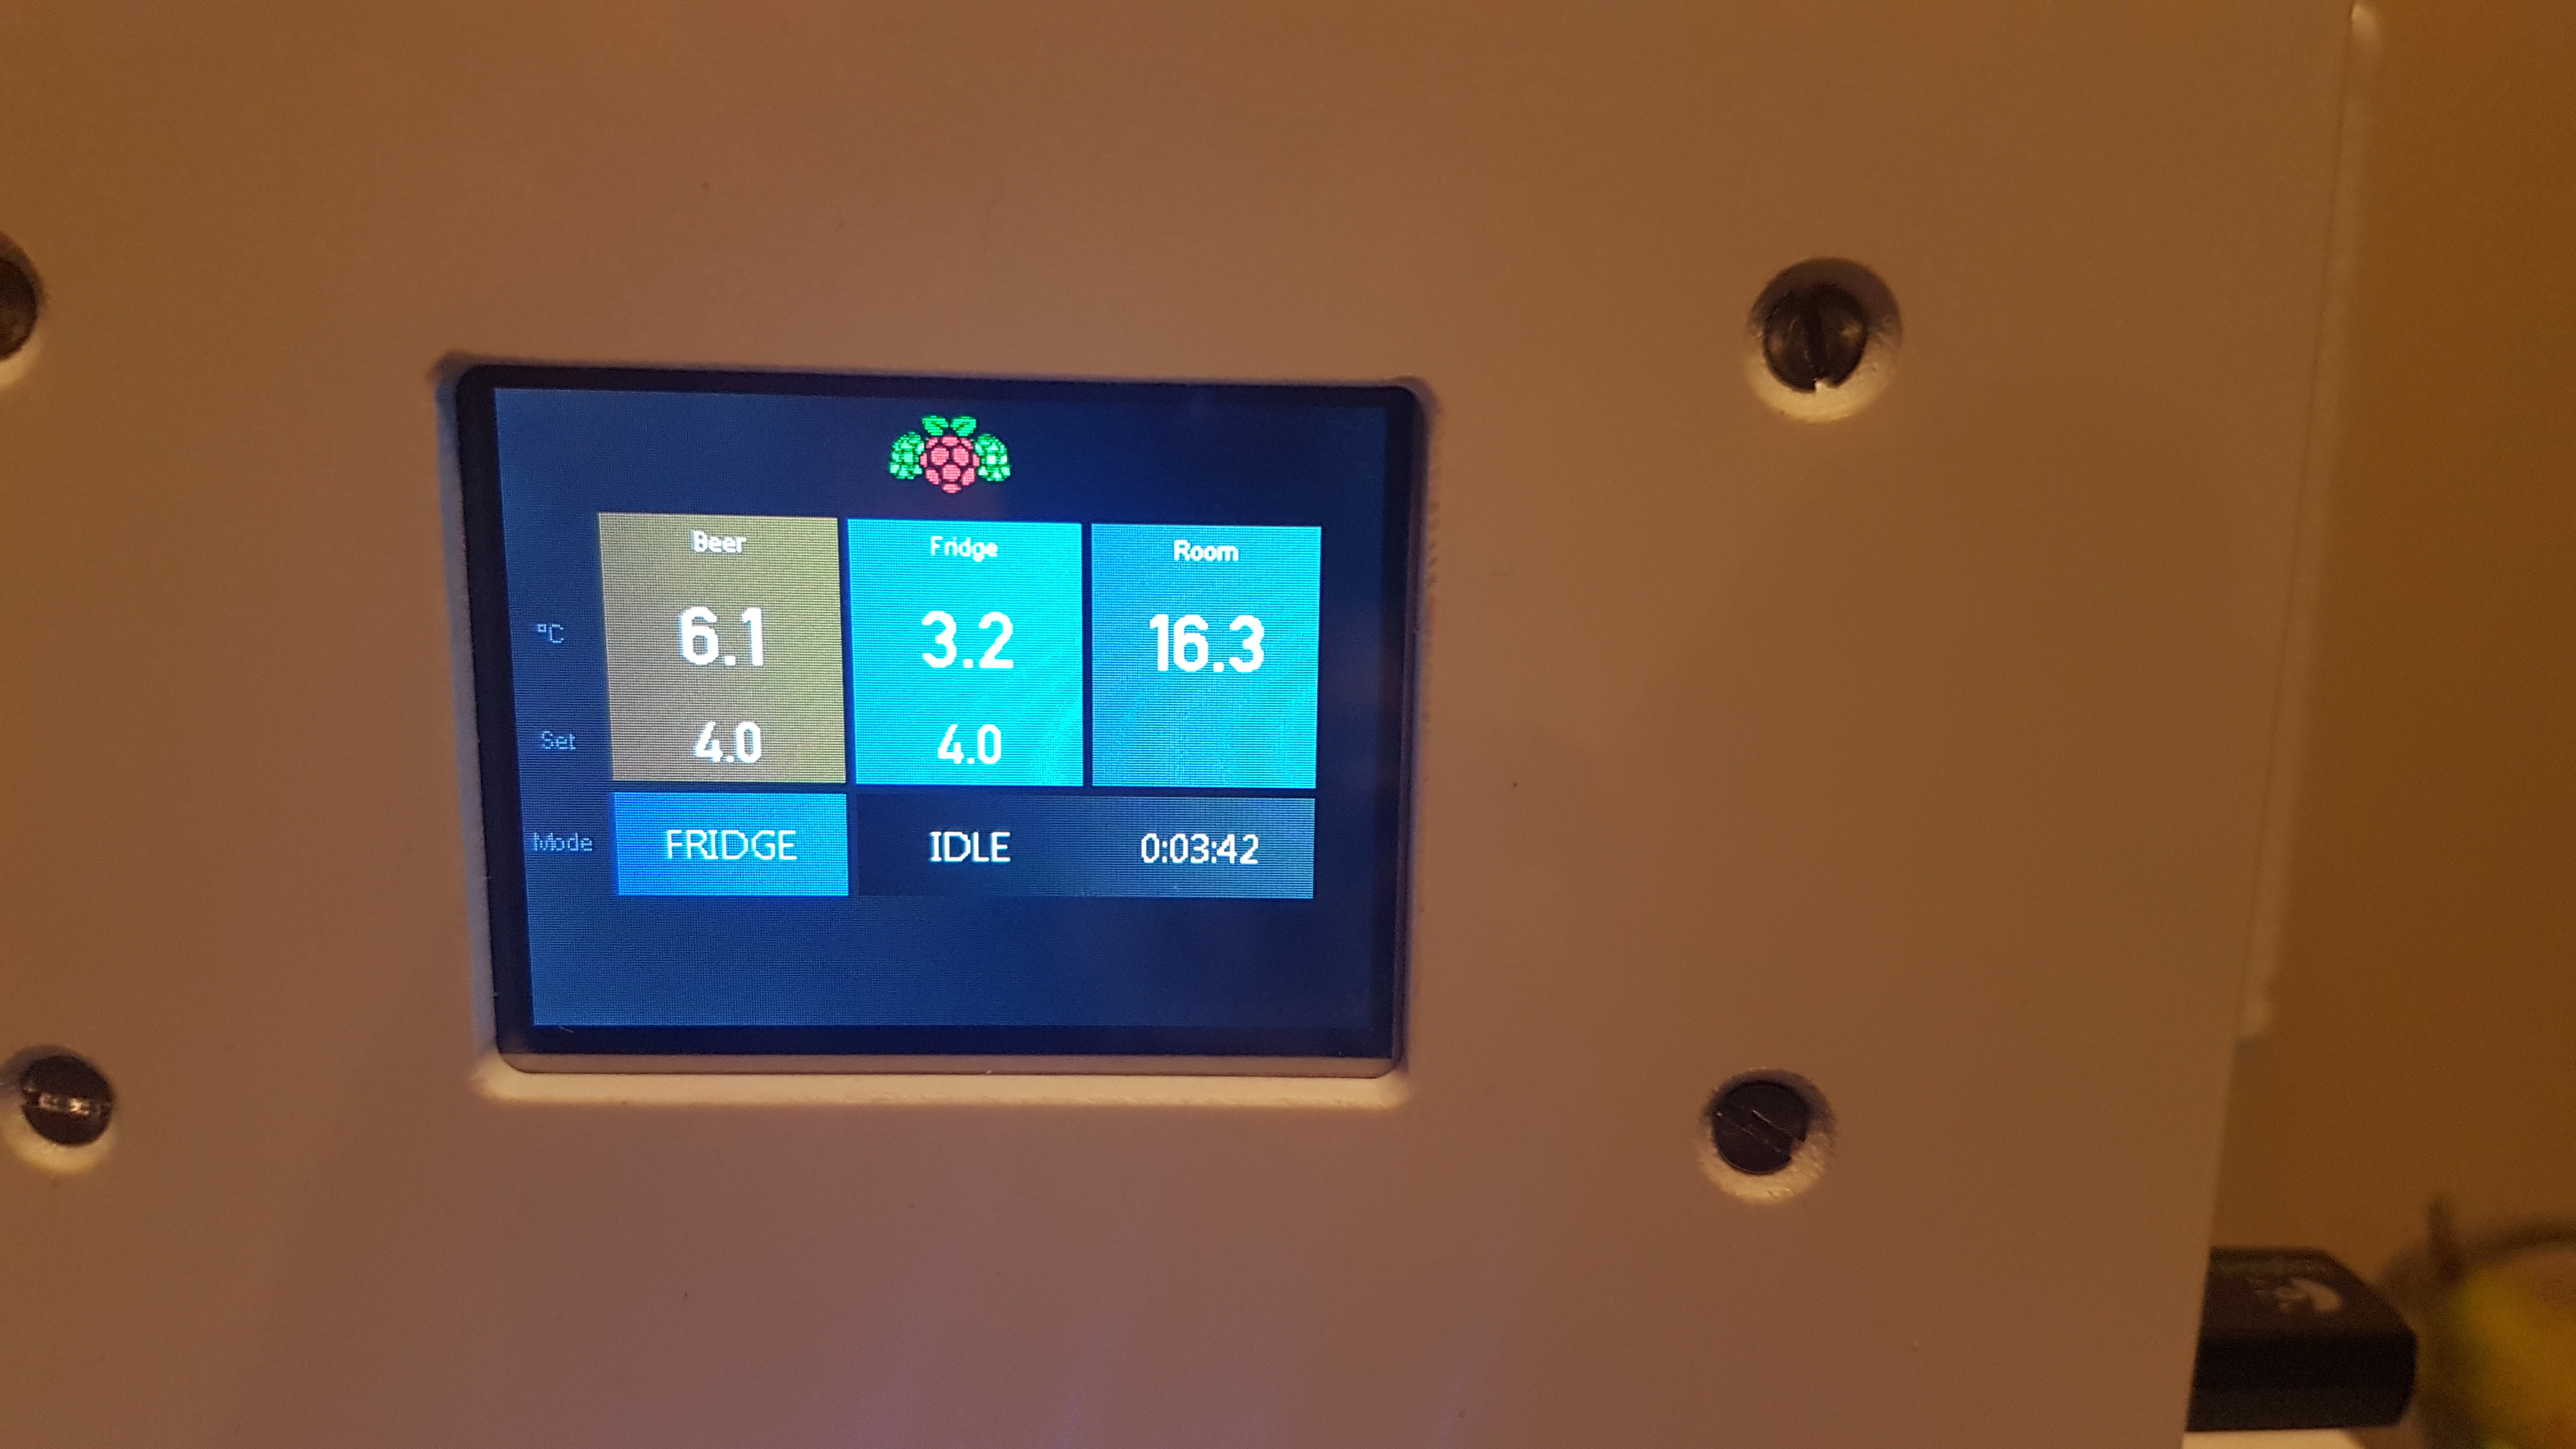
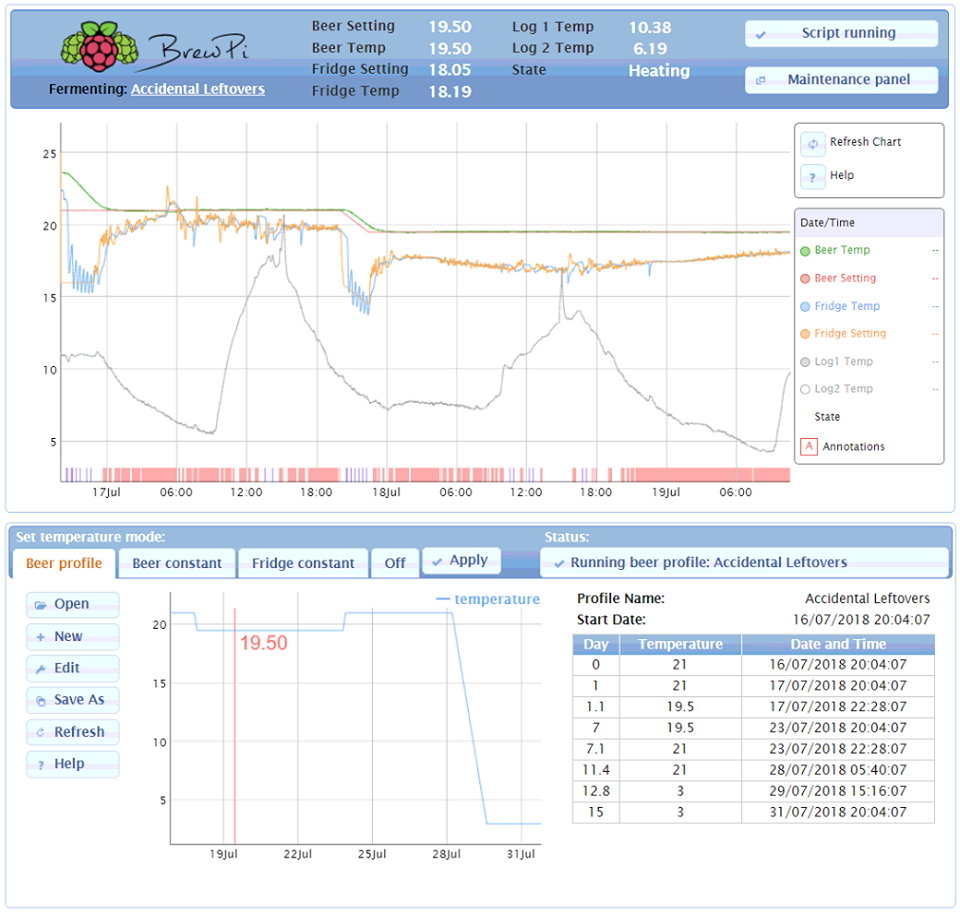
Brewpi temp controller display

Build pretty much completed
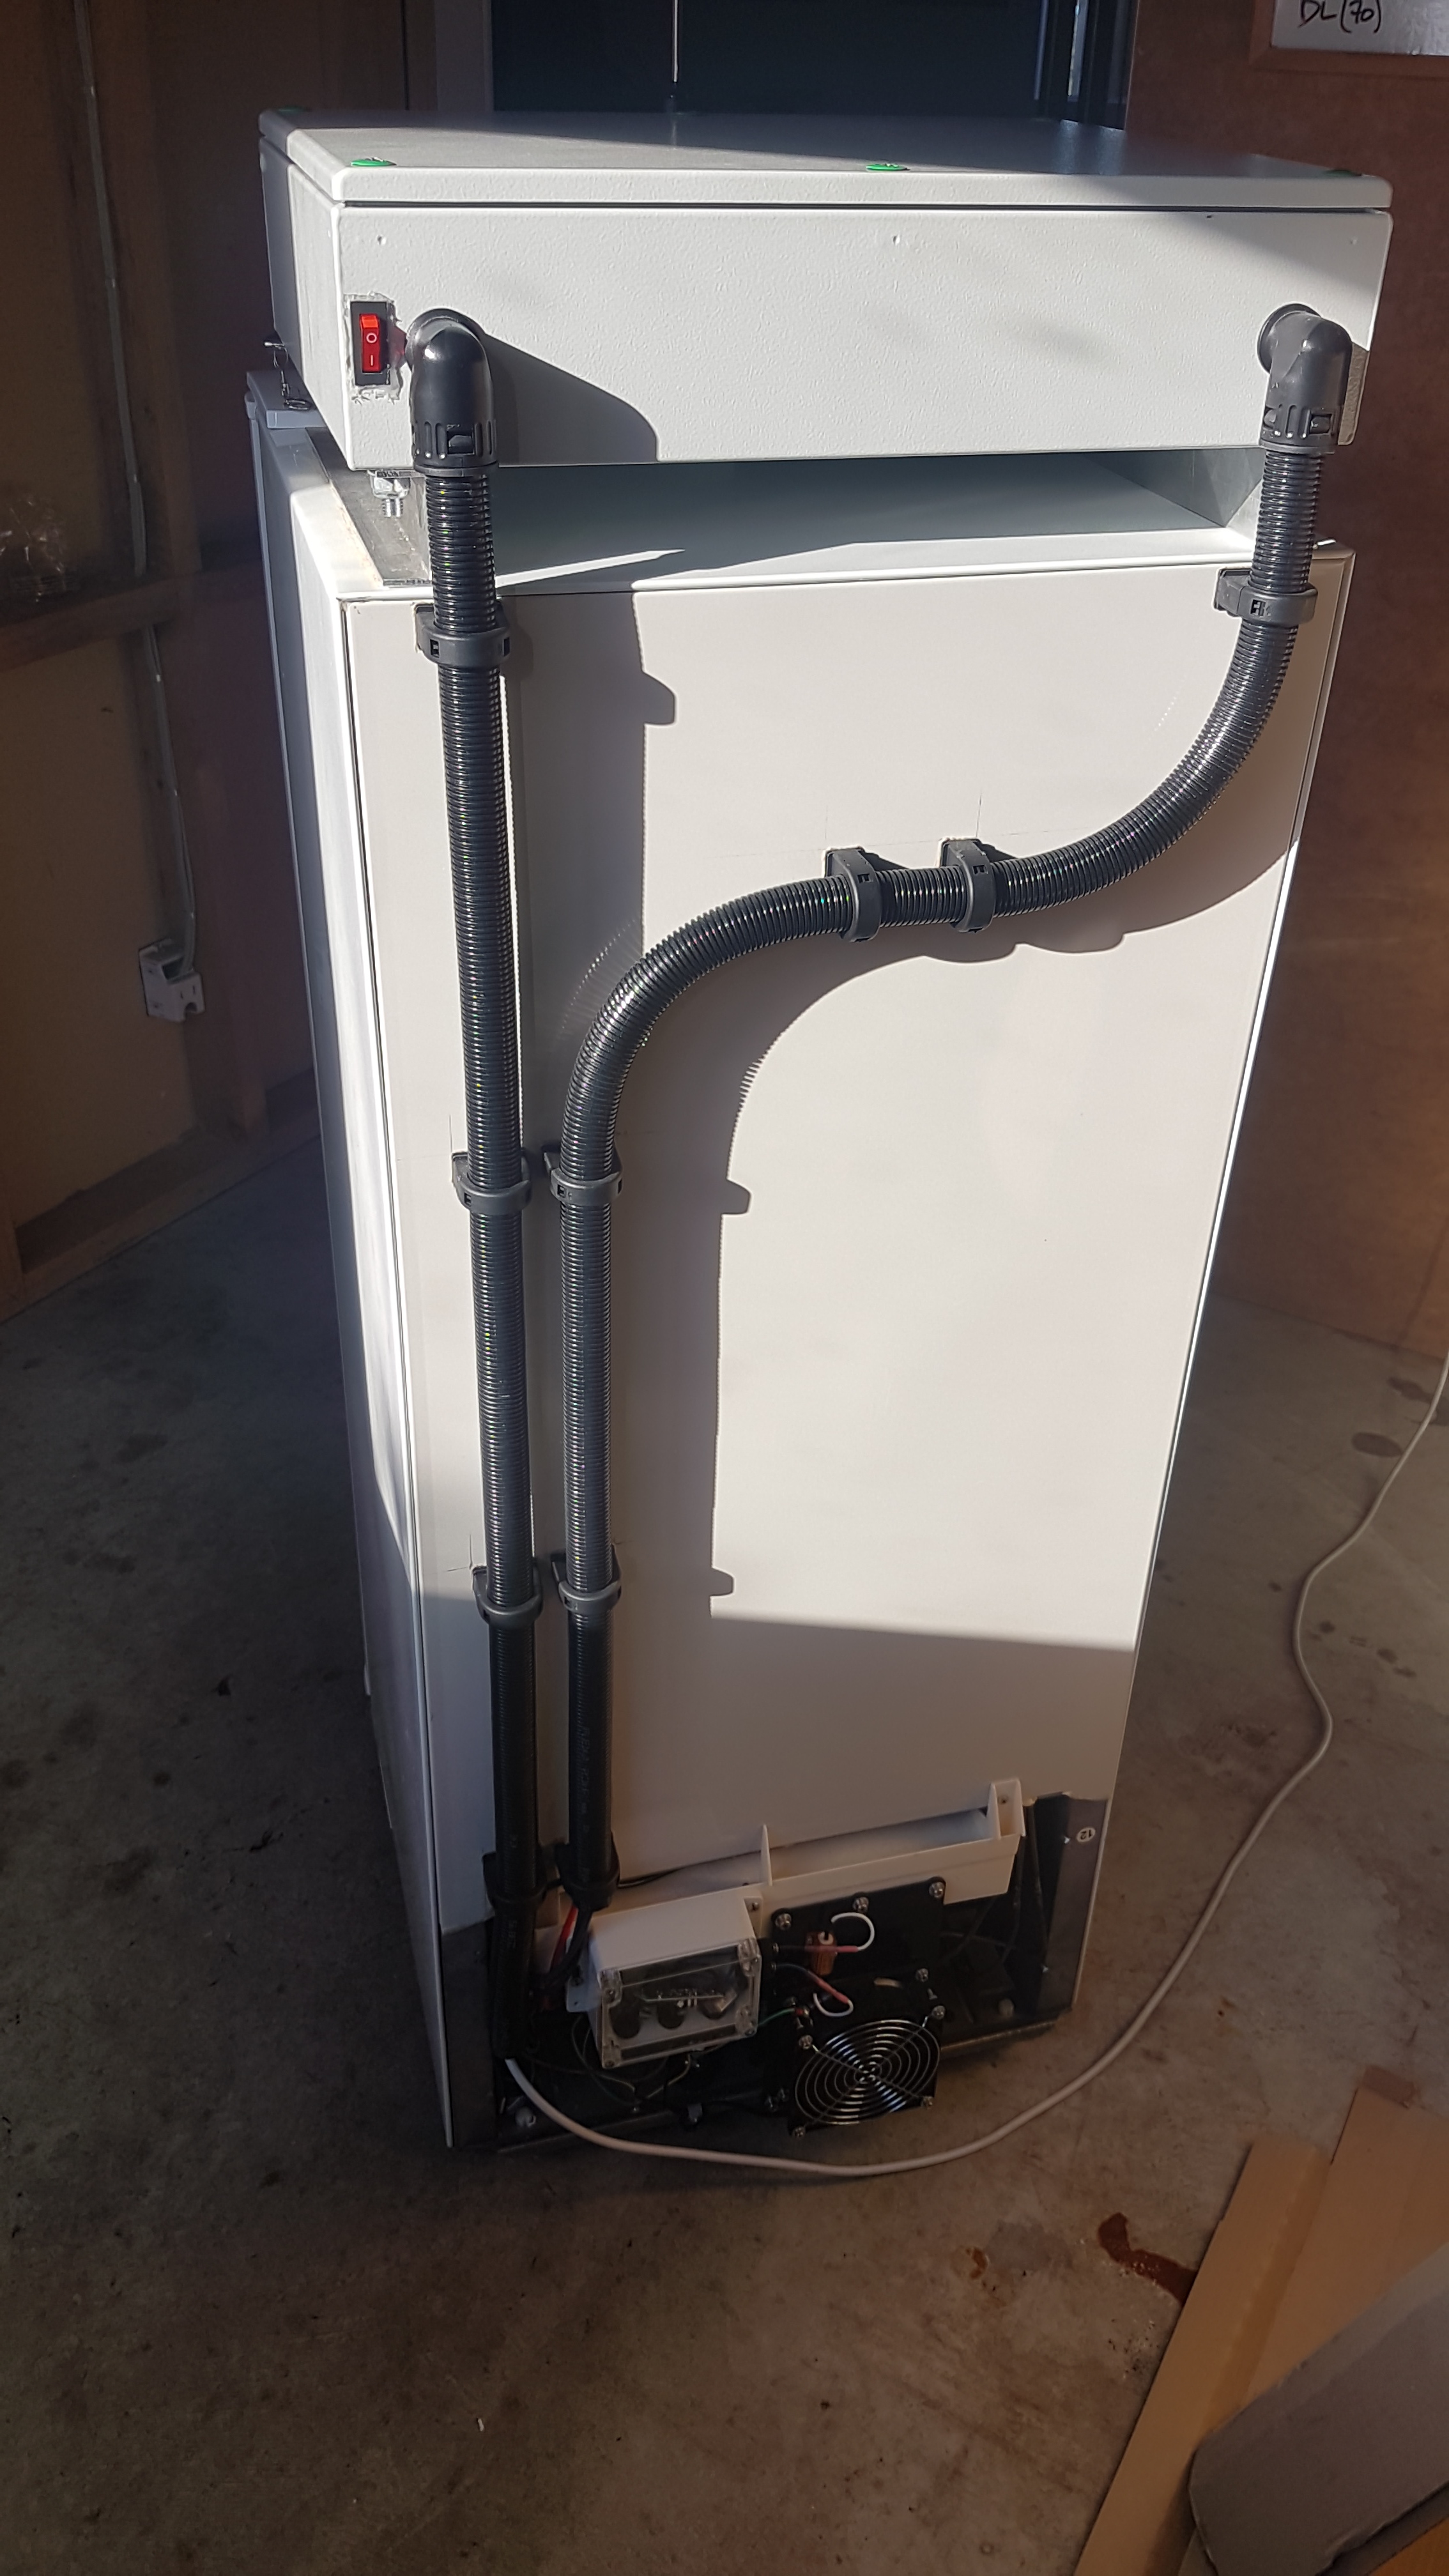
Reticulation. Left side for 240VAC power and right side for 5VDC temp probes
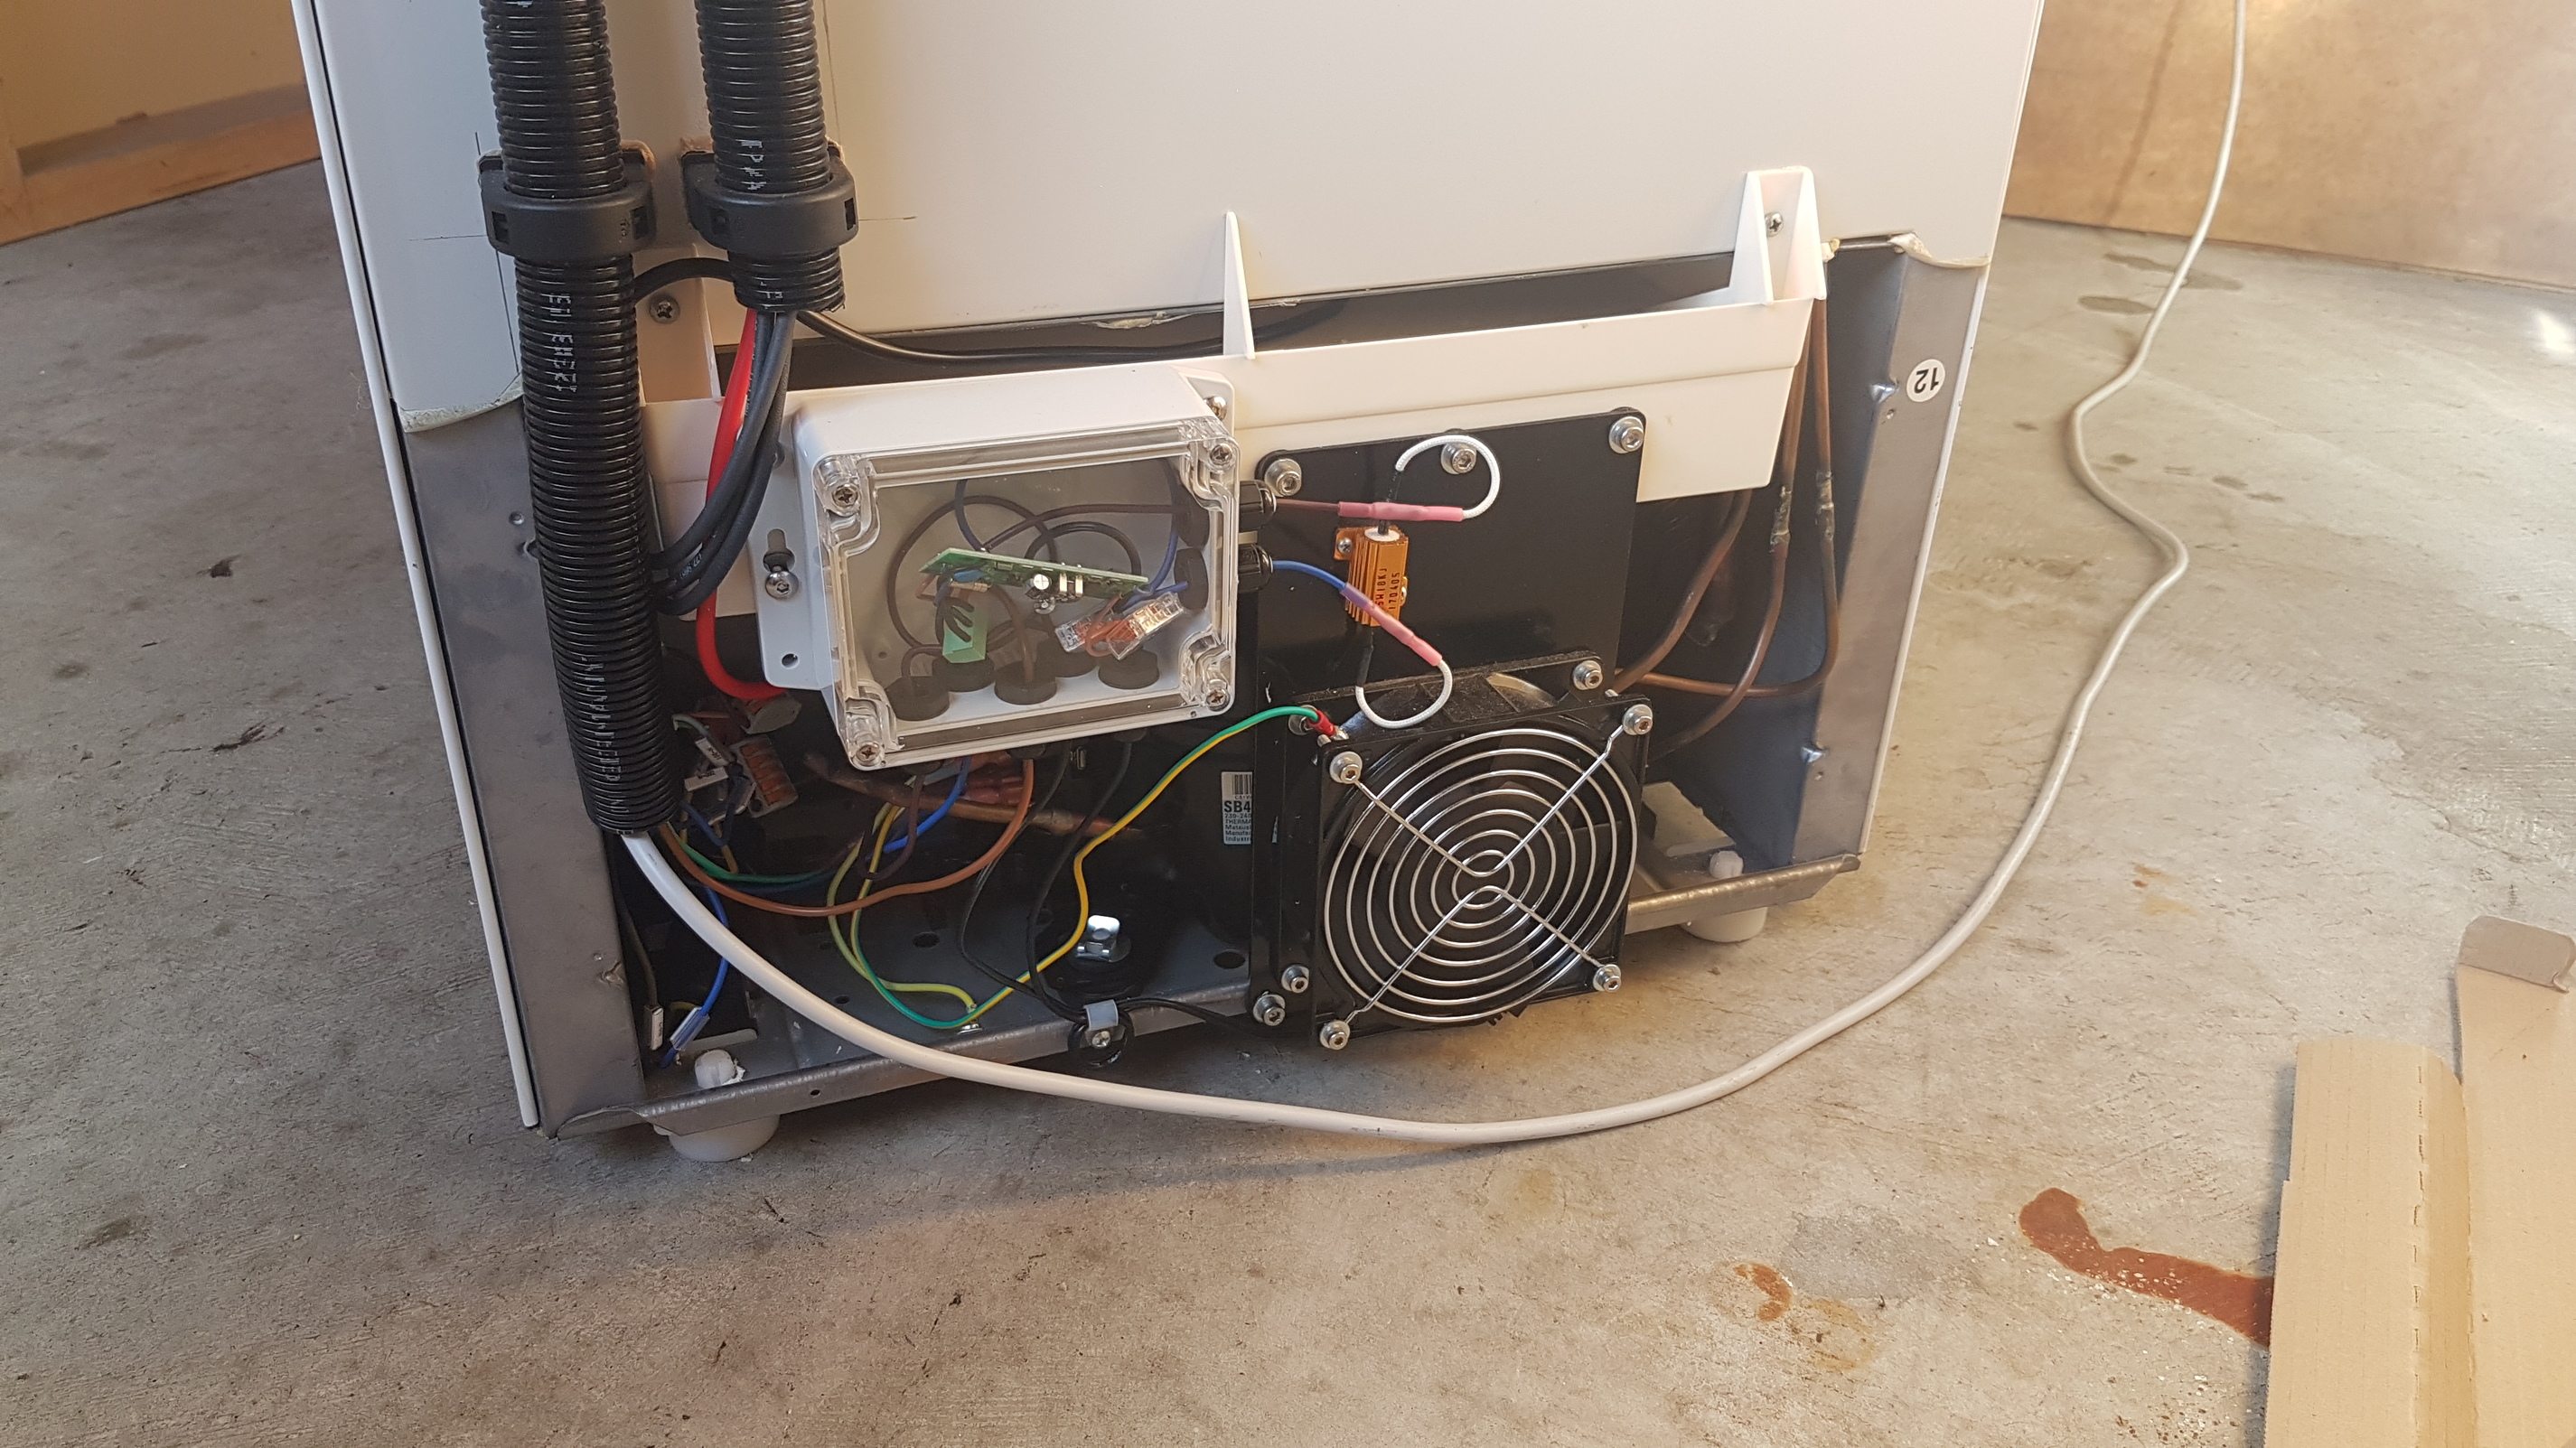
Additional cooling for fridge compressor running off a bathroom fan run on timer