Hi Elco,
As usual you are absolutely correct, I ran the sketch you suggested and sure enough sensors were running in parasite mode. Replaced with normally powered sensors and they were detected straight away.
Thank you so much for your help. Maybe I can get back to brewing now!!
NOTHIG!!!
after read different forum i fel on
/boot/config.txt add Line dtoverlay=w1-gpio,gpiopin=4
WORKING NOW!!!
but how write the line in my photon??
How did you connect your new sensor to the RJ11 connector?
It is also possible that you got a parasitic mode only sensor. They have recently flooded the market. But those parasitic sensors are not supported by BrewPi.
Please also be warned that your new sensors are probably not really waterproof, at least that is my experience. The shrink wrap is not enough. I recommend using a thermowell with them.
How do you know that the sensor is not in parasitic mode on the pi? If you have a DS18B20-PAR, the 5V pin is internally not connected in the sensor. Even if you connect it to 5V, it doesn’t work.
Do you have your BrewPi out of the enclosure? If so, can you (with the power unplugged) measure connectivity between the pins on the bottom of the board and your sensor?
We test OneWire on all the BrewPi Sparks before they ship.
I purchased a raspi, brewpi photon spark (v2), a temp probe, a valve control expansion board and 2 motorized ball vlaves from the brewpi website about 2 years ago. I was using the spark and temp probe for monitoring mashing temps thus far. Recently I have started integrating the rsp software to ultimately be able to have motorized valves control of mash temps through a glycol chilled loop. Reading through the community threads it seems that the capability is close, but not yet ready.
My issue: The raspbian software install was clean (as far as I can tell) and the web GUI showed the temperaure profiles of the probe connected to the mashtun. When I updated the spark firmware last week (from origionally 0.4.3 to 0.5.0), I lost the temp probe detection on the device list and also on the spark display. I have tried rebooting the spark and reconnecting the rj11 and usb cords, but nothing has worked thus far. I know the connection between the rbp and spark is active because I can change the sceen to test and send temperature changes. I don’t know if its the rj11 clip is worn or the sensor has gone bad. The spark is connected to a 12V plug and the rpi is connected to a standard 5V plug. There’s a usb to micro usb connecting the spark to rbp.
Which version do you run? 0.5.2 is the latest stable release.
Do you see ‘script running’ in the top right corner? Do you see anything on the display of the Spark or do you have a white screen?
If you set the Spark to test mode, by going into the maintenance panel, advanced settings -> mode, your Spark should search and list temp sensors on the display. If it doesn’t, it is most likely a hardware problem. Make sure you try plugging the sensors directly into the Spark.
Ps, You say you control mash temps with a glycol chilled loop. Glycol and mash? Don’t you mean fermentation?
The script is running on the webpage (version 0.5.2) and the spark screen is visible in test mode. The temp sensor is directly plugged into the spark. I have check each of the 4 ports for signs of detection using matience–> device conif–> refresh. Still doesn’t register.
from stderr:
Sep 27 2017 16:05:03 Notification: Script started for beer 'test1’
Sep 27 2017 16:05:03 Connecting to controller…
Sep 27 2017 16:05:03 Opening serial port
Sep 27 2017 16:05:03 Checking software version on controller…
Sep 27 2017 16:05:03 Found BrewPi v0.5.2 build 0.5.2-0-g72e633171, running on a Particle Photon with a V2 shield on port /dev/ttyACM0
What is the user life of a temp sensor? Is there a way to check the rj11 clip to make sure the connections are still good?
Apologies if my description was short. It’s a brewing system. The temp sensor is currently attached to the brew kettle. The brewing configuration I’m using is a hot plate and pot with a copper coil linked to a chiller to cool. The idea is link the copper coil to the motorized ball valves connected to the chiller. The probe in the mash reads the temp and then depending on the mash profile, the valves open to increase to decrease the mash temp.
It is very uncommon to cool your mash, you usually only step up. Only after boiling, you’ll cool. And that requires little automation, you just cool until the output of your chiller hits your fermentation temp and then you transfer.
Do you only have one sensor? That makes it hard to know whether the sensor or the spark is defective. Which type of sensor is it? If it is 2 years ago that you ordered it, I didn’t have the wall mounted sensor yet I think.
You can’t really measure the sensor. The easiest way is to just try another one.
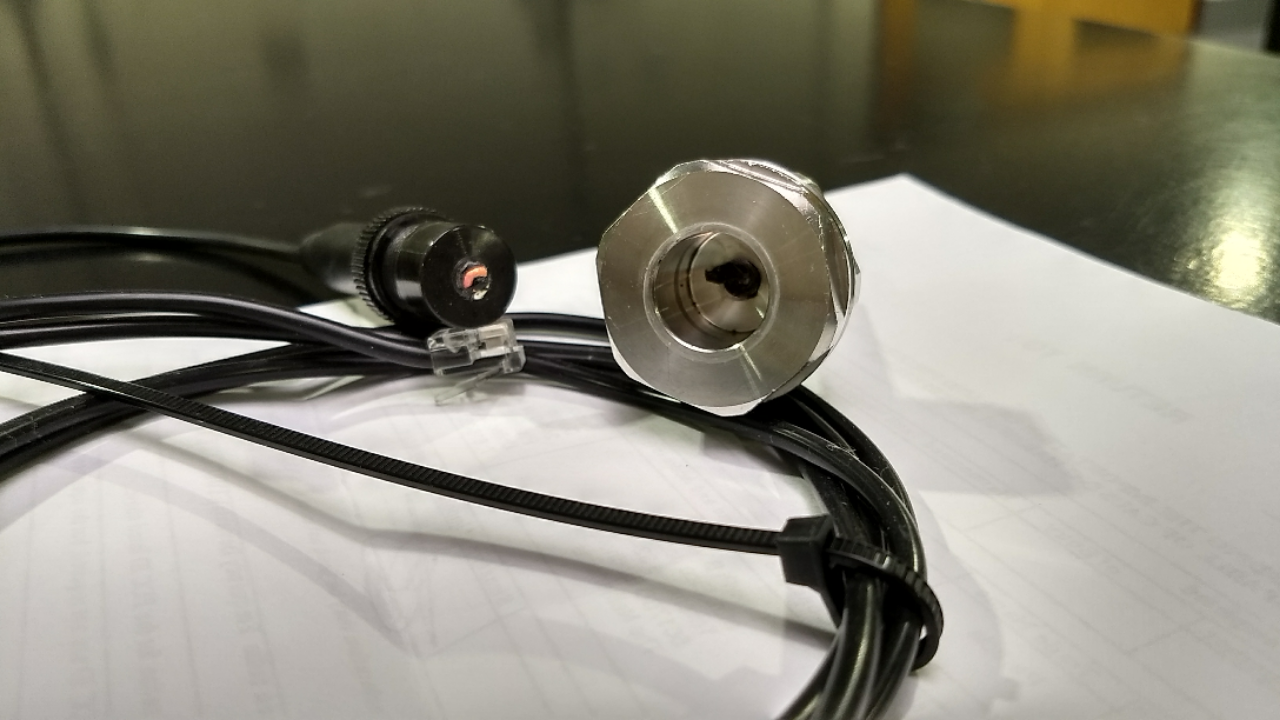
Thanks again for the quick reply. I check my records and the equipment was purchased July 2016. Time flies when you’re having fun brewing! I only have one sensor at the moment. It’s the Wall Mounted Onewire Temperature Sensor - For Kettle or Fermentor, NPT. The pics on the website indicates that the connector is a twist off.
Not sure if its just wear from usage (taking the sensor off to clean the mash kettle and sensor thread), the supplier was different a year ago, or a defected shipment. Looks like the plastic molding was partially threaded and solid with a bubble in the middle. There is partial threading on the inside of the metal casing as well. Doesn’t make sense to me, but I’m by no means and expert on the subject matter.
To your other comment, I’m working through an adjunct recipe with rye. The starches need to gelate and liquefy first before adding the malted barley, hence the need to cool quickly. But getting the motorized valves to work with the expansion board and the brewpi is for another thread.
Yeah, that looks broken. The sensor connector is glued in place and the sensor itself is glued into the probe. If you twist the connector, you’re going to break it. You should really only turn the ring, not the entire connector, maybe that’s why it broke. It is not a twist connector, it only has a locking ring!