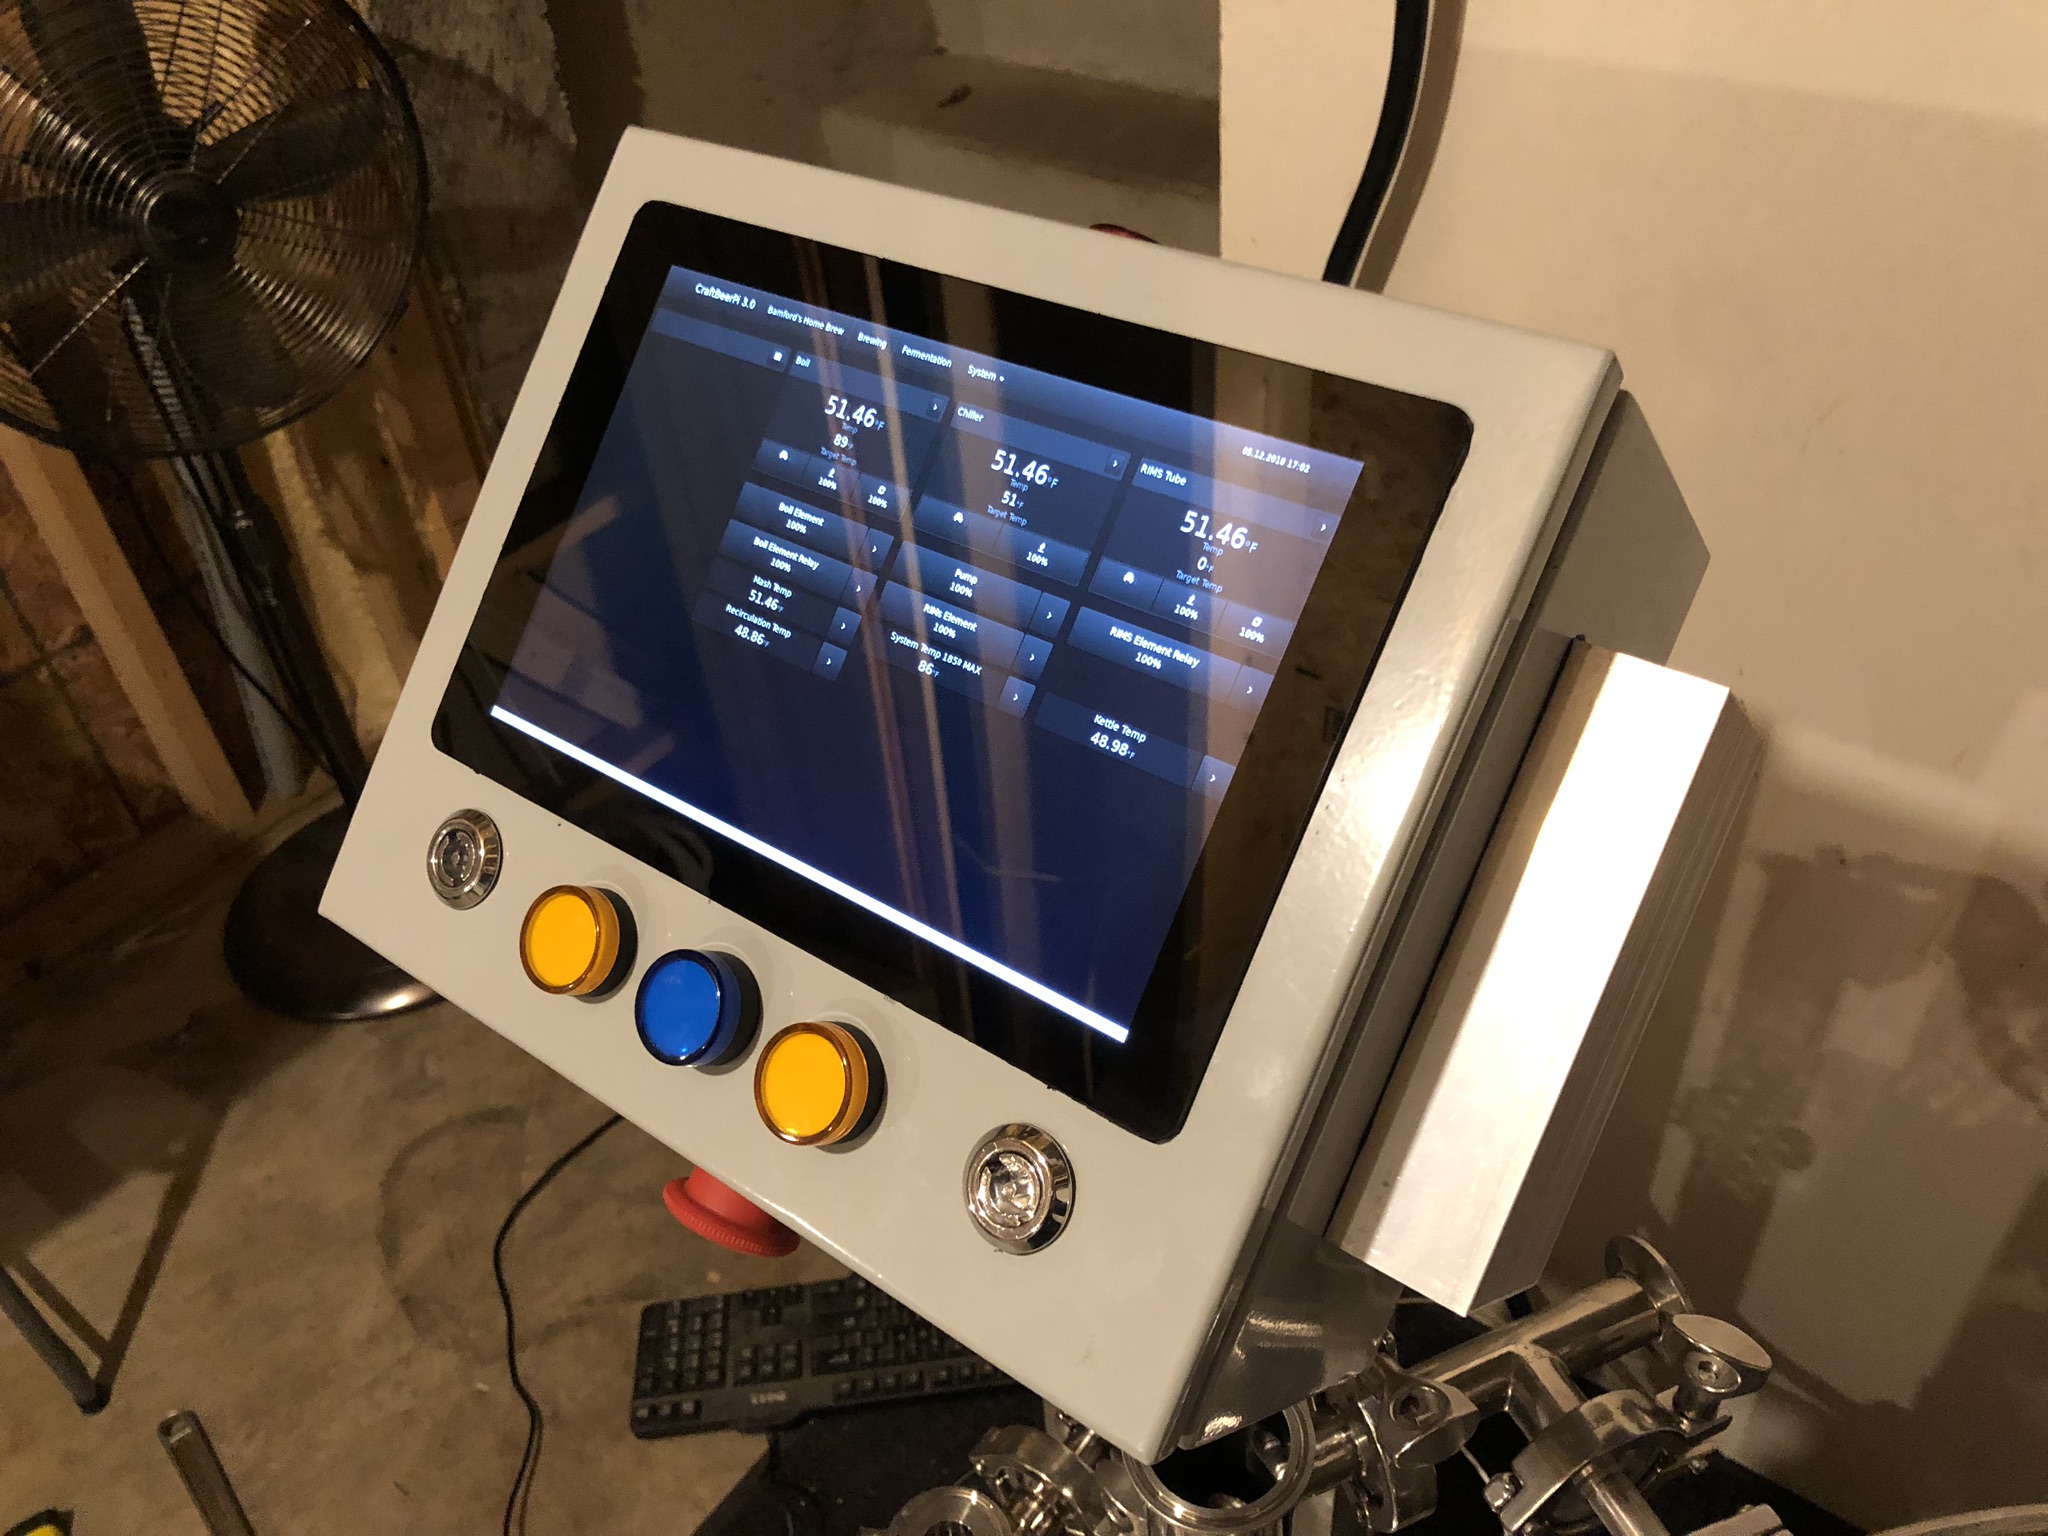
I’m getting close to being done with my new control box powered by the brewpi spark 3. I designed the box around the idea of putting minimal physical controls on the outside (i.e. switches, buttons, etc.) and instead mounting a decent size touch screen on the front– interfaced with brewblox (because its pretty and looks cool). I’ve uploaded pictures of the build so far, I’m wondering if anyone else has a setup like this? I’d love to see it if you do. My screen is just attached directly to the brewpi’s raspberry pi which launches chromium via X in kiosk mode at startup.
Once it’s done it should be able to support up to 2 heated kettles at 240 V and 2 fermentation chambers at 120 V (4 SSRs total). I may have underestimated the size enclosure I needed but I think it looks good and I still managed to feed it with a 50 A service.
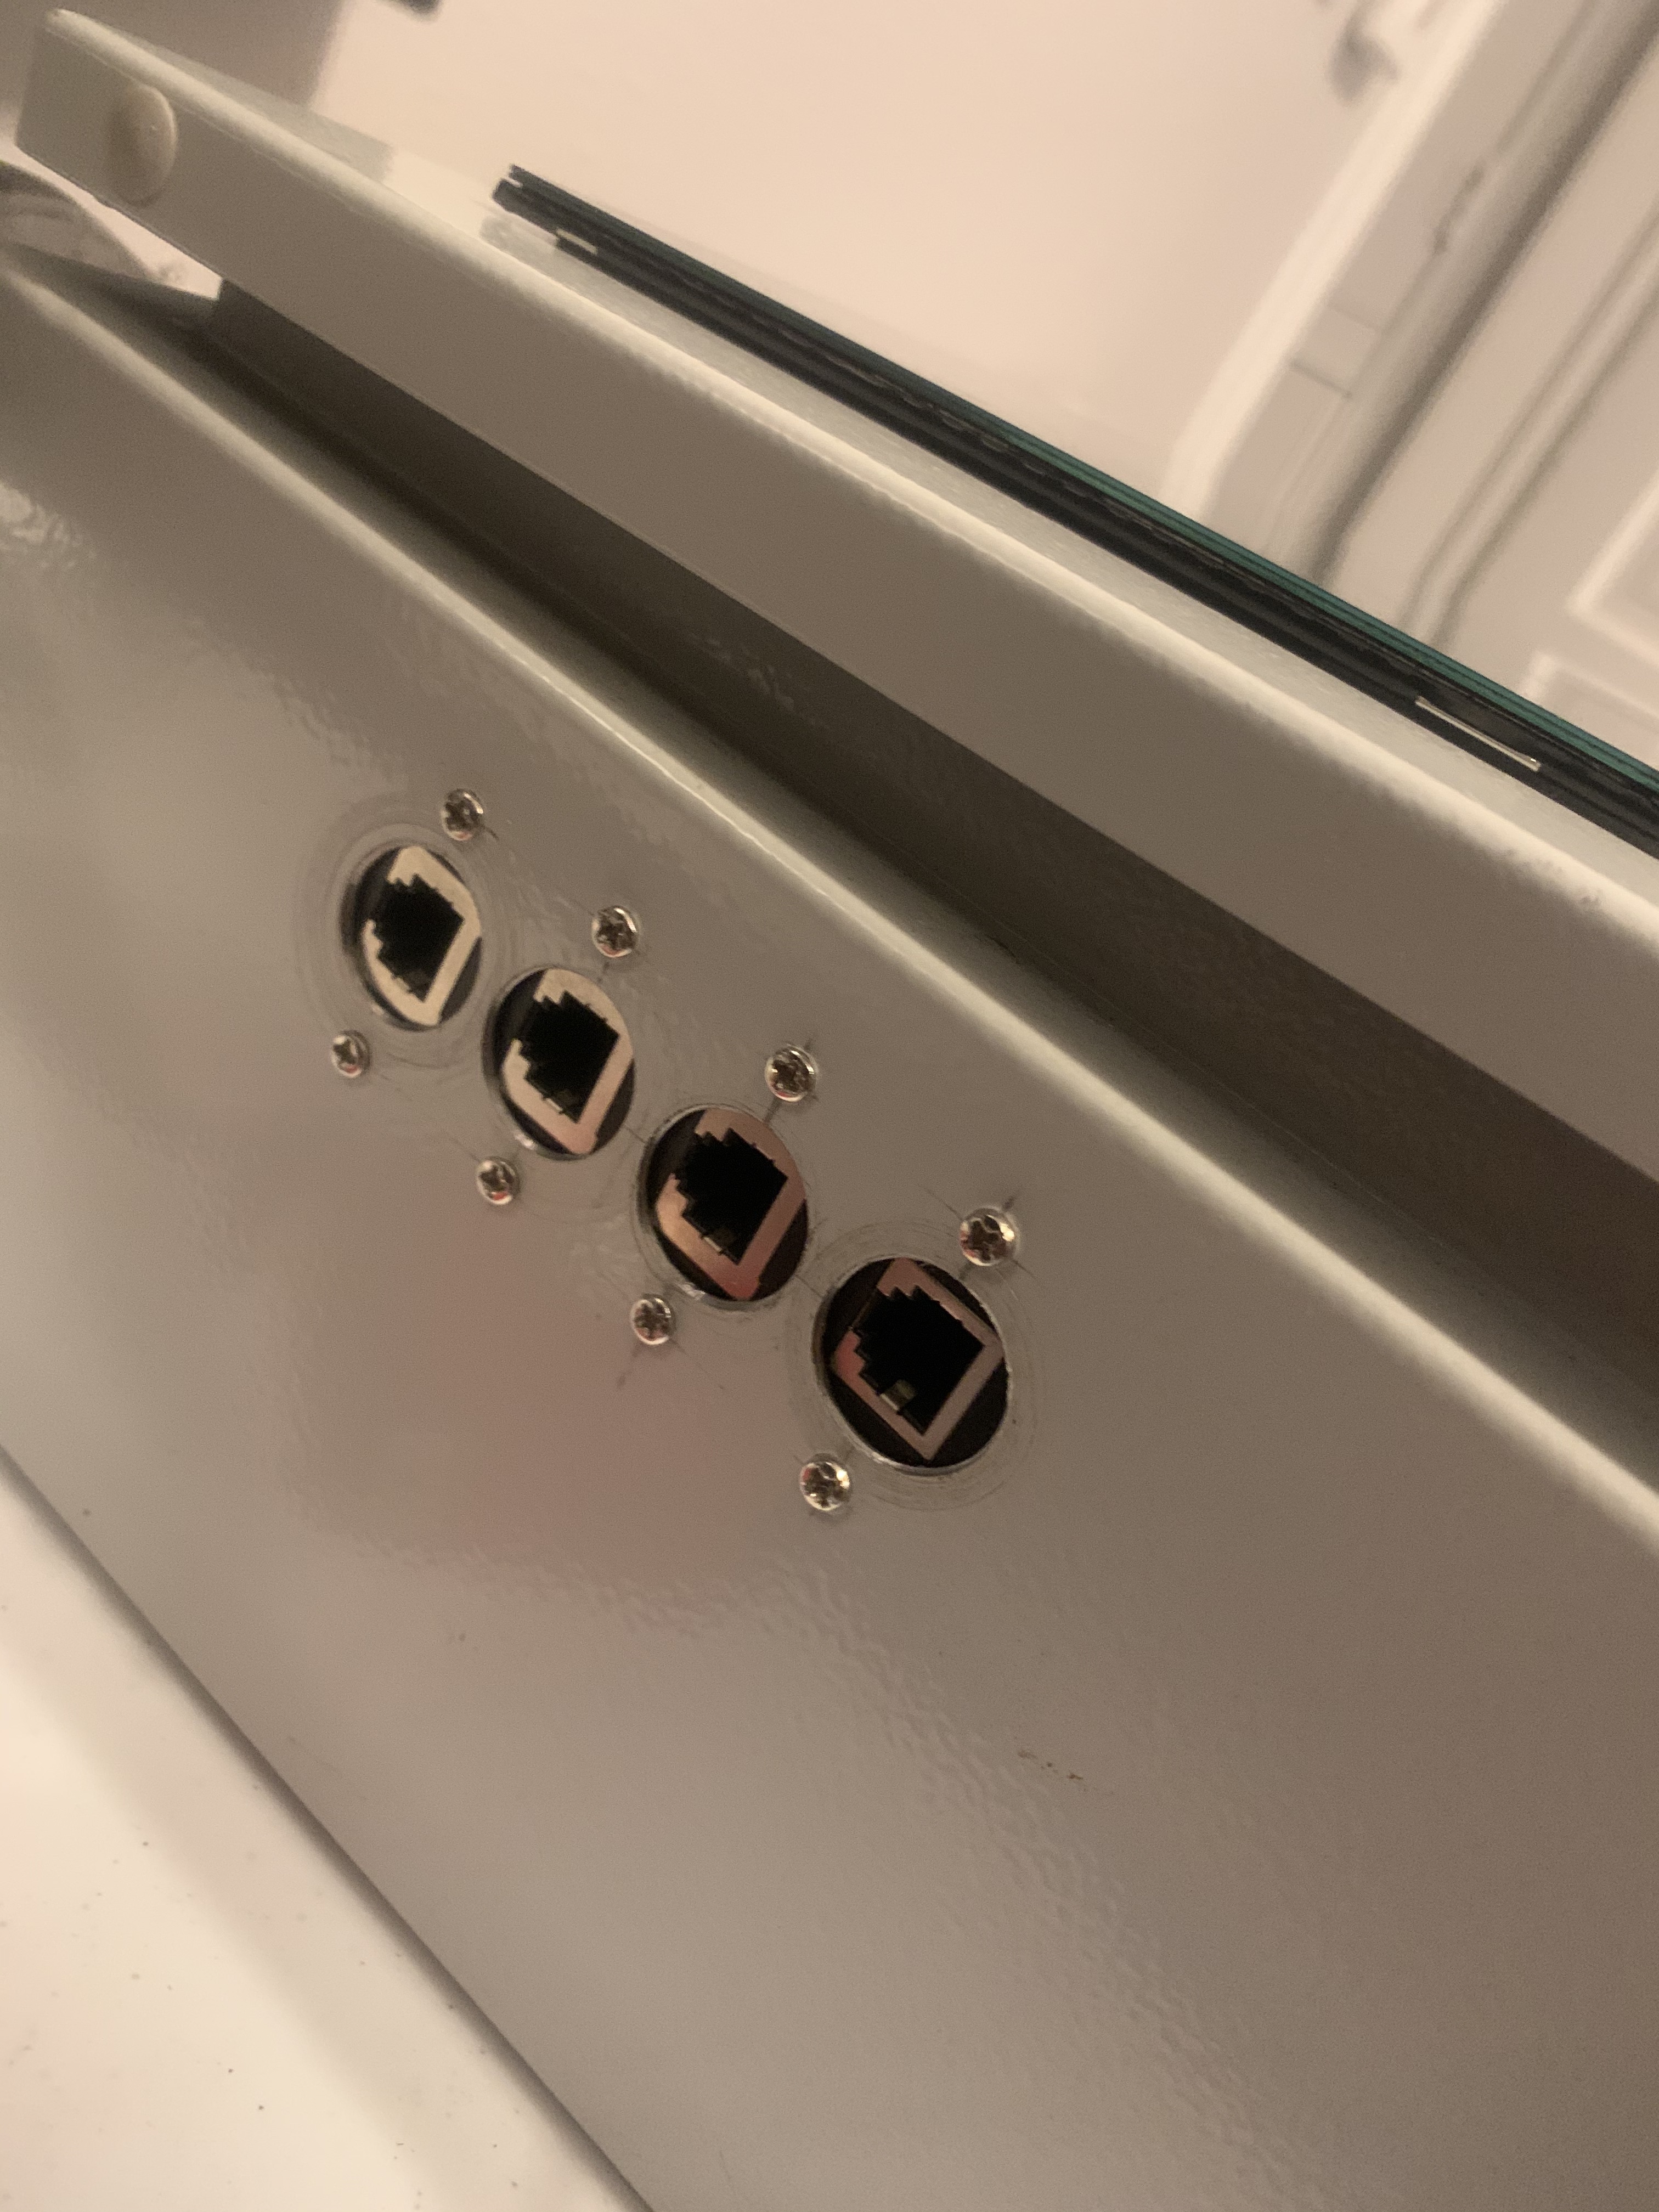
The left switch turns all the 5 V components on including the Pi, the Spark, the screen, and a few other things. The right switch controls a 2 pole contactor that I’ve used to switch the -120V lines leading to the kettles. The +120 V lines are modulated through the SSRs and I didn’t feel comfortable having an energized line leading to the kettles even when the element is off. The two LEDs on the right are on/off indicators for the elements with readouts for how many amps each is pulling. On the left are the 4 remaining RJ12 sockets the stem from the spark 3.
Things I haven’t figured out yet:
How to protect the screen: I’m thinking I’ll mill a bevel out of HDPE to cover the edges and hold a sheet or tempered glass over the whole screen (tested the screen still works through glass)
How to use it when keyboard input is needed (like when changing the setpoints). I haven’t looked too much into it but hopefully theres some way to get a keyboard to popup when I click on a text field.
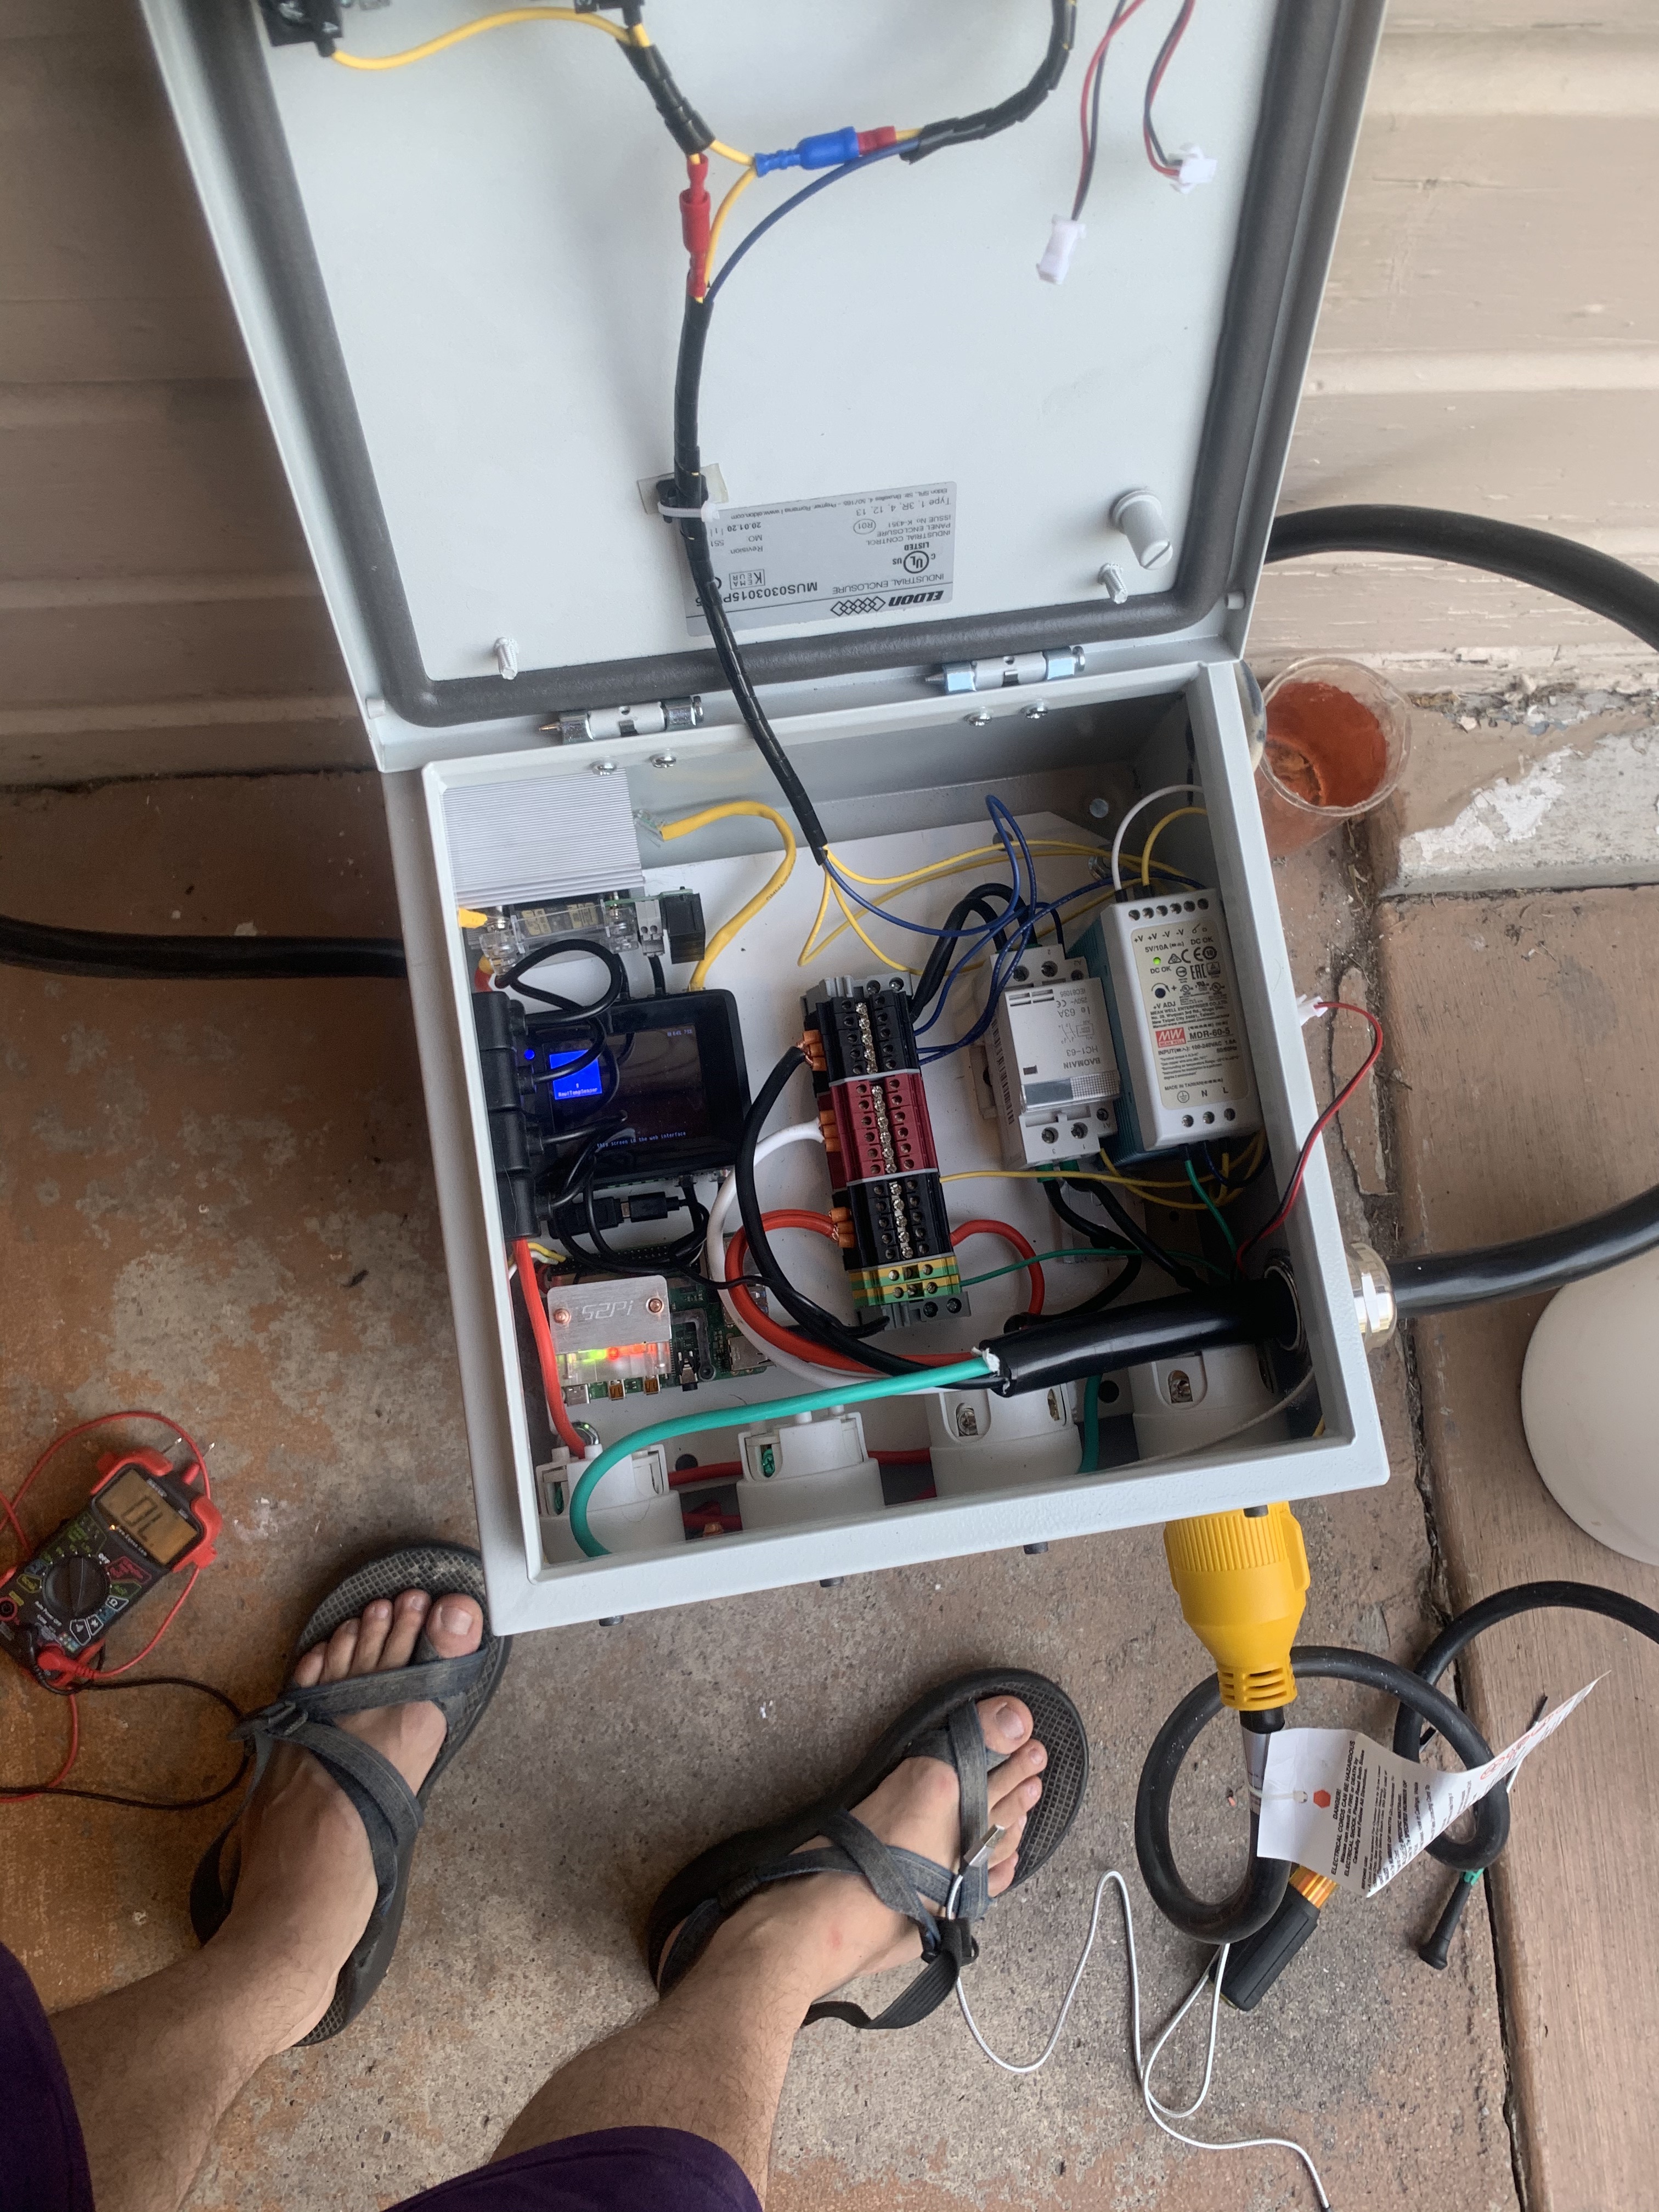
Here’s a shot of before the screen install, I’ll have to take some new shots later today of the after.
The 1 SSR I have at the moment is at the top left mounted vertically with brewpi’s low profile heatsync that fits perfectly against the side wall of this enclosure. I’ve left room to the right of it for 3 more to feed the rest of the outlets on the bottom. I put a tower cooler on the pi because it looks cool and the enclosure is sealed at the moment. Didn’t have space for wire ducts on this one but I think it looks decent as is.
Nice work David. I’ve been toying around with this idea as well and you may have been a catalyst for me to start putting together a parts list! I love it!
Yeah it’s steel with a pretty tough enamel. I really like these enclosures they’re build very solid, I’ve used a variety of sizes for different projects at this point.
For all the round holes I used carbide tipped hole saws. They give super clean holes with basically no burr. The screen is actually mounted on the outside of the box so most of the metal is still behind it. I just removed a few square access holes with an angle grinder (but only because I couldn’t find my dremel).
 The two LEDs on the right are on/off indicators for the elements with readouts for how many amps each is pulling. On the left are the 4 remaining RJ12 sockets the stem from the spark 3.