Hi All,
I thought I would track on this forum my ‘brewpi build’ using an upright 16.6 cubic foot freezer as the fermentation chamber in the hopes that I could get some feedback from the community here as well as help others with future builds. I currently use this freezer for temp control with a ranco controller and decided to go with a brew pi after not being happy with the temp overshoot. I will preface all of this with I am a DIY noob with limited time on my hands. As such I am taking a ‘plug n play’ approach as much as possible. While not as interesting as some of the fridge hacks on here, perhaps it will serve as another guide for those similar to me that are looking for the functionality of the brewpi without some of the DIY aspects.
From reading up on the brewpi, I have put together a shopping list of items needed to get this project underway. I will be going with ‘Method 1,’ which is using switched power cords and leaving the freezer in its original state. Hopefully someone can chime in if I am missing something and answer a couple of questions I have:
• Brew Pi Spark v2 normal w/ enclosure + particle photon
• 12V Power Supply for Brew Pi Spark
• 2 Waterproof OneWire Temperature Sensor (RJ11, DS18B20). One for the conical thermowell, the other for the air in fridge.
• 2 SSRs: 1 for cooling and 1 for heating. Since I am going for a plug in play, I will get 2 PowerSwitch Tail II power cords.
Question, I am assuming I would get the ones that are ‘Normally Open (NO)’?
• Antec Tricool Computer Fan - 120mm DBB Cooling Fan with 3-Speed Switch for air circulation in the fermentation chamber.
• Zoo Med Reptile Heat Cable 100 Watts, 39-Feet.
Question, this is per the recommendation of another member here to get a heat source in the 50-100 watt range. I already currently have a 40 watt ‘Fermwrap’ for wrapping around a conical or carboy. Not sure if that will suffice to tightly control the chamber temp in this size of the freezer. Thoughts?
• Magnets to mount Brew Pi Spark (https://www.kjmagnetics.com/proddetail.asp?prod=MM-A-16). M3 size screw with a tapered countersunk hole
Here are the freezer specs (runs 5 amps). It is an energy efficient model so it should have good insulation

Here is the Freezer setup with the conical. Note that this freezer does use a fan (vents at the top) to circulate air when cooling but based on the advise from everyone here, I opted to go with computer fan to ensure the chamber temps don’t stratify either during heating or when idle.
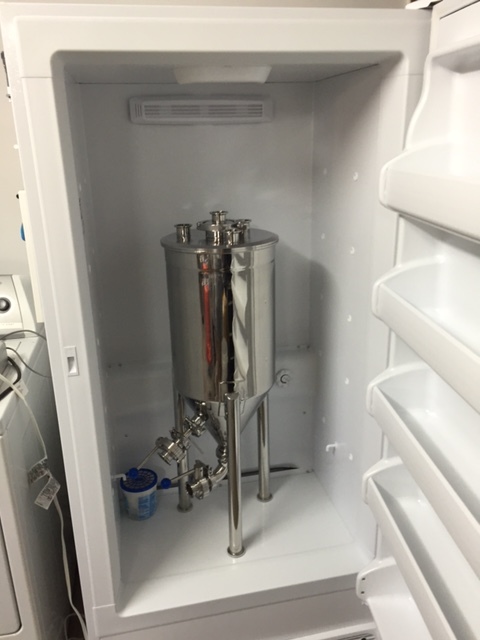
Based on the setup I would install one of the shelves at the top to mount the computer fan, the temp probe for the fermentation chamber air and if it is recommended I get the 100W heat cable, wrap it through that shelf. Yes, heat does rise but if the computer fan is next to it, it should help to distribute the heat.
Lastly, right now I was planning on running the temp probes through the front door as I have always done. But if there is way to run them through the defrost drain located inside on the bottom shelf, perhaps I can explore that.
Again any input or suggestions would be appreciated before I order. Once I get the parts ordered and they arrive, I will post the setup process with pictures for all to chime in. This is a great site and community.
Cheers,
Matt