Hi All,
Starting today with mod. of fridge(Gram from Denmark). I have control of most of the build, but…
When connecting temp. sensors to the spark they use rj connectors.
I will use 3-4 sensors. Can they all be conneted to the same rj input on the spark, or do i need to split them again before i connect them to the spark with separate connections?
Will post some pic. on my way.
Thank’s
Kai
Everything is address based. The 4 inputs on the controller are identical and connected to each other. So you can have one cable going into the controller and split it later.
Thank’s. Less welding is good
Hi again. What’s the color coding in the temp. sensors? The guide has different colors than my temp. sensors.
Mine have red, black and white. Would like to know the colors for data, 5v and gnd
The sensors we have in the shop now (with RJ11) have 5V = red, GND= black, OneWire = white.
1 Like

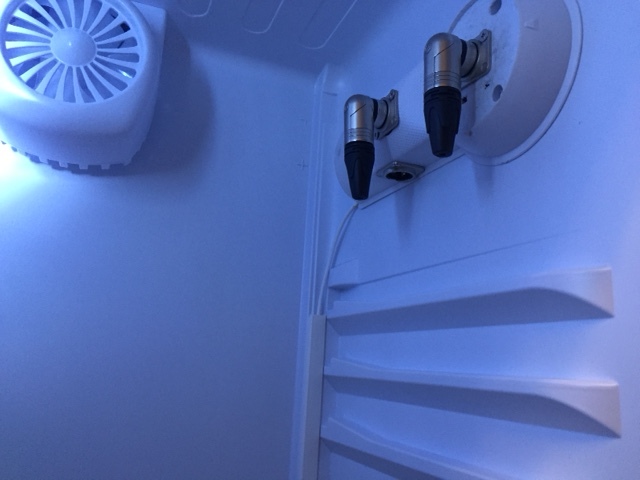
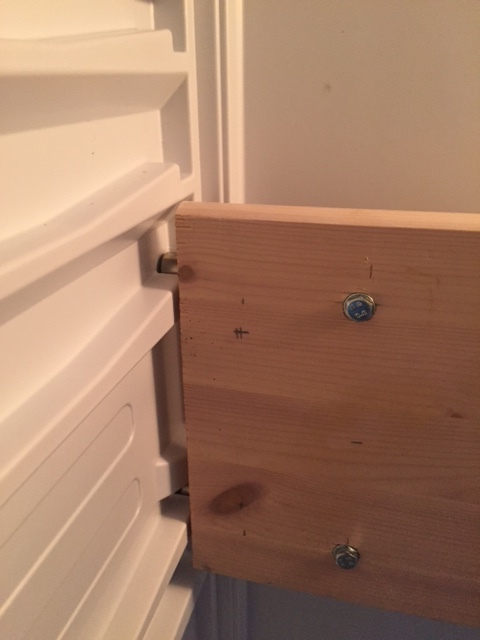
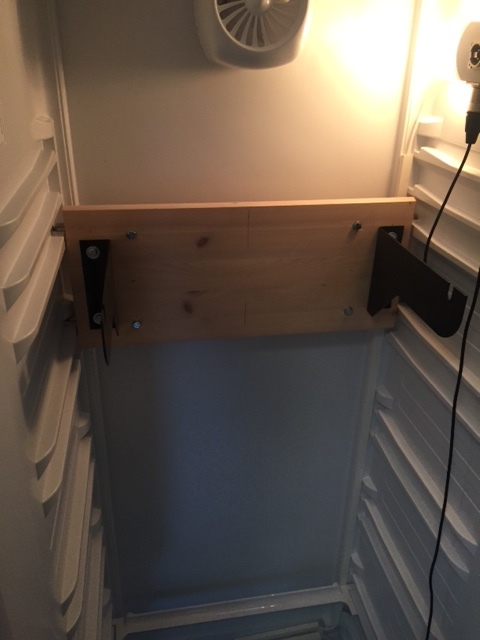
Here’s my Gram fridge. The fan at the top will do the air circulation

When all the drawers and shelfs are removed, the thermostat knob flipped off i started the “find all the screws” game.

3 screws found and the housing came loose

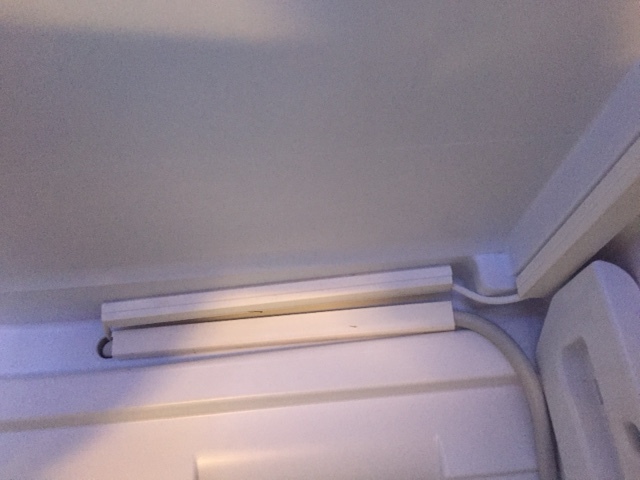
Thermostat and light. Temp. probe removed from the black hole behind and cut off.

The thermostat assembly split apart.

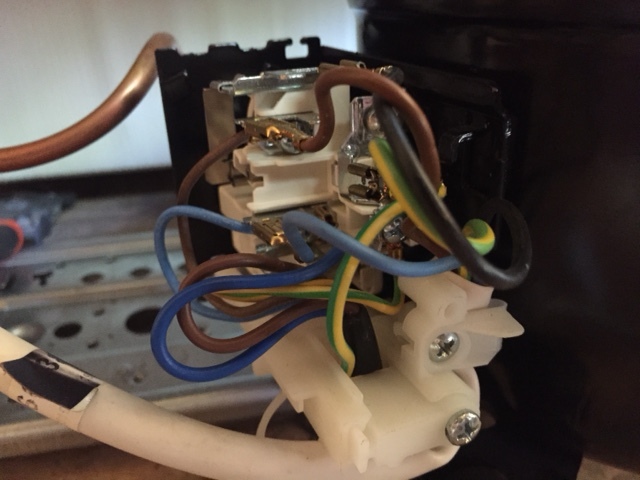
Welding complete for light and recirc. fan control.

Din plug for fridge temp completed.

Thermostat housing modified for the din plug connectors.

Din male connectors finished welding and ready for the thermostat housing.

At the bottom is fridge temp. In front beer 1 and beer 2

Almost ready to mount the thermostat housing back into the fridge.

Here we are. Light works as it should and the recirc. fan starts when i close the fridge door.
Next up is messing with the compressor connections. Hope i don’t burn the house down 
5 Likes
Nice work there with the connections!
Nice job - and thanks for the pics, will help someone in the future I’m sure.
Curious - Why did you choose to go for DIN connectors?
Thank’s. No spec. reason for the din connectors. I saw some pictures somewhere and thougt the 90 degree bend looked cool. More pictures will come, but lack of time right now. 

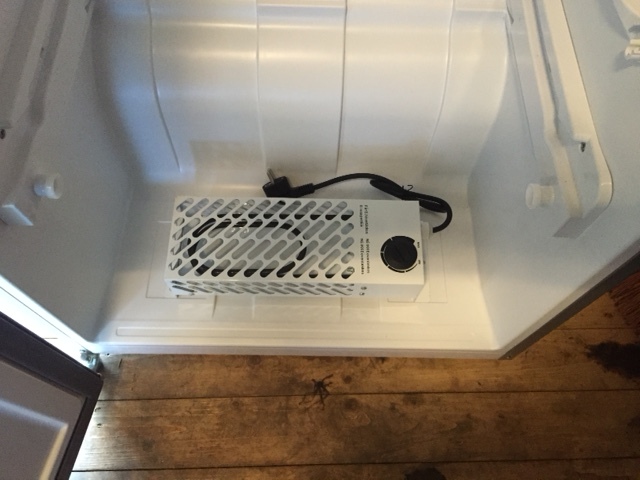
Heating element from Biltema in Denmark.
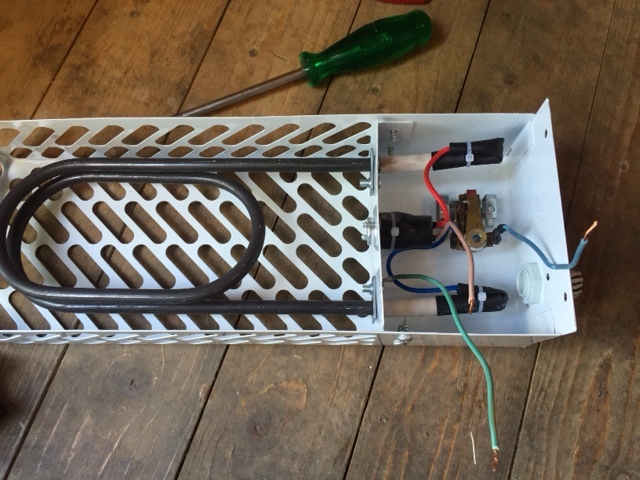
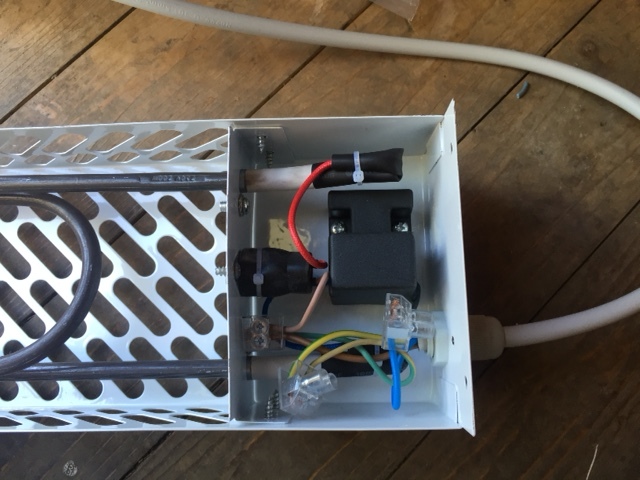
Cable is to short, so a quick modification is needed
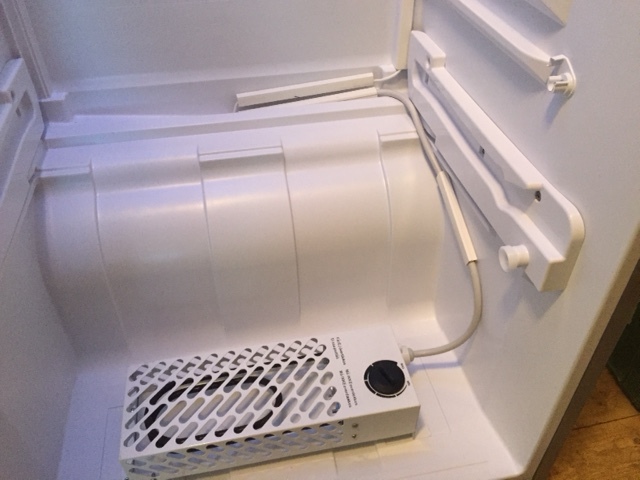
Heater mounted in the fridge.
Cables running out of the drain hole to the back of the fridge.
This can be exiting, or not 
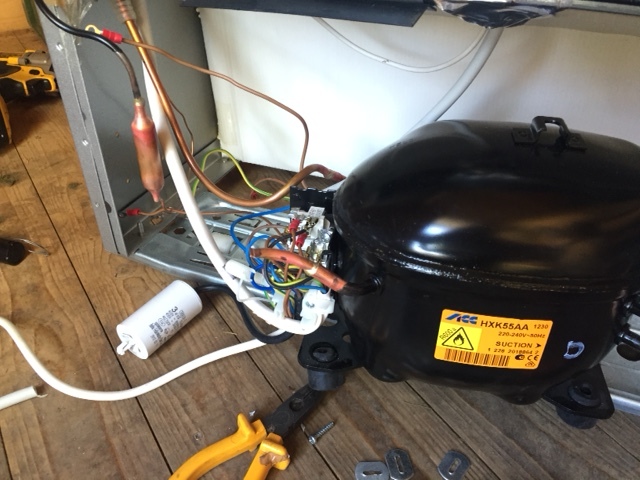
Removed the compressor a bit to get some space to work
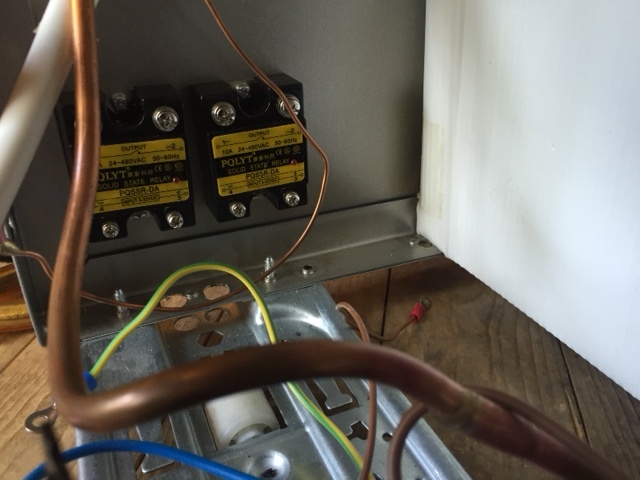
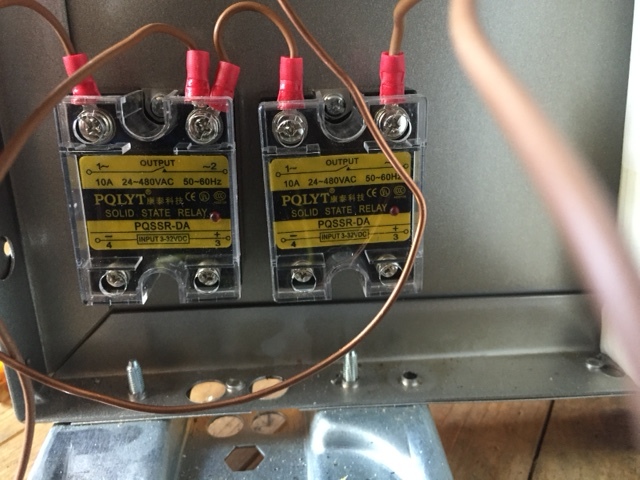
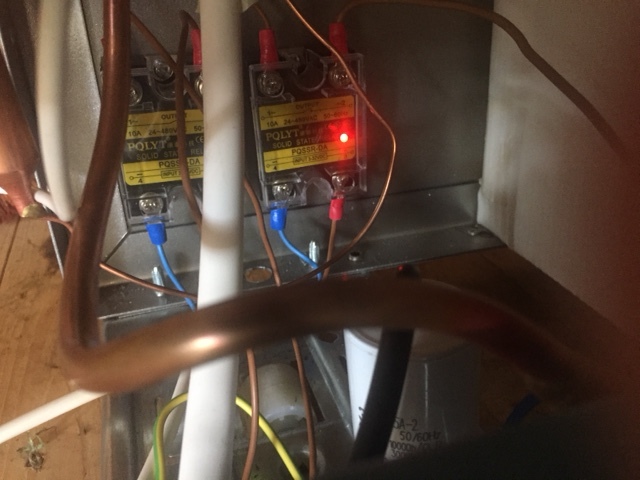
Found a good spot for the relays.
Almost ready with the connections. Just the two cables to the Brewpi Spark to go.
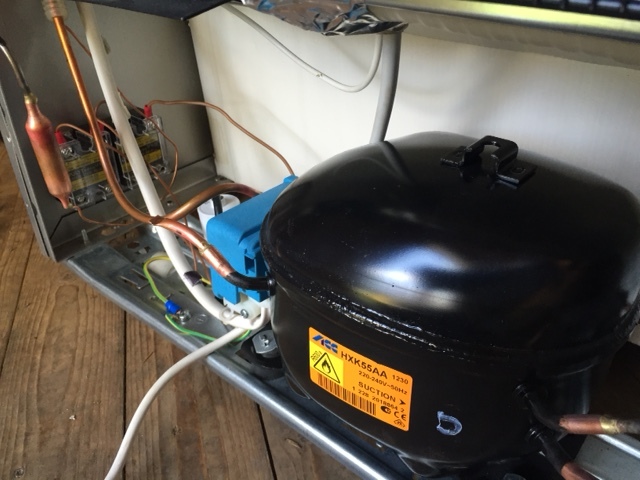
Compressor back in place.

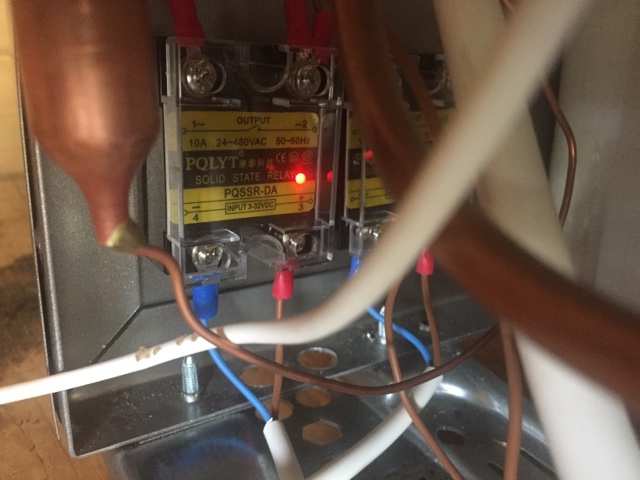
Heating and cooling control cables from the Spark to the relays.
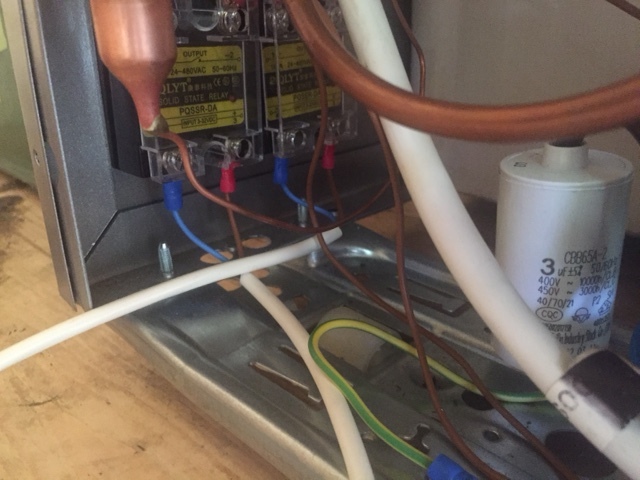
Almost done
It’s alive 
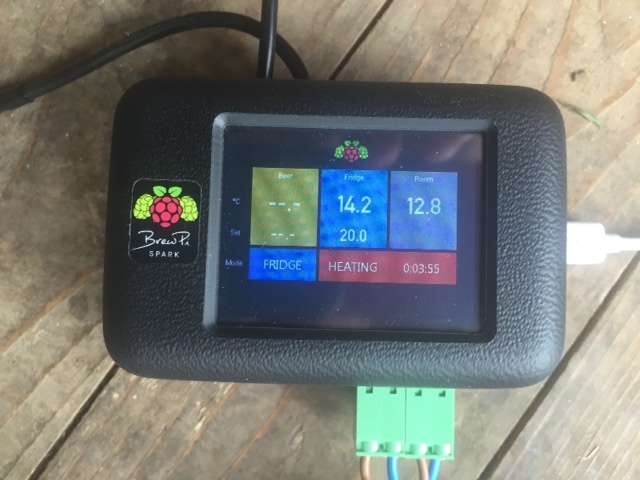
and heating.
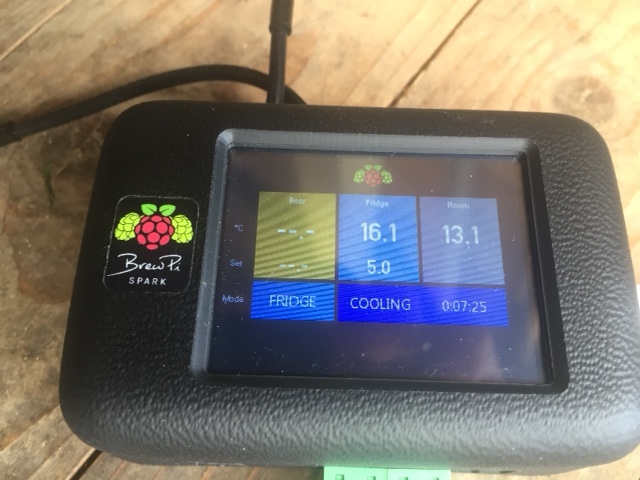
Cooling works as well.
Now it’s off to brew some beer. Sheers 
3 Likes
Very nicely done and thanks for sharing!
We need more build threads 
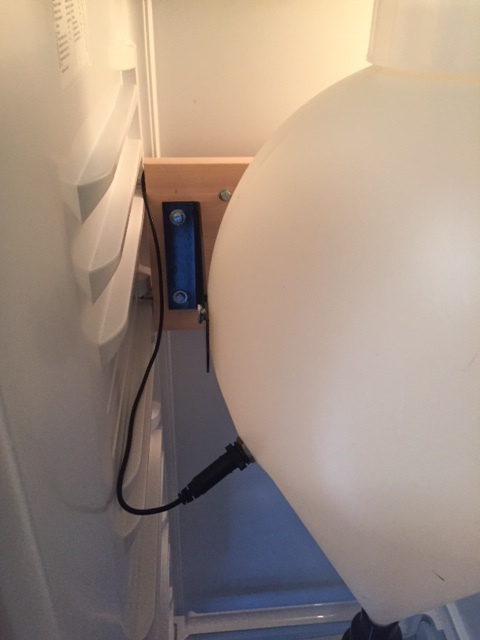
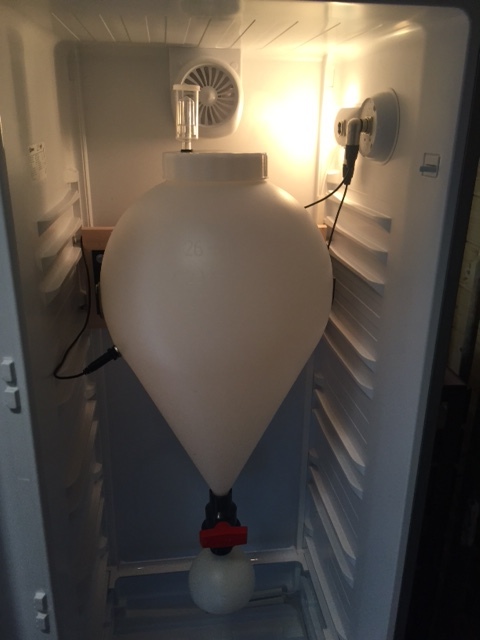
To finish the whole project i made an Fastferment installation with temp. control sensor from Brewpi. The sensor was just plug and play into the fermenter.

3 Likes
Wooh, really nice!! Thanks for sharing! I also started out with the same heater from Biltema, but I think it was too efficient. A light bulb seemed to work better.
Thank’s for the tip. I will se how it works out, and maybe some mods have to be done. My initial testing was good though. Do you also have beer, fridge and outside temp. sensors in your setup?
@hankai, yes, I got 3 sensors, one beer-sensor, one fridge-sensor (placed 2 cm from the cooling element in the back of the fridge) and one room-sensor. The room-sensor keeps disconnecting and reconnecting as others has reported here on the forum, but I haven’t focused on it really. Right now it is placed inside my BrewPi control box to monitor the heat generated from the SSRs when turning on the fridge and light bulb. I have created a couple of blog-posts about my setup here - they are in Norwegian, but Google Translate might turn out something understanable if you are interested  http://www.bobsbittelillebryggeri.no/web/bbb.nsf/d6plinks/DIY002_BrewPi_ControlBox and http://www.bobsbittelillebryggeri.no/web/bbb.nsf/d6plinks/DIY003_BrewPi_Cooler
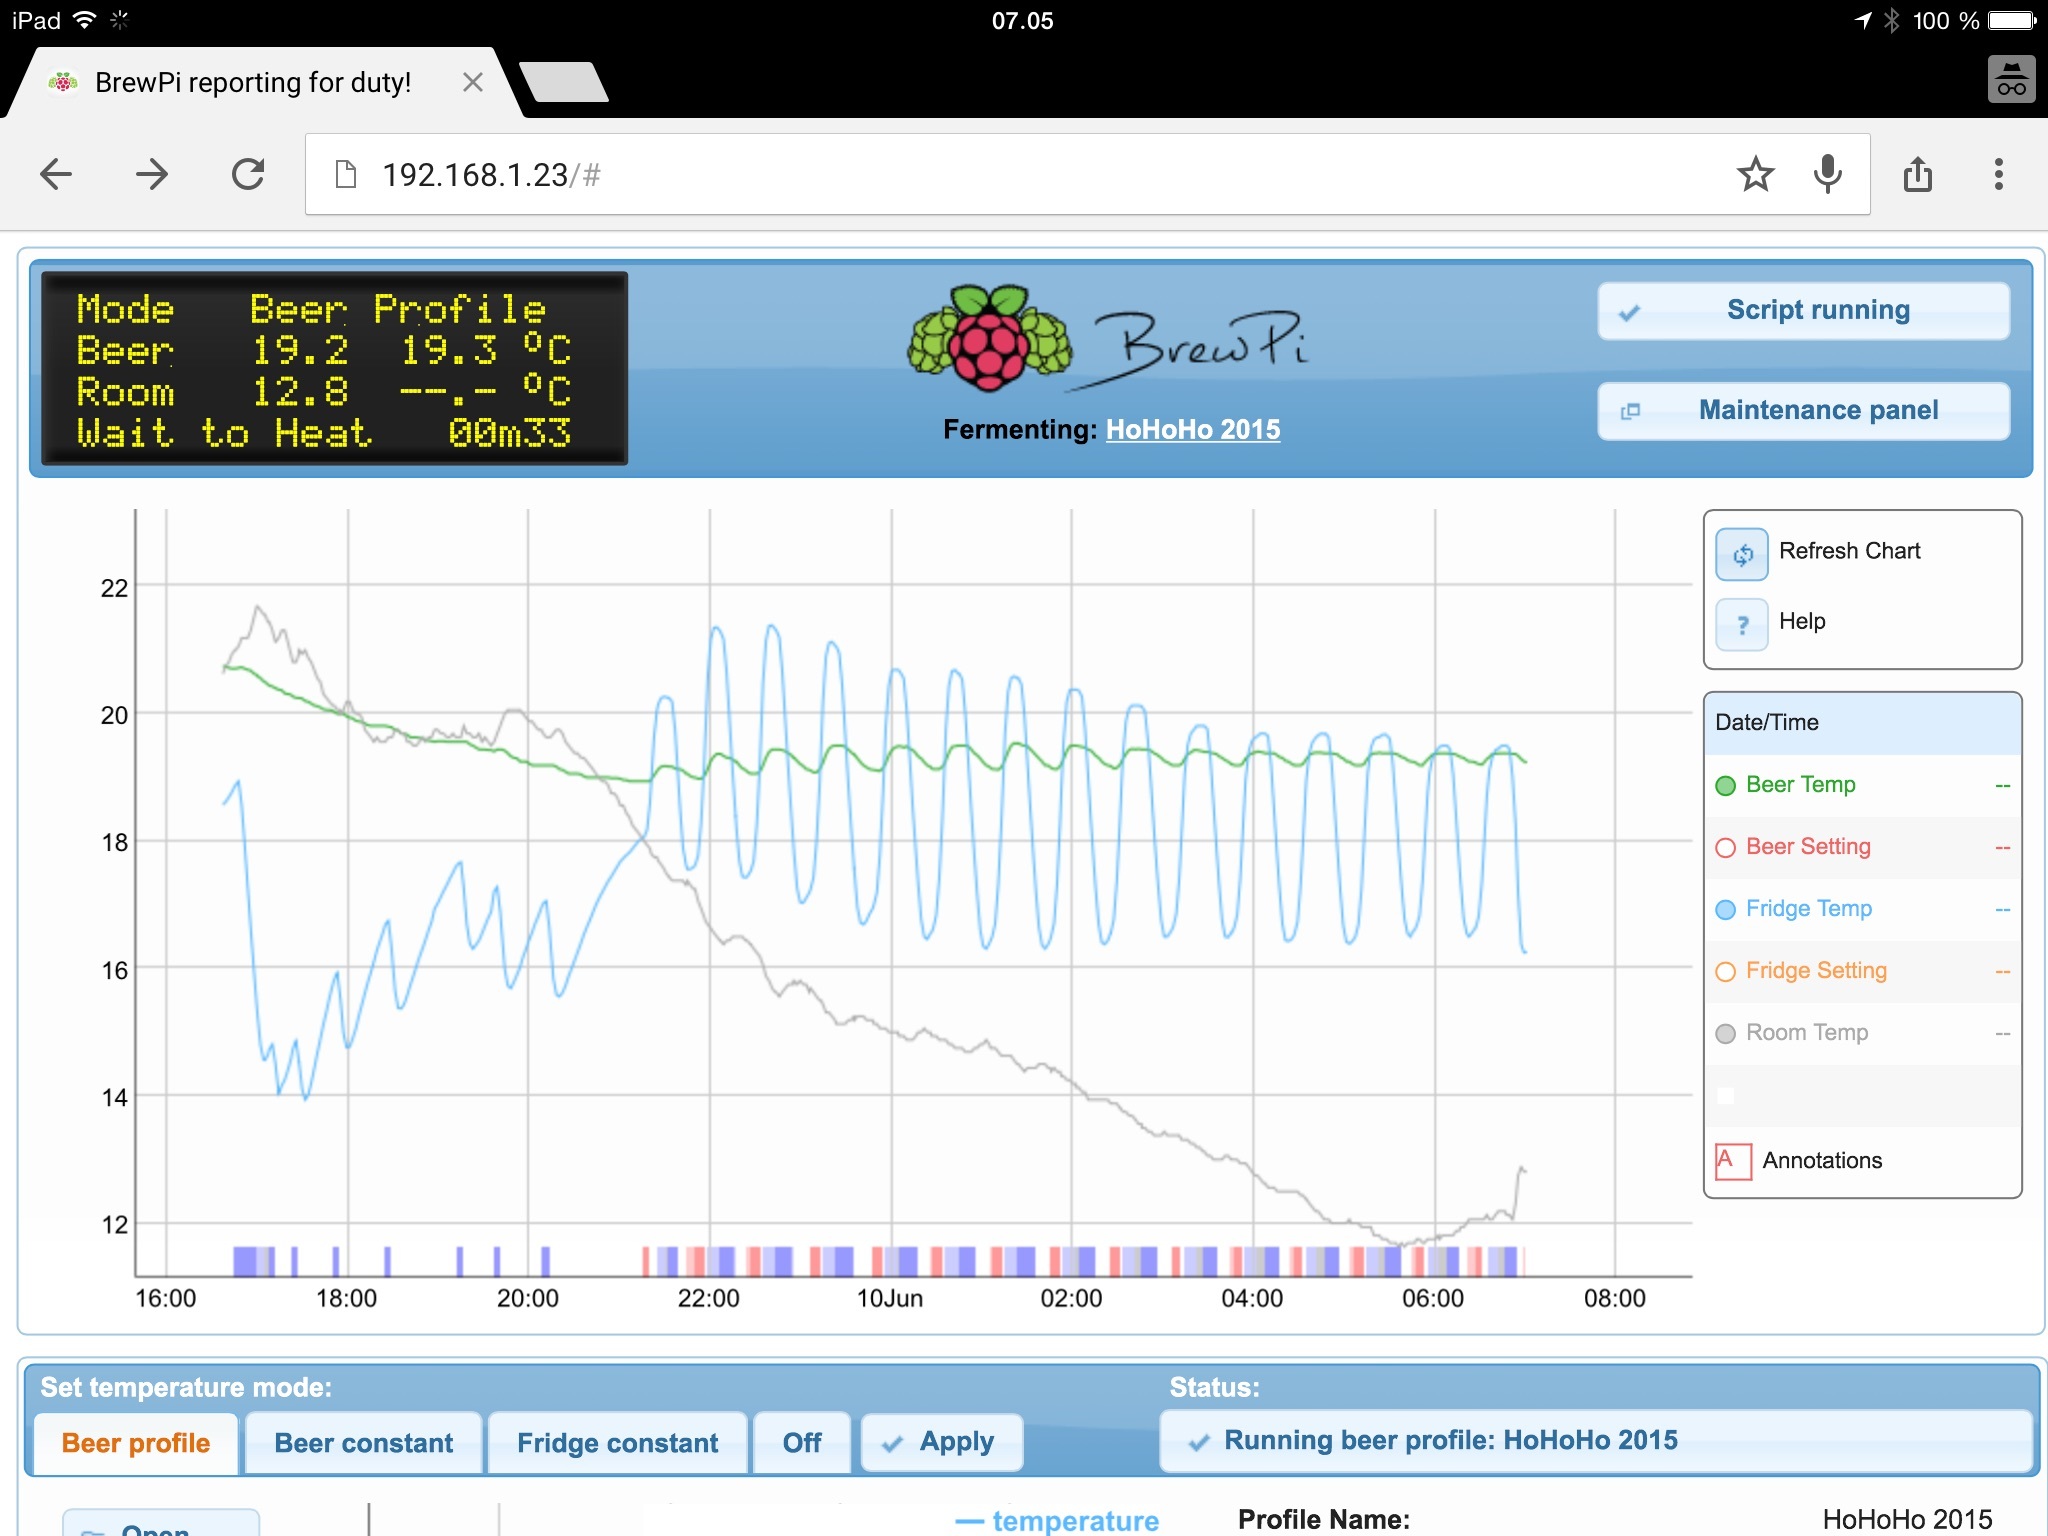
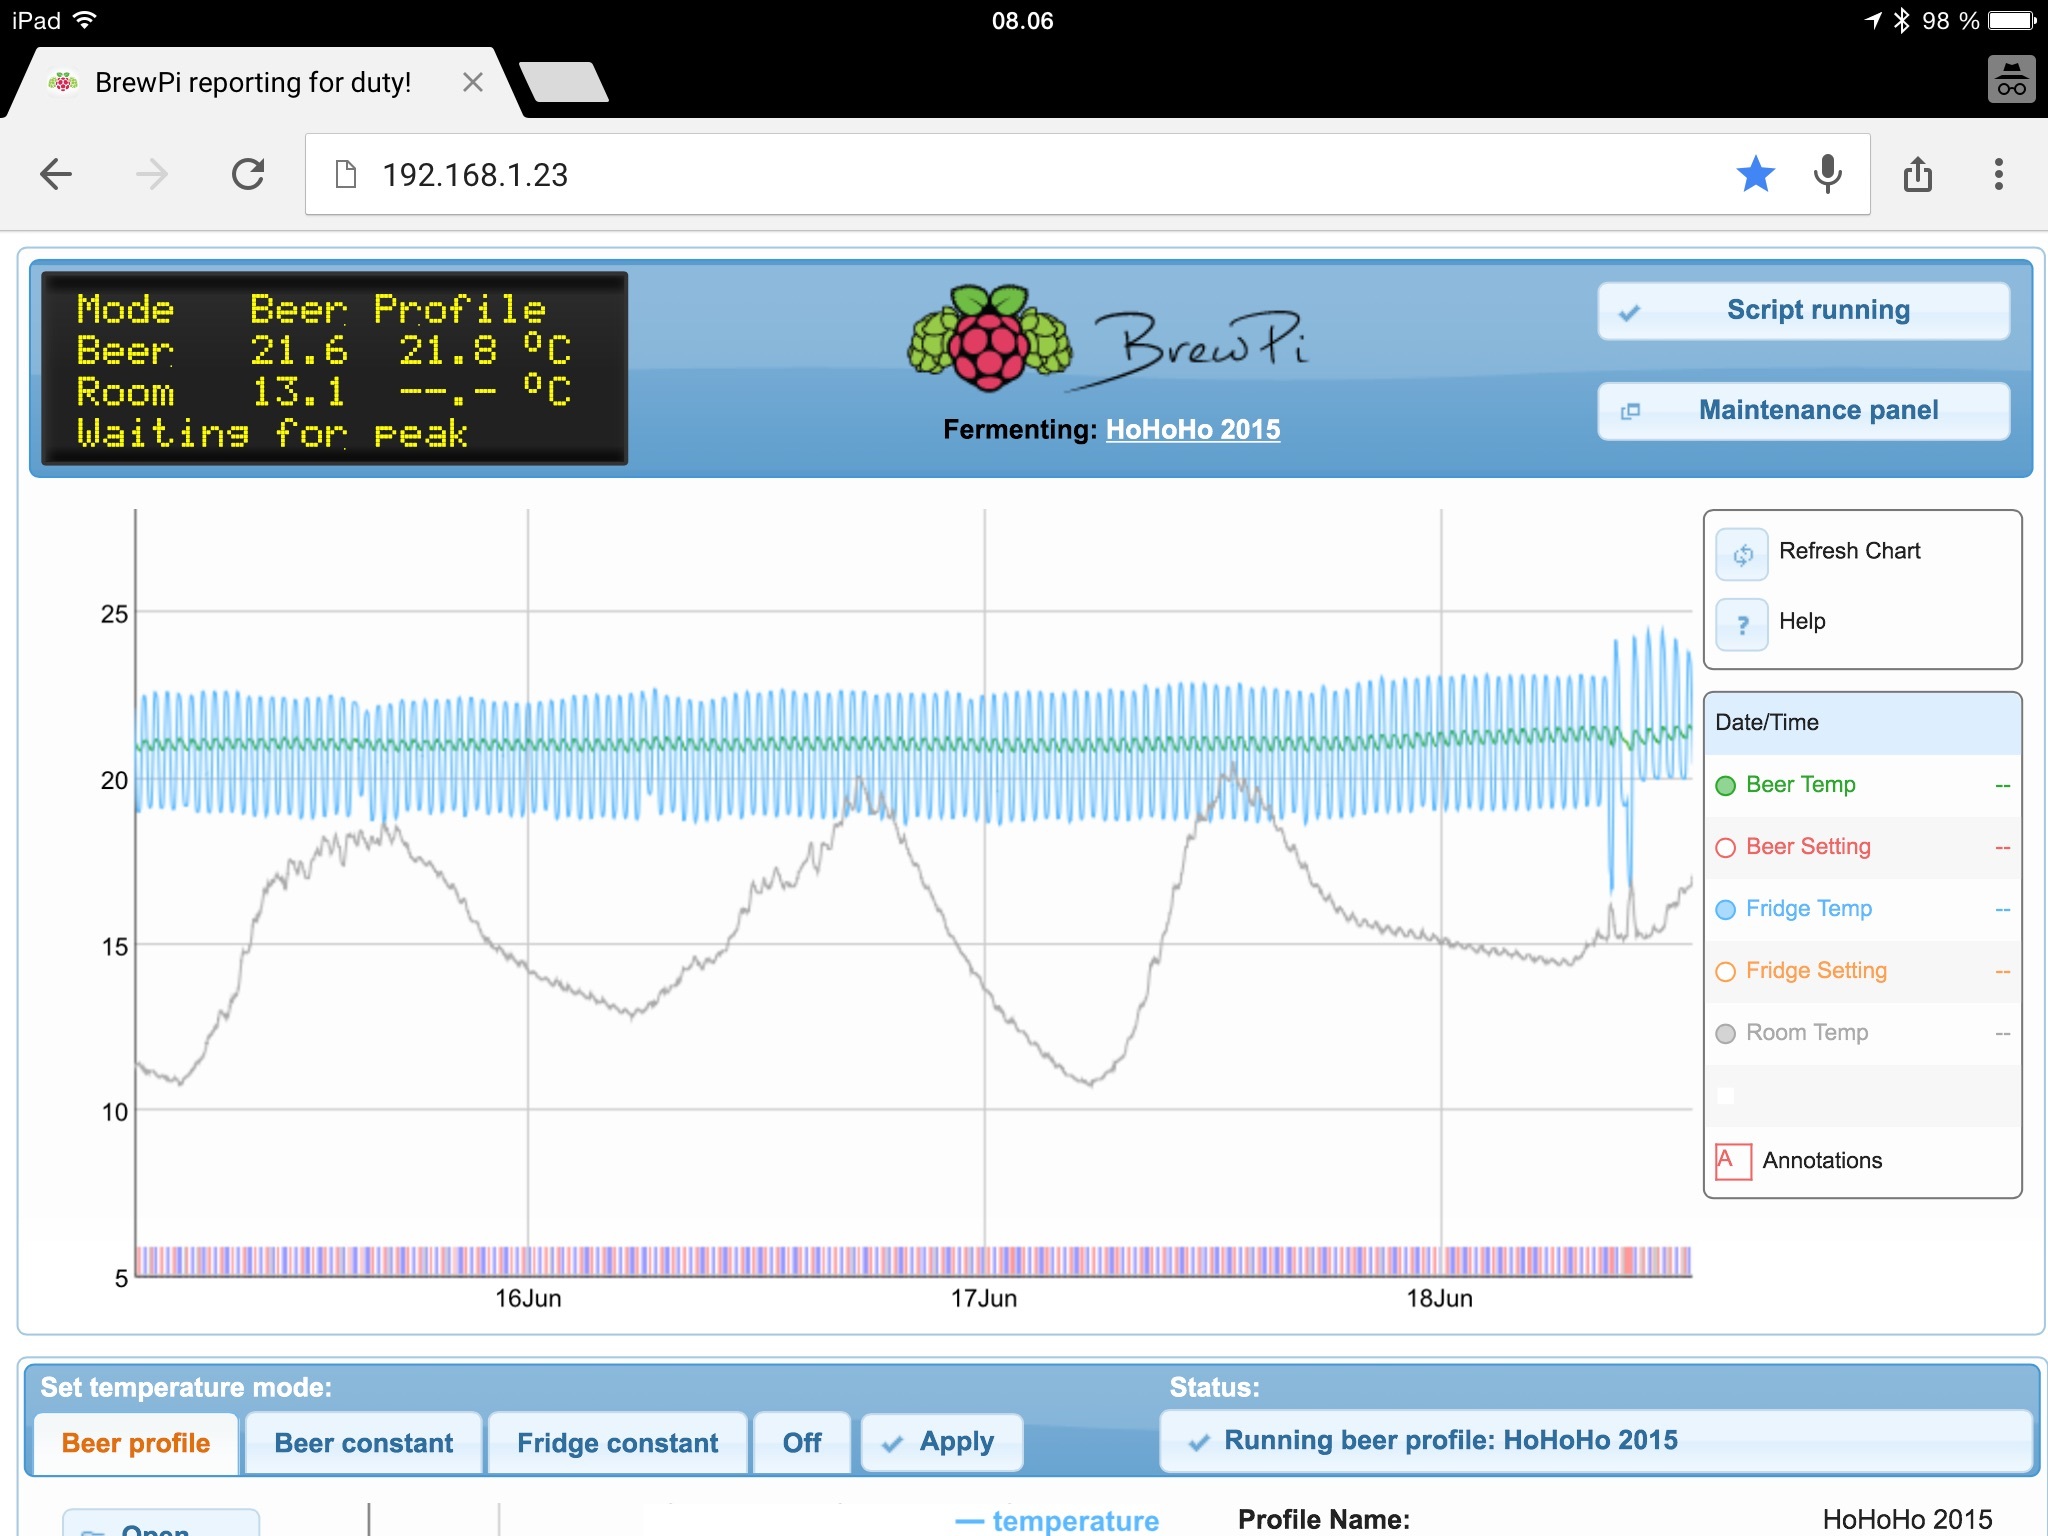
Fermentation running very nice and steady. No problems with room temp. probe. Ready in a couple of days. Love how the Spark works and no glitches what so ever.
A slight tweak on the settings should solve that slight ossicaltion too.
What is the strange fermenter called? looks interesting!

What setting to tweak? A bit scared of messing th whole setup. Using the setup that brewpi was born with now and do not have much knowledge on the diff. settings.