About a week ago I finally finished my 4-tap Keezer home draft system. (Sorry if the photos are a little fuzzy. I took them with a Ipad and my “man cave” was a little too dark.)
The project was about a year in the making, and perhaps the most challenging part of it was finally getting my wife to agree to having it! I am from the United States, but have lived in Germany in for the past three years. I opted to buy nearly all of my draft equipment in the U.S., most of which I bought from Midwest Supplies. I ordered the wall plates and keystone jacks for my USB and RJ12 connections from Monoprice. This unfortunately was necessary, since despite Germany being a beer haven, finding the exact equipment that I wanted, like all stainless steel hardware proved to be challenging. Unfortunately this often goes for other brewing equipment as well, so my options are often to either fabricate my own or import what I need.
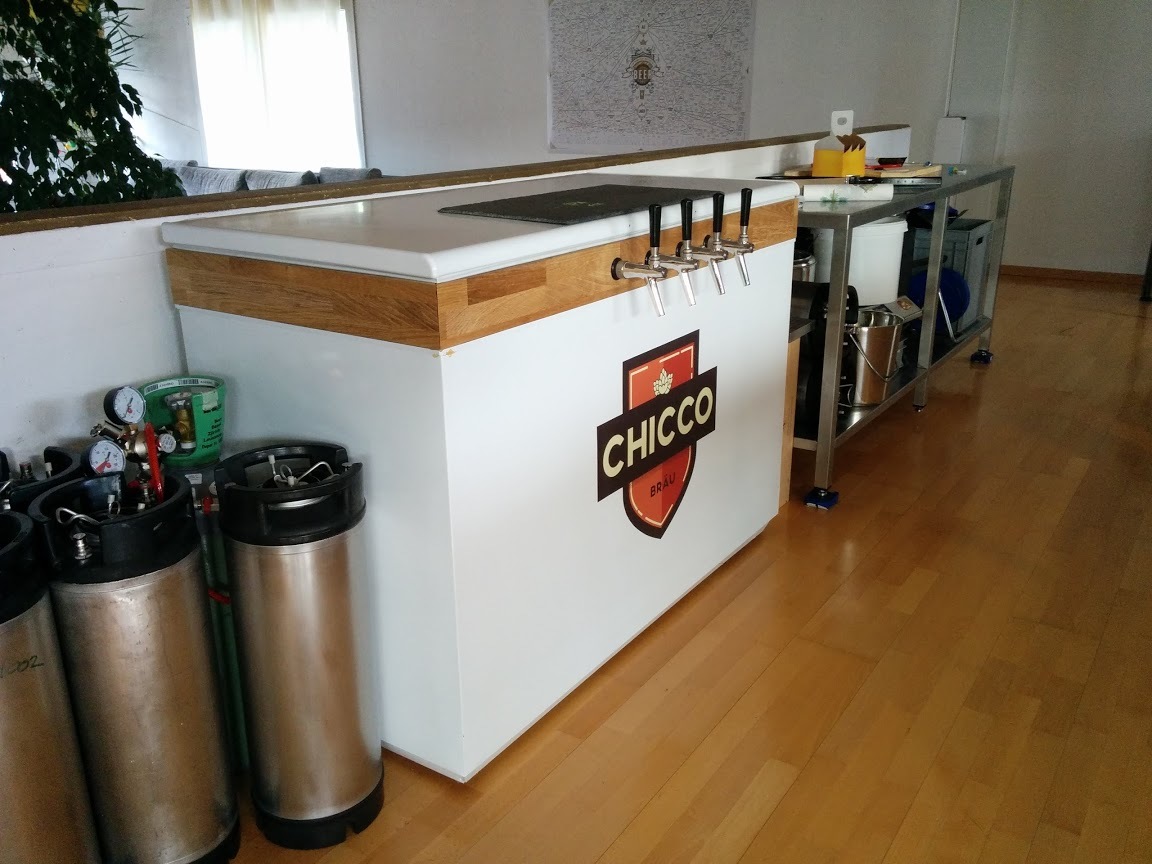
I had purchased an Arduino-based BrewPi a while ago which I use to monitor my fermentations. I had planned to buy a second one for this Keezer project, but then the BrewPi Spark was announced and so I decided to wait for its release. Another challenge was finding an adequate chest freezer to accommodate the project. I knew that I wanted to have three different beers on tap, but I did not know what size chest freezer would be large enough. I had scoured forums in search for some advice. On some homebrewing forums there are databases with fridge/freezer specs and how many Corny kegs can fit inside them. Unfortunately, I could not find something like this for European manufacturers. I had seen suggestions on other forums to make cardboard circle cutouts, equivallent to the area of a Corny keg as a means to see if a fridge or freezer can fit the kegs inside, and so I made three cutouts that I carried with me when I went to appliance stores. After testing my Corny keg cutouts in a number of chest freezers, I learned that I would need a freezer that had a volume of at least 175 liters. I opted to go with a Bomann GT 258 Gefriertruhe. At 205 liters, it was a little bigger than what I needed, and as a result, I discovered that I would be able to fit an additional keg inside! As a “consequence”, I had to order a 4th tap and all the necessary hardware from the U.S., which added some delay to when I could start the build.

The drip tray was custom built by a friend of mine who is a metal worker. It hangs on the shanks of all four taps. I purchased the bottle opener from Amazon in the U.S. and the cap catcher from Amazon in Germany. The bottle opener is also available in black. I used magnets to attach the cap catcher, BrewPi and RaspberryPi to the freezer. The plan was to make the setup as flexible as possible. Also since I didn’t modify the freezer really in any major way, in the future I can return the freezer back to its original form and use it as it was intended. However, I doubt that this will be the case!
The “junction boxes” were also fabricated by the friend who built the drip tray. These were necessary to accommodate the space needed for the keystone jacks and cables that were used to make the connections from outside the freezer to the inside. I installed USB B connections on the outside and USB A connections on the inside. I primarily wanted USB to power a fan inside the Keezer however, the second port can be use to add another device inside or power something else in the future if there is something additional to add down the road. I also wanted to be able to install two temperature probes for flexibility such as possible using the Keezer to lager, if the need arises.
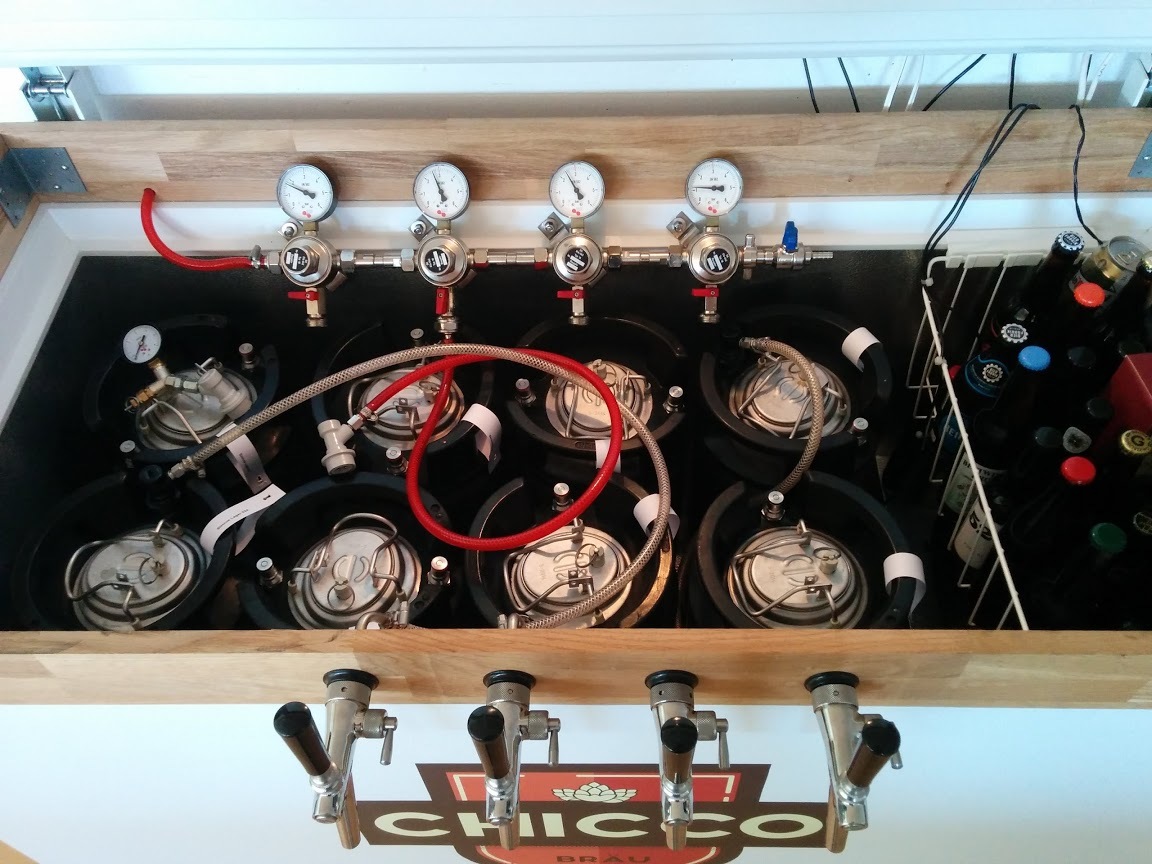
Finding a way to keep the CO2 tank outside of the Keezer was a bit of a challenge. Finding connections that would provide a solution proved difficult. As a result I ended up making something like a bulkhead fitting out of stainless steel hose barbs, washers and a threaded sleeve. I opted for two CO2 connections, one for artificial carbonation which would be need to be adjustable, depending on the beer and the other for a constant pressure for serving this one is connected to the CO2 manifold inside the Keezer so that all kegs can have the same serving pressure (which I am still fine-tuning.) I was also able to use my dual regulator that I purchased in the U.S. However, I had to change out the large nut which connects the regulator to the tank, since the threads are incompatible between the U.S. and Europe.

I have the RaspberryPi installed here on the side above the venting for the compressor. The RaspberryPi is attached with magnets to the Keezer.
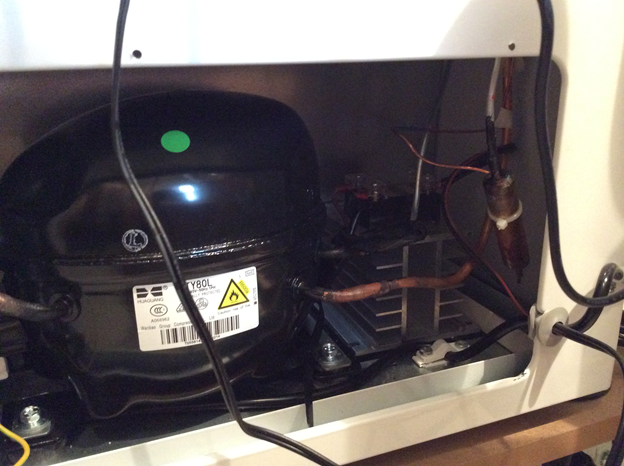
Initially, I had planned to have the heat sink and SSR mounted on the back of the wooden collar. However, this would have meant that the unit would have been too wide to move in and out of the room. The plan was also to make the Keezer as aesthetically pleasing a possible, and unfortunately these parts in my opinion are not the nicest looking. As a solution, I discovered some space inside the compressor compartment. I had to prop the Keezer up on sawhorses and loosened the brackets which held the compressor in place (This is easier with two people. One to hold the compressor and the other to loosen the hardware). Using a piece of double sided tape, I secured the heat sink next to the compressor. I was also able to use the existing cable grommet for the freezer’s power cable to route the cable link from the SSR to the BrewPi.
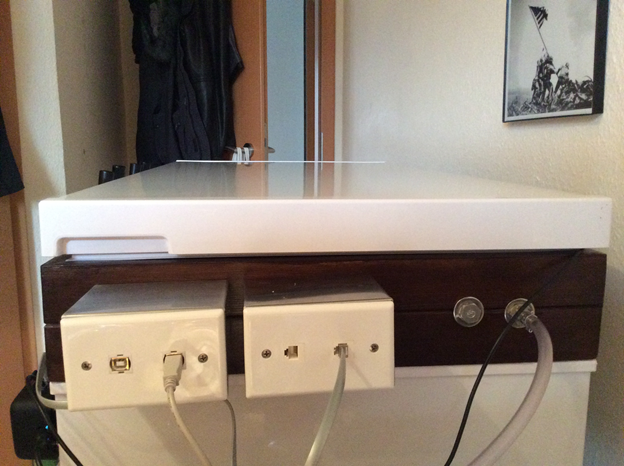
Here’s a closer look at the side of the Keezer. This is where all connections from outside to in are centralized.
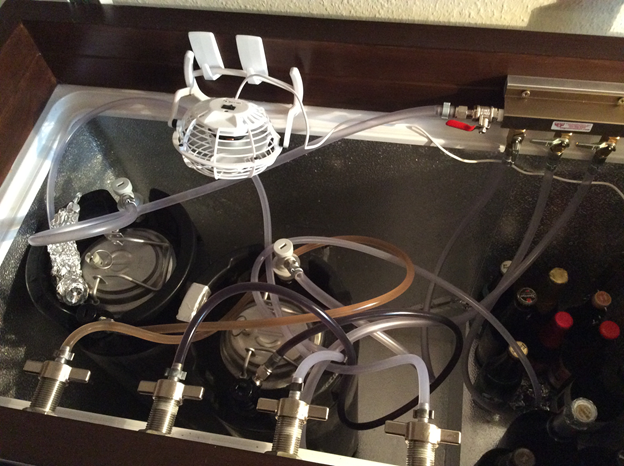
Here is an internal view of the Keezer. I learned that installing a fan was an effective was to help ensure cooling efficiency. What kind of fan and how to power it was the primary question. I decided to go with a USB-powered fan. Inexpensive and having low power requirements, it seemed like a good solution. The fan hangs on plastic wall hooks attached to the wooden collar via quick release strips. Instead of a permanently mounted solution, having the fan hang allows me to move it when it comes time to add or remove kegs. It also allows an easy way to switch out the fan in the event that this one fries or I want to go with something different.
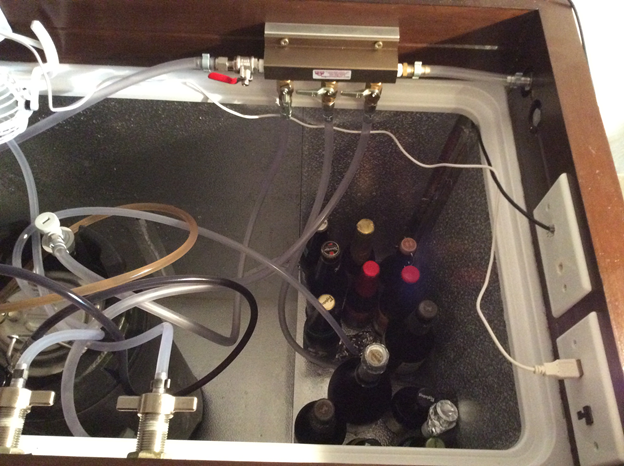
Here is a second view of the inside of the Keezer. You can see where the CO2 tank connects with the manifold. By keeping the tank outside, it left the internal “hump” available for keeping bottles of beer cold. I also plan on using this space to keep a yeast bank for future brewing.
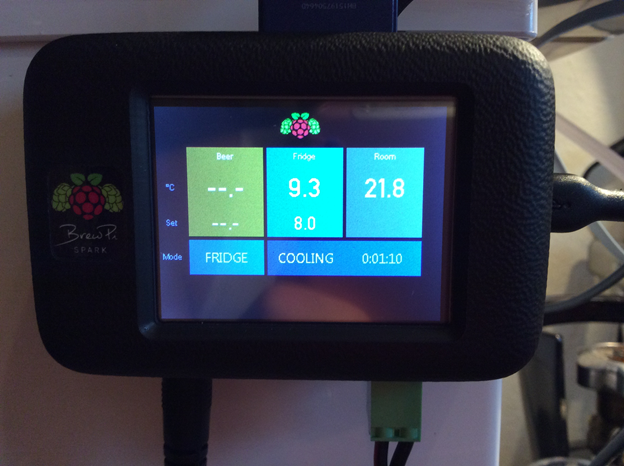
I run the BrewPi in Fridge Constant Mode. I brew primarily mid-high gravity ales. After doing some research regarding serving temperatures, 8 degrees Celsius seemed to be the best compromise. If I keg something like an Imperial Stout, Barleywine or other beer that should be served at a warmer temp, having a little will power and letting the beer warm a little is what I will have to do. Or change the setting a few degrees warmer.
Please feel free to comment or ask me any questions. I hope this build inspires other brewers who want to build something similar. I opted to do a lot of research before the build, rather than just slap something together. As a result, I am quite satisfied with the result and look forward to years for fresh draft homebrew!