Multi process will be possible, valves can be driven. What won’t be in the release is this type of UI to toggle many valves at once:
https://brewpi-ui-demo.herokuapp.com/processview/herms-automated-valves
Multi process will be possible, valves can be driven. What won’t be in the release is this type of UI to toggle many valves at once:
https://brewpi-ui-demo.herokuapp.com/processview/herms-automated-valves
Fantastic! Can’t wait. Thanks.
Elco, thank you and everybody else that has helped get BrewPi to where it is today. BrewPi has come a LONG way over the years. I’m really excited about the new platform. I do have one hope however, that I can still use my Tilt with the new BrewBlox setup. Monitoring / controlling temp is important but SG dictates the process (when to do a diacetyl rest, when to cold crash and when fermentation is done). The ultimate power would be to be able to automate temp changes based on SG (provided by something like the Tilt) and not time as that is not a true indicator of when the beer is ready for the next step.
At the end of the day, this platform is amazing and has made brewing just that much better. I did a presentation of BrewPi at my brew club and people were amazed this kind of tech exist. So keep up the good work guys!
Chris
We already took into account external integrations and will be able to add tilt support shortly after launching the base functionality.
I also have a long term project for a more accurate SG sensor that I’d like to use for controlling fermentation rate, with temperature being an intermediate force instead of the goal.
First things first though, the framework that will enable all of that.
That would be really cool. Especially if it uses non-reactive materials. The main reason I haven’t gone for a tilt-hydrometer is that I have reservations about immersing a polycarbonate container in my wort (especially for sour beers).
Hey!
Any new updates?
Would love to be able to create my own layout in the heroku app demo, if only for designing and thinking and discussing while now building my entire new system!
All updates appreciated!
@glibersat, a BrewPi contributor and owner of microbrewery Le Singe Savant in France has been brewing on the new software for 1.5 week now as our first tester. Together we found some small bugs which were quickly fixed, but overall it’s running very well.
We’re now finishing these last things we want to have ready before public beta:
Real world testing has given us the confidence that the software is mature enough for the first users to start brewing with it. We’re mostly working on stuff to make the upgrade process smooth now.
The UI as demoed on heroku will not be part of the first release, but is expected to be ready in February. If you want to play around with a layout, the layout is editable as json files in the mocks directory. It’s a time consuming process though, it would be much easier with drag and drop.
Thank you! I actually cloned the repo and started editing the json but have up halv way through. it was BORING.
It’s the UI im actually most interested in, will it be released on github as opensource when it’s finished? Or can I pay to get my hands on it for my brewsystem?
Just wanted to let you know all that @Elco & all the team did a FANTASTIC job, it was worth waiting!
Using the new firmware, we can now preheat our BK + HLT during night at the same time and during brewday, the load balancer allows us to let everything run without caring about what is heating and risking a power surge : we now save a lot of time and required attention during a batch.
The UI is also quite great to use, still at the moment, targetted at advanced users but if you’re comfortable with advanced settings of brewpi and you are a bit adventurous, you should be delighted to try it, docker deployment (great Bob for that!) makes installing it a breeze.
Cheers! 
Can it be istalled today on a RBPi3 for testing?
Sure! But don’t use it for production yet, have a separate setup
You can use the following repository: https://github.com/BrewBlox/brewblox-deployment
Enjoy!
Dumb question - I know it is still in Beta and @Elco and Team are still working out the bugs and a few other support pieces I am sure. If one upgrades to the new software firmware upgrade and things go wrong can we go back to the old firmware. Also, I know with my current setup the new software is what I have to have anyways, so I just want to make sure if I go down this path its either “no turning back” or yes you back backup if need be? I would like to start messing with it, since my electrician is working on the panel right now.
You can always go back to the old firmware. To make it easier, use a new SD card and install the new stack from scratch.
I have one important item left on my TODO list before beta release and that’s adding sensible default settings for each block you can create. Nothing is stopping you from following the instructions on above link, but that’s stopping me from officially putting it out here.
We pushed a lot of breaking changes last 2 weeks, so if you switch earlier you know what you’re in for.
Good luck with the last bits there Elco&team! Don’t feel rushed by deadlines and be proud of your product and hard work! Everyone is looking forward to it.
I fully appreciate this is in a pre-beta stage, and don’t expect any support, …but… 
I have successfully installed BrewBlox using the guide linked above, and flashed the spark, all worked well! Is there a getting-started guide on how to get running with a basic fermentation chamber (one-wire probe in fridge, another probe in beer and control of chamber heating and cooling as per standard BrewPi setup) ?
Or alternatively… is there a simple step to revert the spark back to BrewPi firmware so it can be returned to the old environment easily?
Here is a bullet point list until we have added this in the documentation.
We want to provide some kind of templates later too.
The BrewPi set up was:
To set up the same configuration on BrewBlox:
Now go to a dashboard to create a few widgets (and the blocks they display).
That’s the process inputs covered.
Now the outputs:
Now create 2 PIDs:
You now have your fridge process fully set up. You can run in what used to be called “Fridge constant” mode.
To control beer temperature, we are going to manipulate the fridge setpoint. We do this with an ‘Offset Actuator’ driven by our ‘Beer PID’.
Now you have the same kind of setup that was hidden behind the previous version of BrewPi, but with much more freedom to tweak and see internal values.
Rearrange your dashboard in any way you like and try out the session widget. The session widget allows you to create charts for each brew by selecting a time range and block data to show in the chart.
If you want to run a profile for your beer temperature, create a SetPoint profile widget/block and use that as the setpoint in the ‘Beer’ sensor setpoint pair instead.
We’re open for suggestions on how to simplify this process .
Elco, thanks so much for the detail there. I will digest and you can consider me a willing beta-tester.
Edit: I’ve reverted back for a bit… Spark is connected by USB but getting a default ip (10.0.1.2, which isn’t routable on my network) and wasn’t available to the PI. I couldn’t see how to switch between USB and TCP for the spark connection, but will re-visit this. Ideally I need a spare 'spark!
Brilliant job on the new interface and thanks for the summary above on the setup, all systems are go.
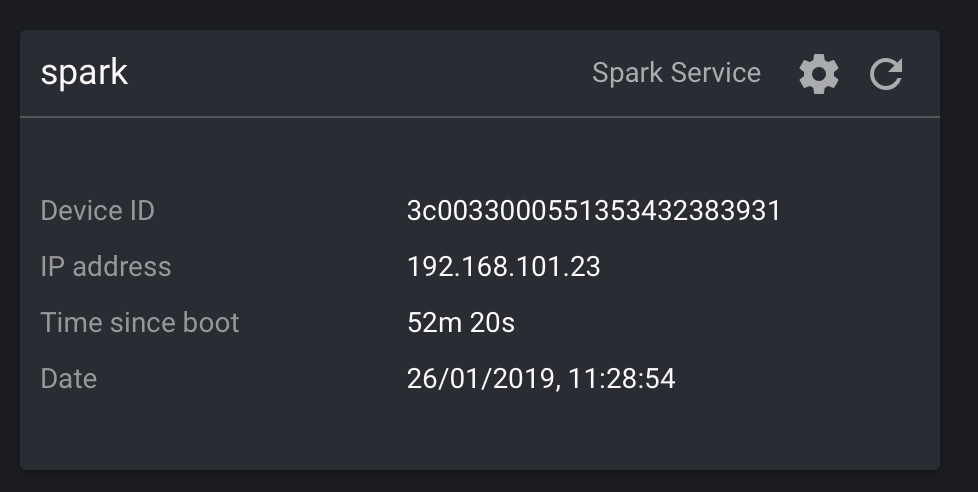
I have one small problem on setting the Pi to talk to the Spark over Wifi.
As you can see the Spark has an IP address but when I unplug the Pi from the Sparks USB port it all goes off line.
Is there a setting/file config I’m missing some where?
It automatically discovers USB devices and then mdns devices. Probably mdns discover is not finding it automatically.
In the docker-compose.yml, for the devcon service add this argument to command:
–device-host=192.168.101.23
Sorry to be stupid, but you mean the docker-compose.yml in the /brewblox directory?
If it is in this file is it under the spark: section that I just add
 command:
    –device-host=192.168.101.23
as there is no commas: as you can see.
services:

  mdns:
    image: brewblox/brewblox-mdns:rpi-develop
    network_mode: host
    restart: unless-stopped

  eventbus:
    image: rabbitmq:alpine
    restart: unless-stopped

  influx:
    image: influxdb
    restart: unless-stopped
    volumes:
      - ./influxdb:/var/lib/influxdb
    environment:
      - INFLUXDB_HTTP_LOG_ENABLED=false
      - INFLUXDB_LOGGING_LEVEL=warn

  datastore:
    image: treehouses/couchdb
    restart: unless-stopped
    labels:
      - "traefik.port=5984"
      - "traefik.frontend.rule=PathPrefixStrip: /datastore"
    volumes:
      - ./couchdb/:/opt/couchdb/data/

  spark:
    image: brewblox/brewblox-devcon-spark:rpi-develop
    privileged: true
    depends_on:
      - eventbus
      - datastore
    restart: unless-stopped
    labels:
      - "traefik.port=5000"
      - "traefik.frontend.rule=PathPrefix: /spark"

  history:
    image: brewblox/brewblox-history:rpi-develop
    depends_on:
      - influx
      - eventbus
    restart: unless-stopped
    labels:
      - "traefik.port=5000"
      - "traefik.frontend.rule=PathPrefix: /history"

  ui:
    image: brewblox/brewblox-ui:rpi-develop
    restart: unless-stopped
    labels:
      - "traefik.port=80"
      - "traefik.frontend.rule=PathPrefix: /"

  traefik:
    image: traefik
    restart: unless-stopped
    ports:
      - "80:80"
      - "443:443"
    volumes:
      - ./traefik:/config
      - /var/run/docker.sock:/var/run/docker.sock
    command: -c /config/traefik.toml --docker --docker.domain=brewblox.local```