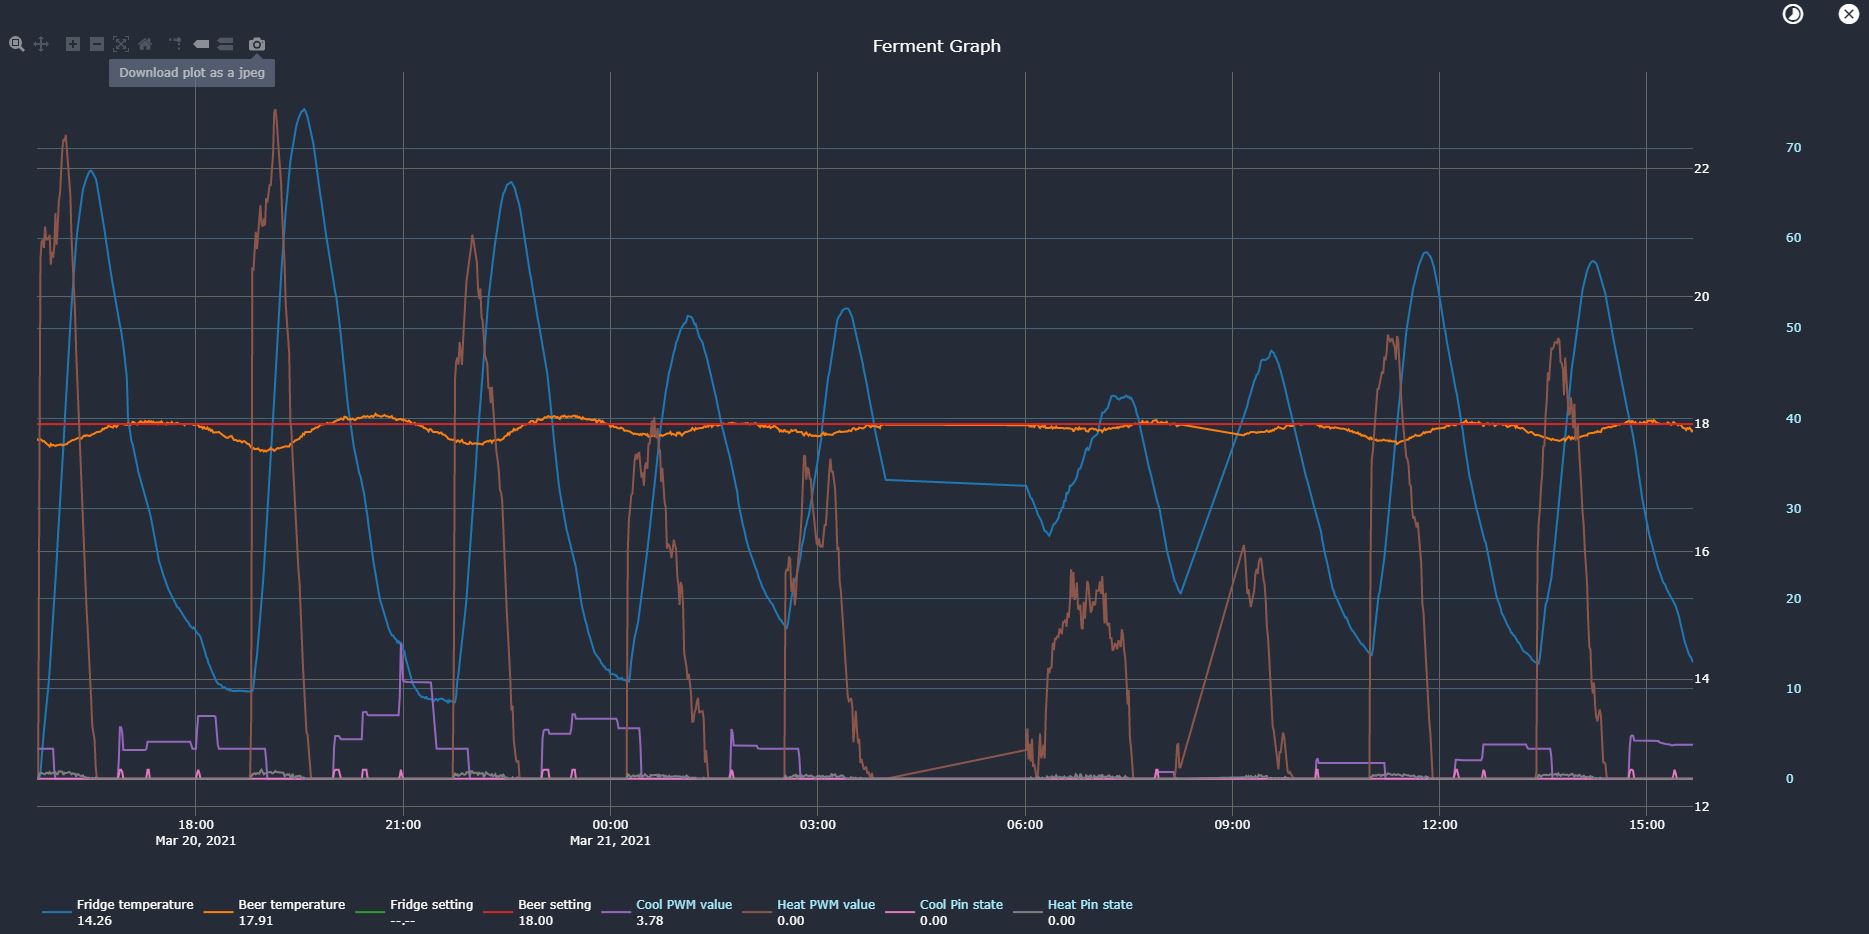
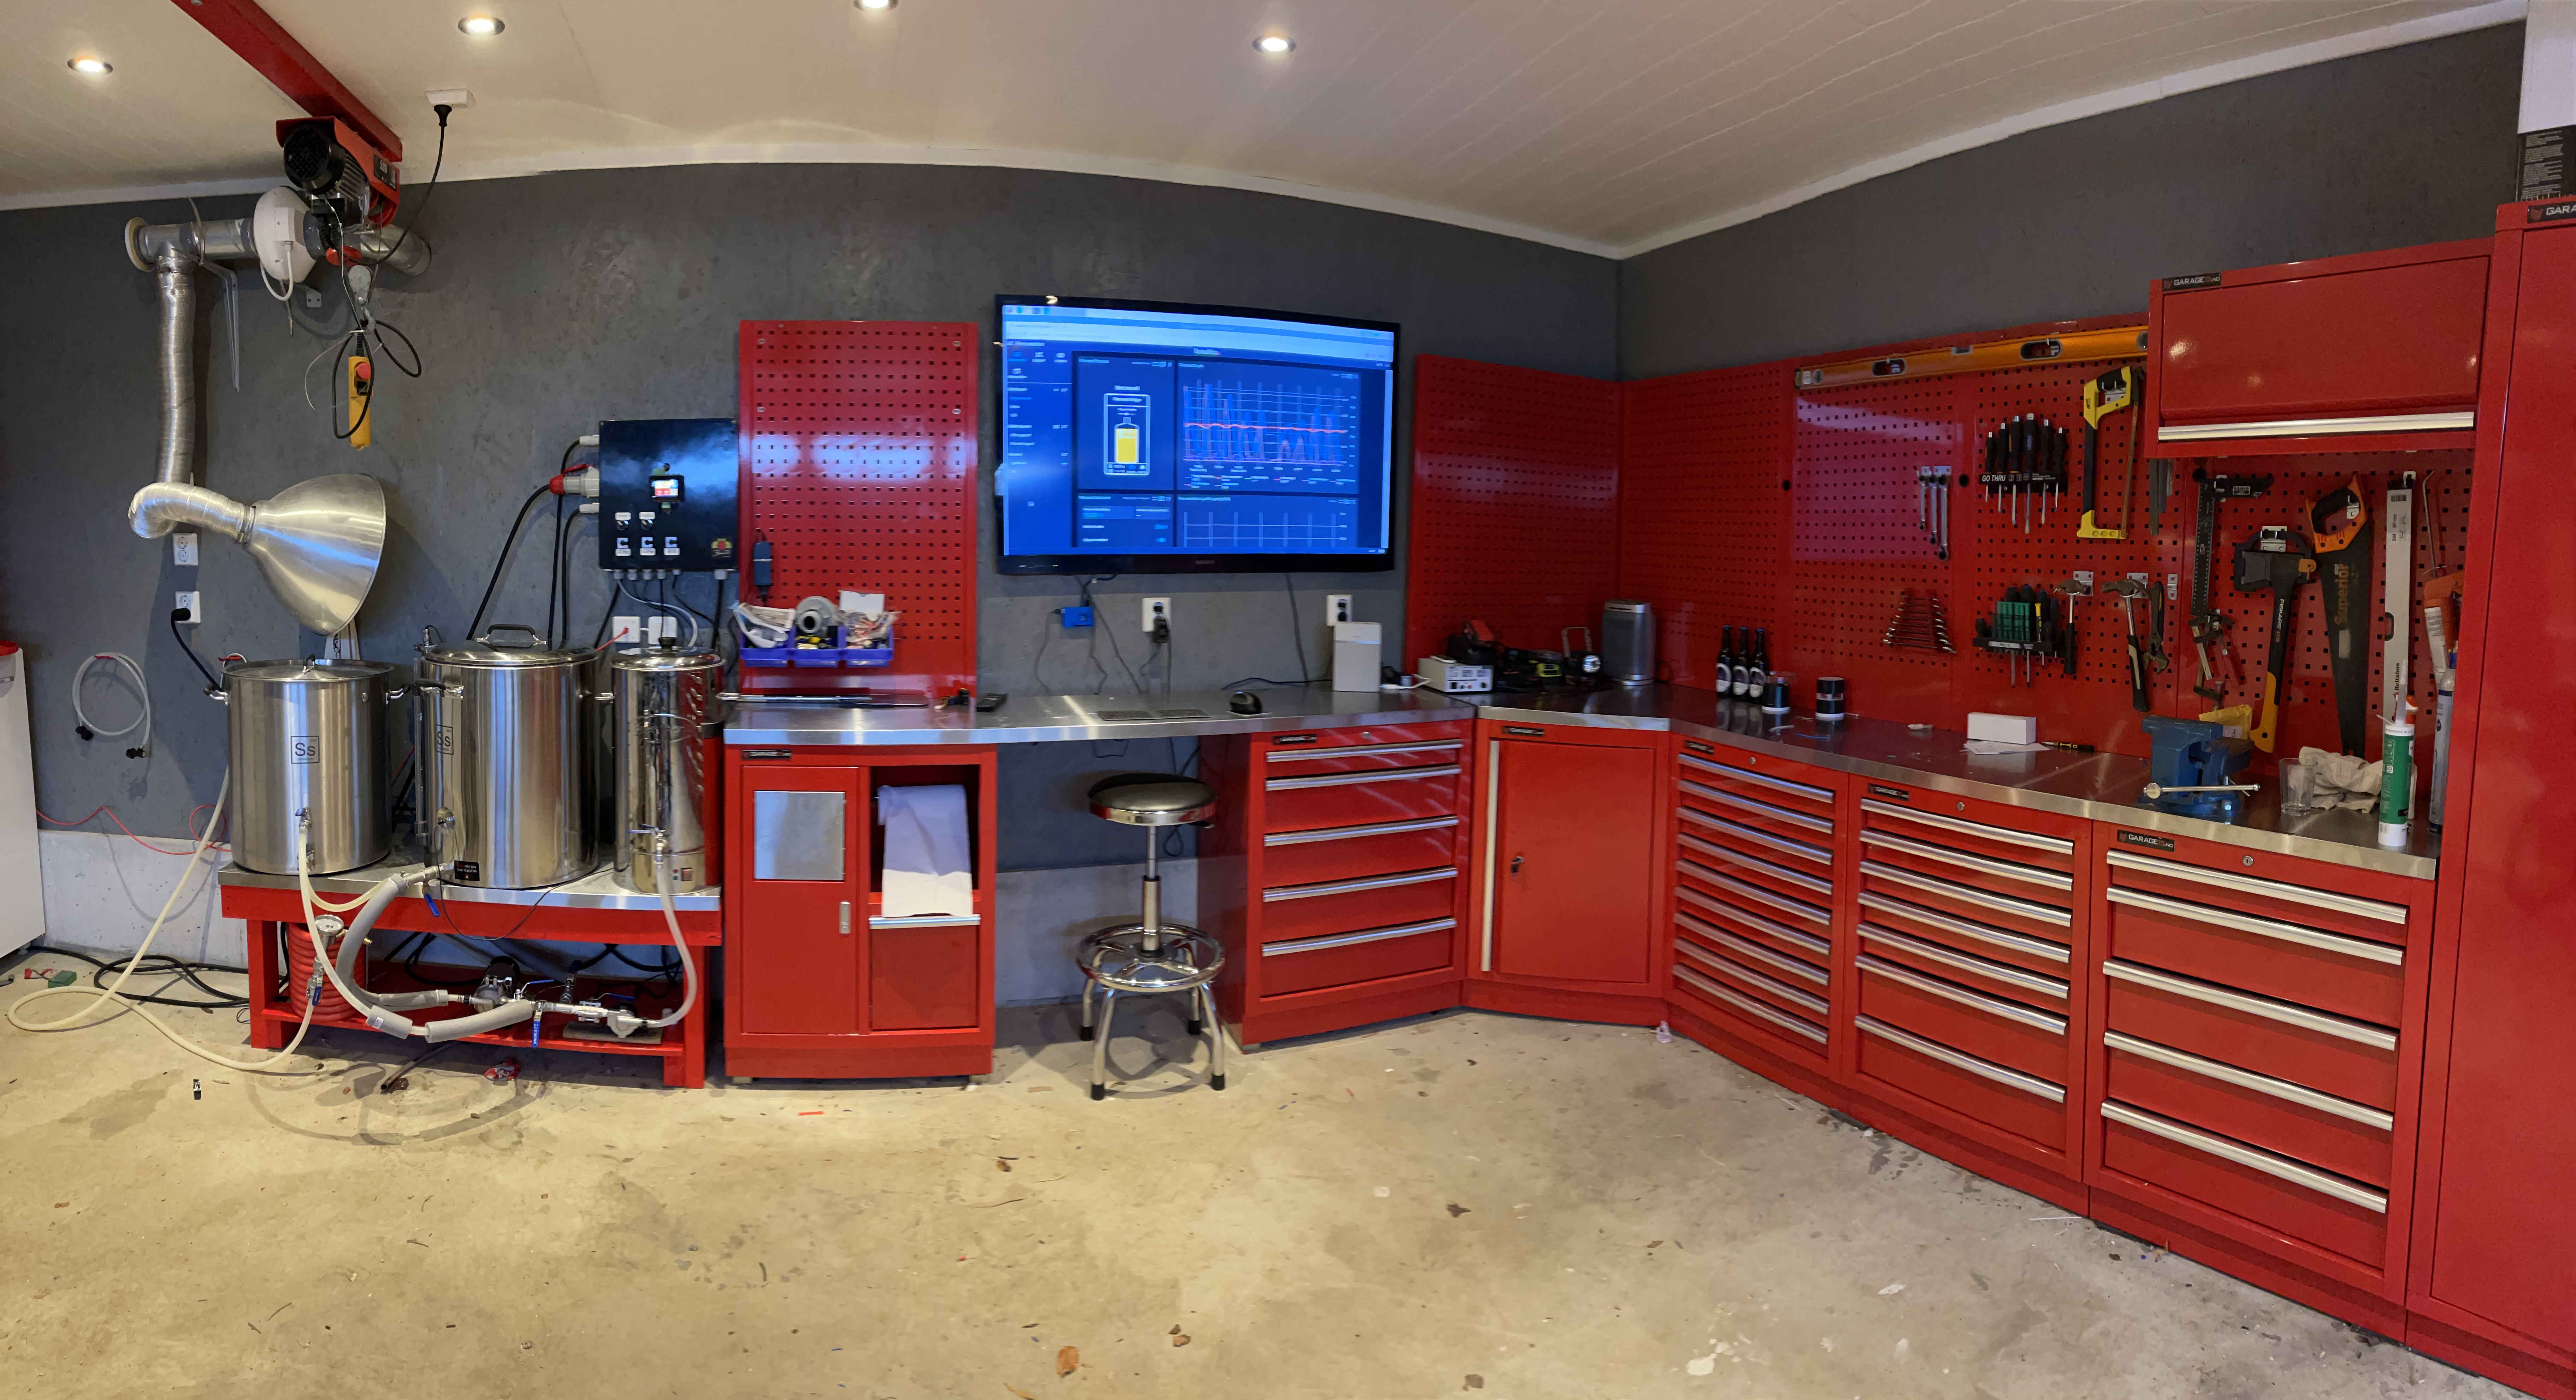
Hey guys. Just finished converting my fridge to be controlled by brewblox a few days ago. I used the wizard and connected it to SSR’s that control fridge compressor and heater. It’s really fun to see it all working. I’m using the default PID settings right now and it seems to be working fine. Just wondering if I should adjust the PID settings more, or if this looks good based on your experience with this kind of application. This is just a test with 30L of water.
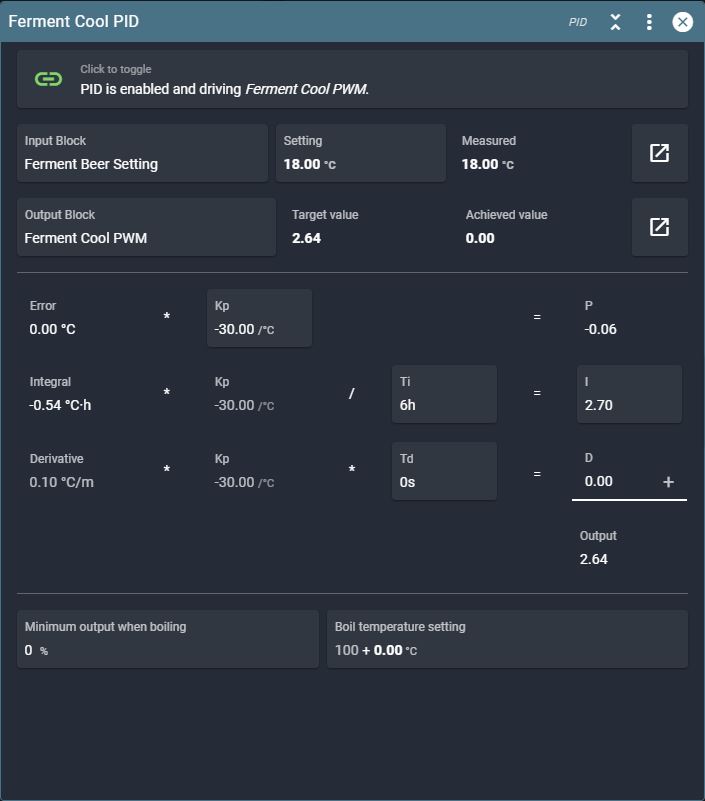
It looks like there’s a ~0.3*C error in beer temp. Best achievable for the system is ~0.05*C. Beyond that, you run out of temp sensor resolution.
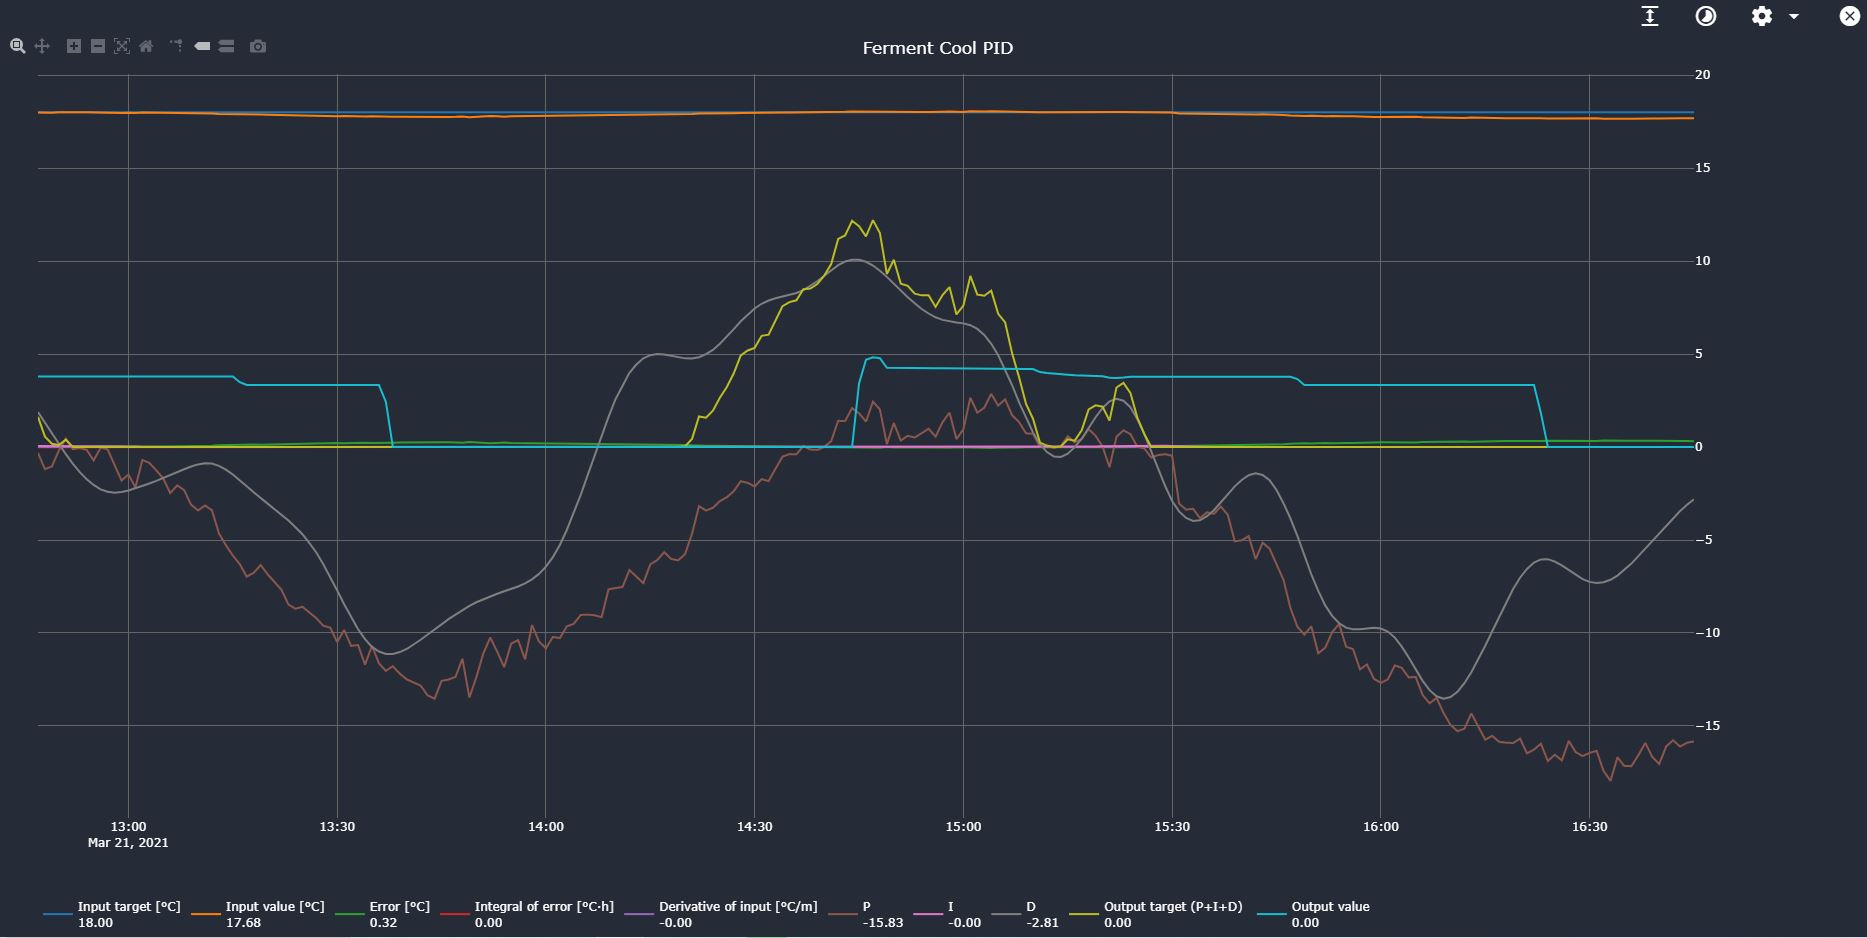
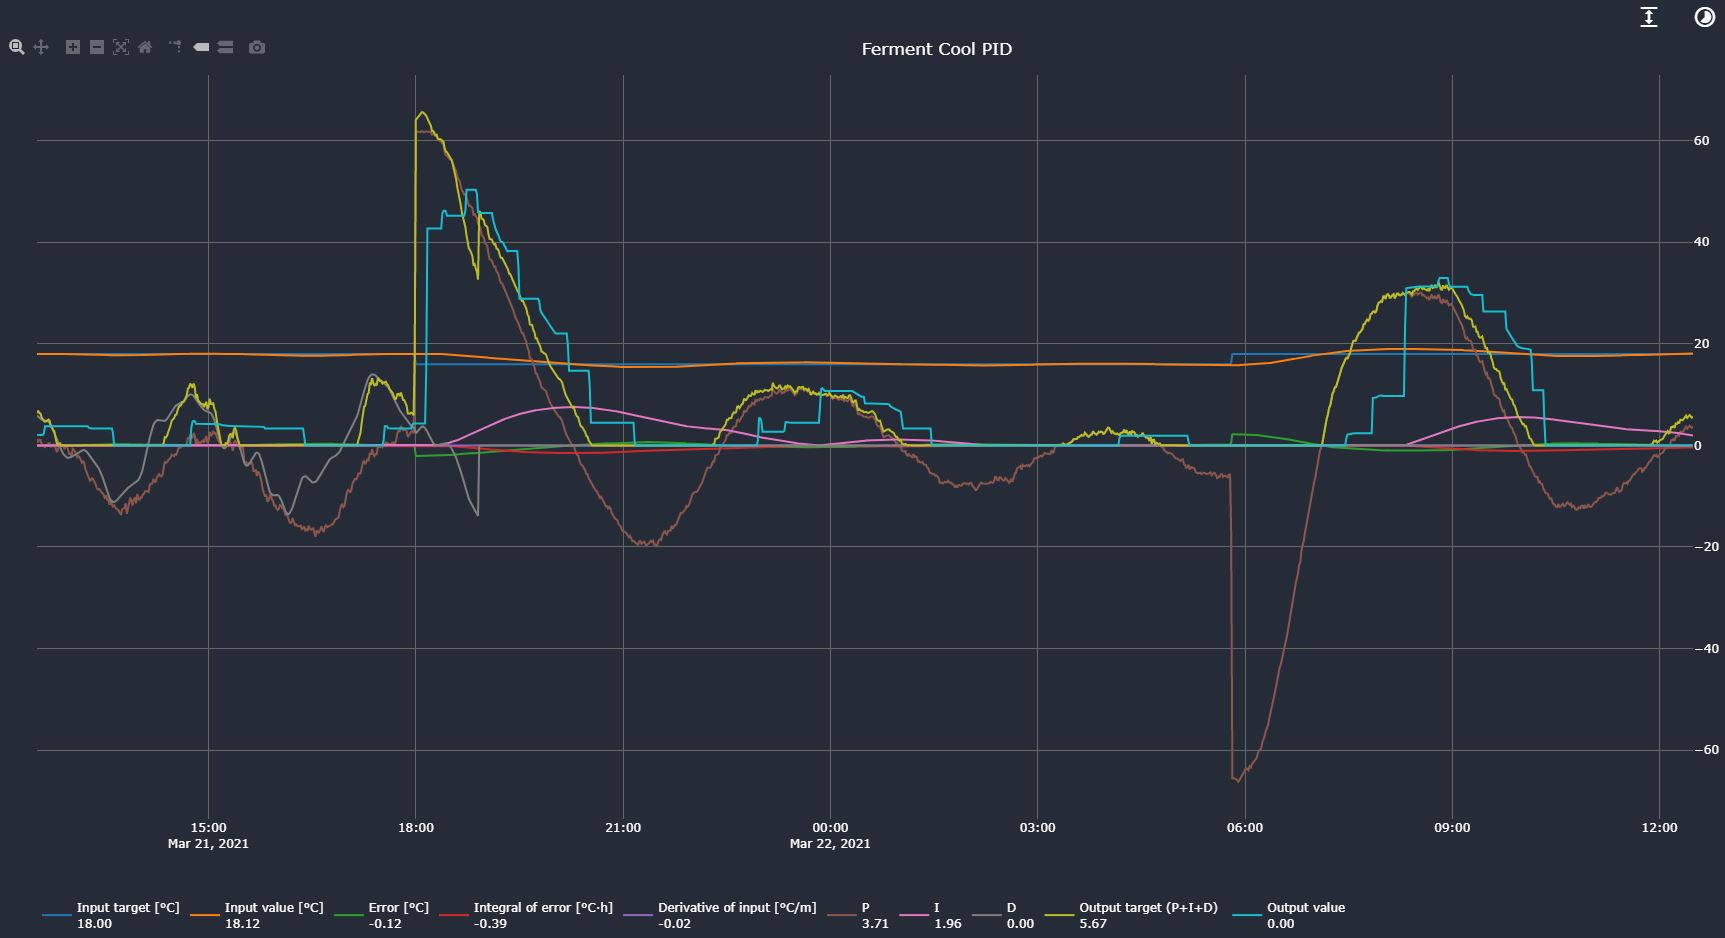
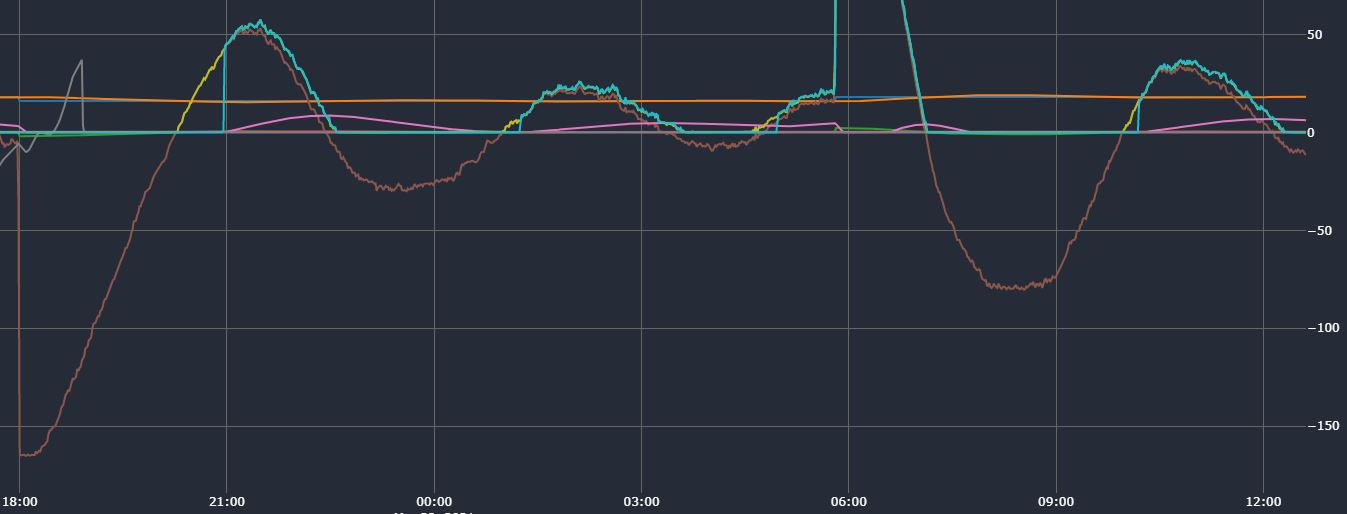
It’s definitely not bad, so kind of up to you whether this is good enough, or you’d rather tinker with it until it’s perfect. In the latter case, could you please post the graph for the Cool PID block?
Currently, P and D are mostly in charge of output. During steady state you want the I portion to counteract losses to the environment.
Here, you can try reducing Kp somewhat. This should decrease P, and give the I time to build. If that only increases temp error, we’ll have to take a step back, and first tune step response.
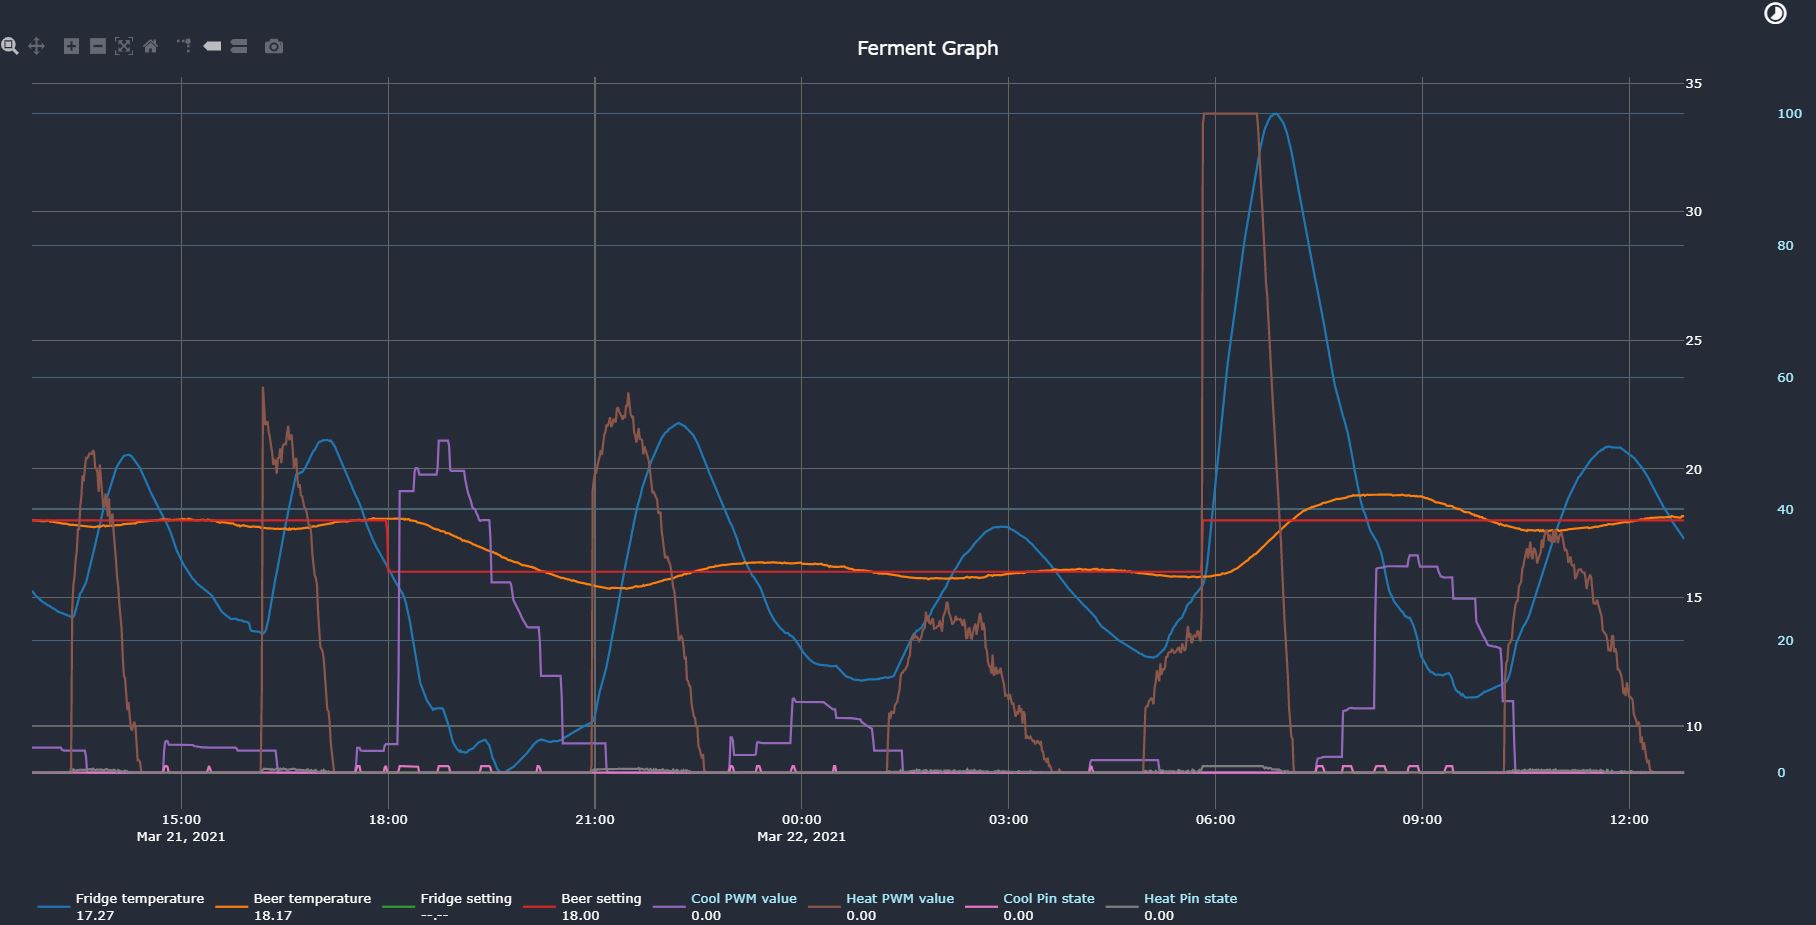
It’s really hard to judge without a step response.
A step of 2 degrees down and 2 degrees up will give us the information needed.
I would set Td to zero for that. Then aim for a little bit of overshoot by adjusting Kp. Afterwards increase Td a bit to get rid of the overshoot. The ballpark estimate for Td is the duration of the overshoot.
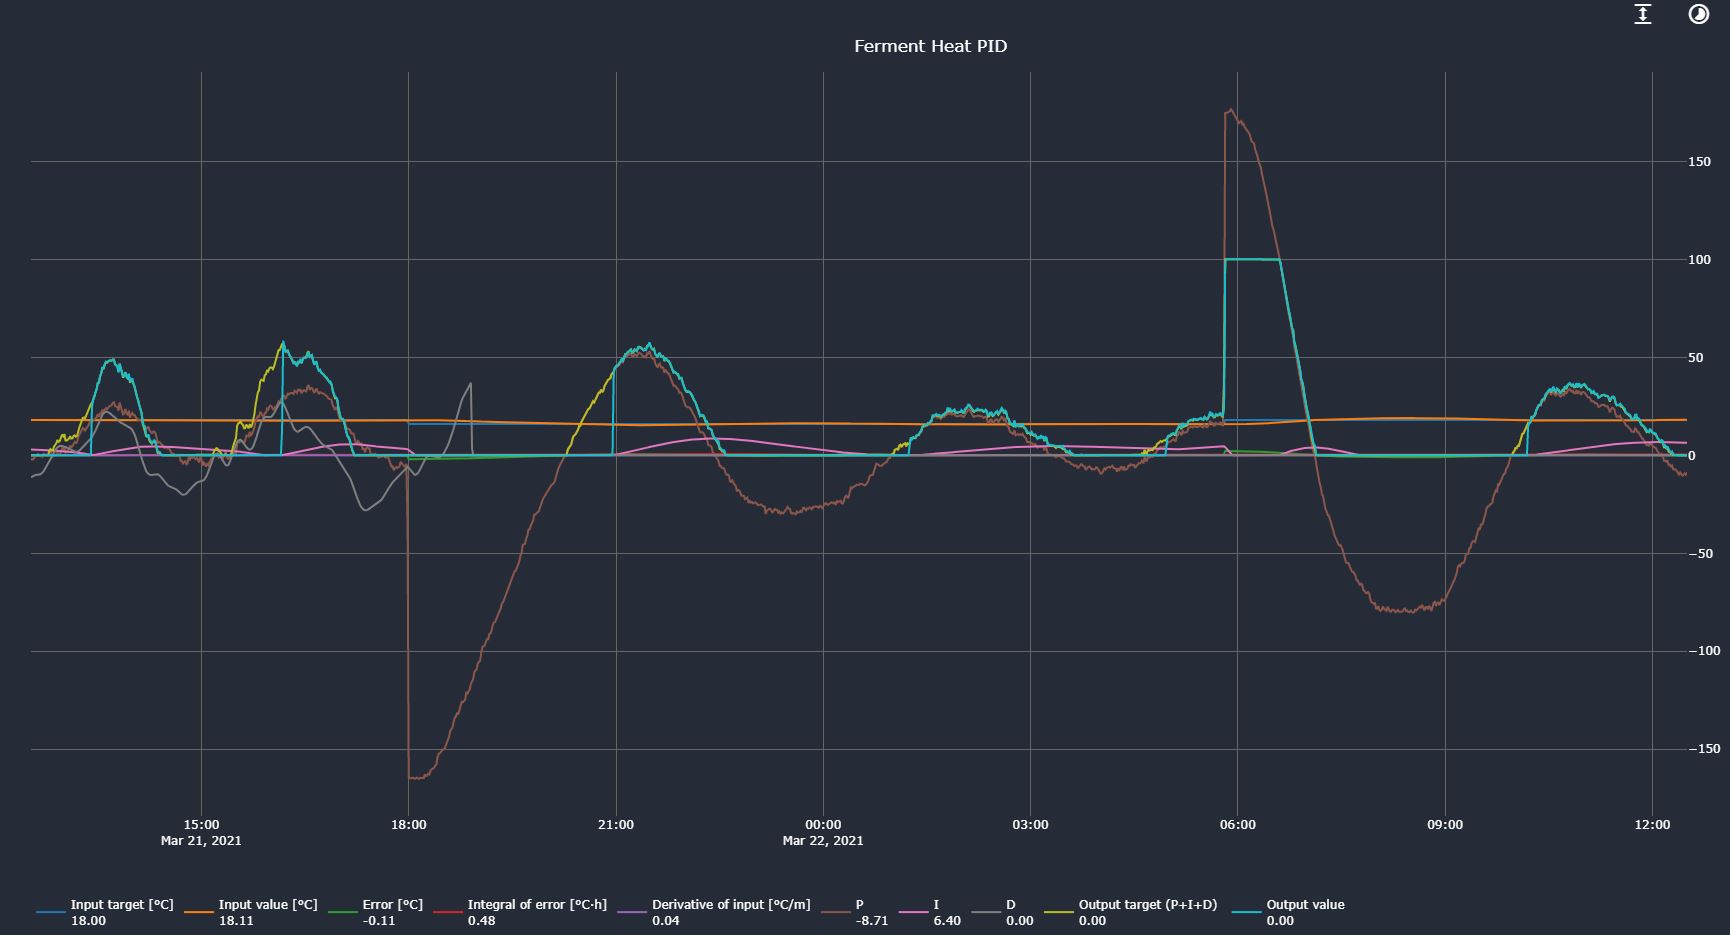
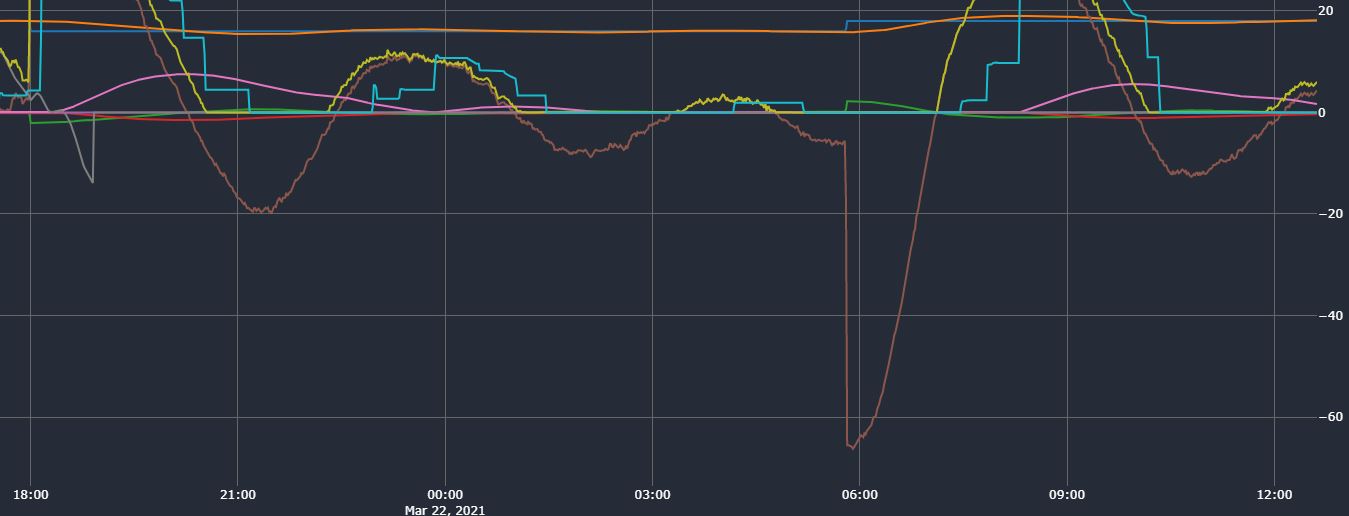
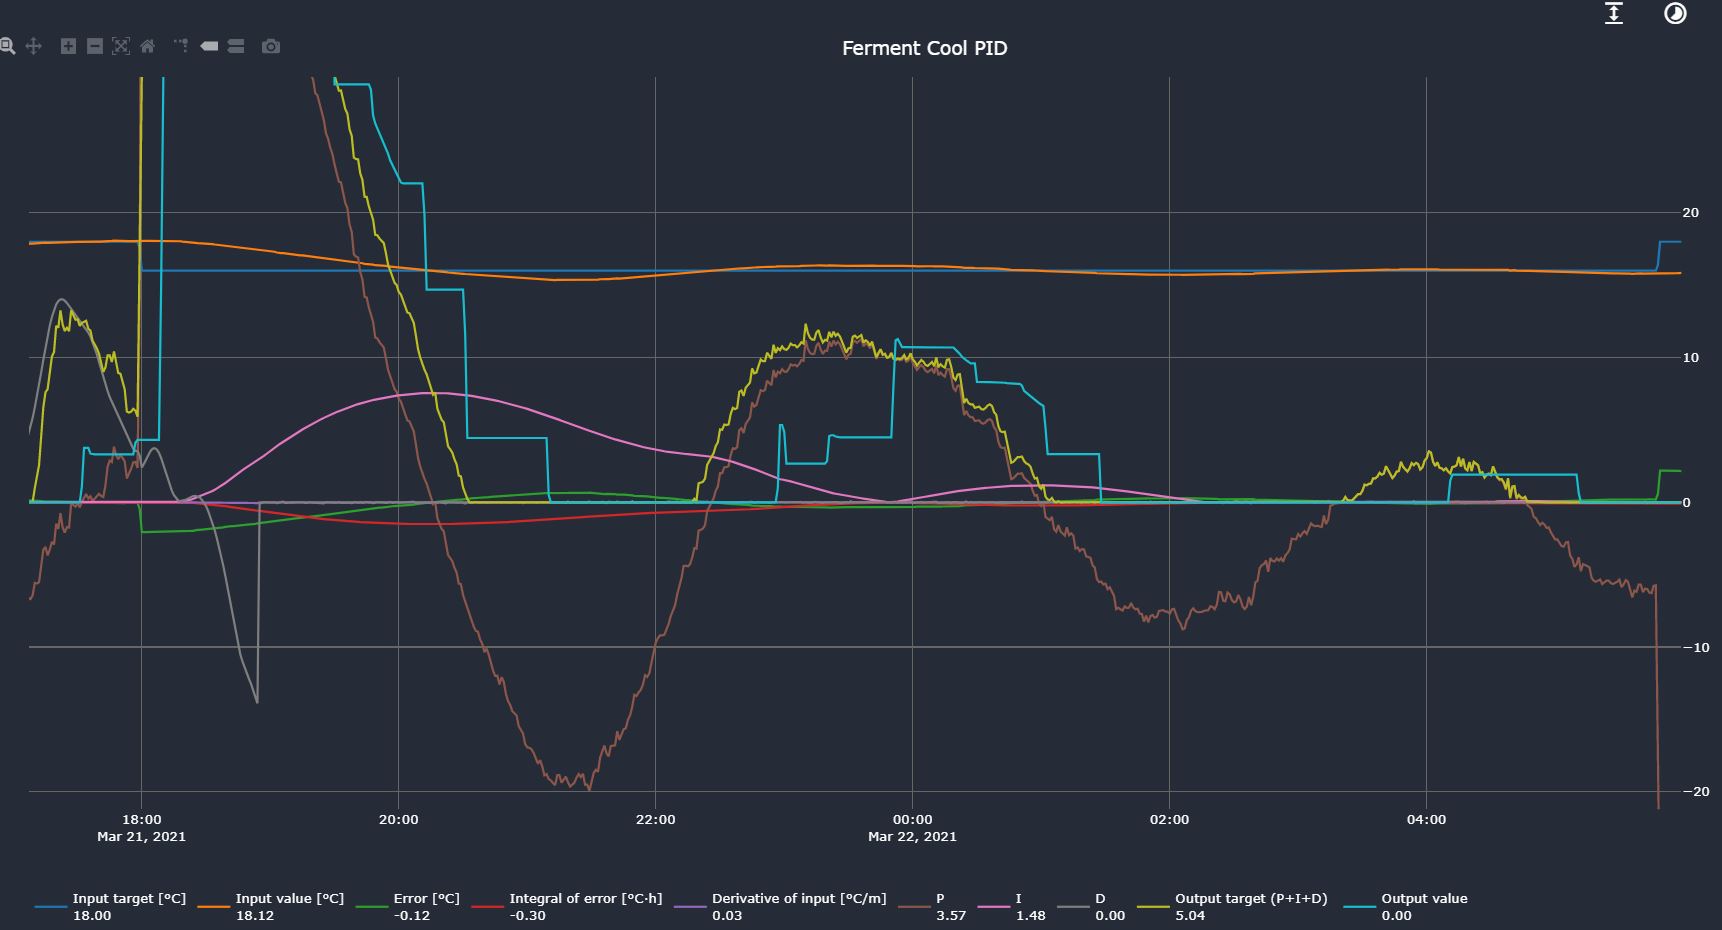
From the bottom graph, it seems clear that the fridge temperature rises or falls quickly, and that energy eventually transfers to the beer.
I think that’s your main source of overshoot. You see that once the fridge temperature crosses the beer temperature, the beer temperature reverses.
The simplest fix for this is to just lower Kp so the heating/cooling is more gentle and the fridge temperature doesn’t run away as much.
Another option is to have a low-speed fan in the fridge. But it will also generate a bit of heat, so make sure it is a low-power fan. Not much is needed.
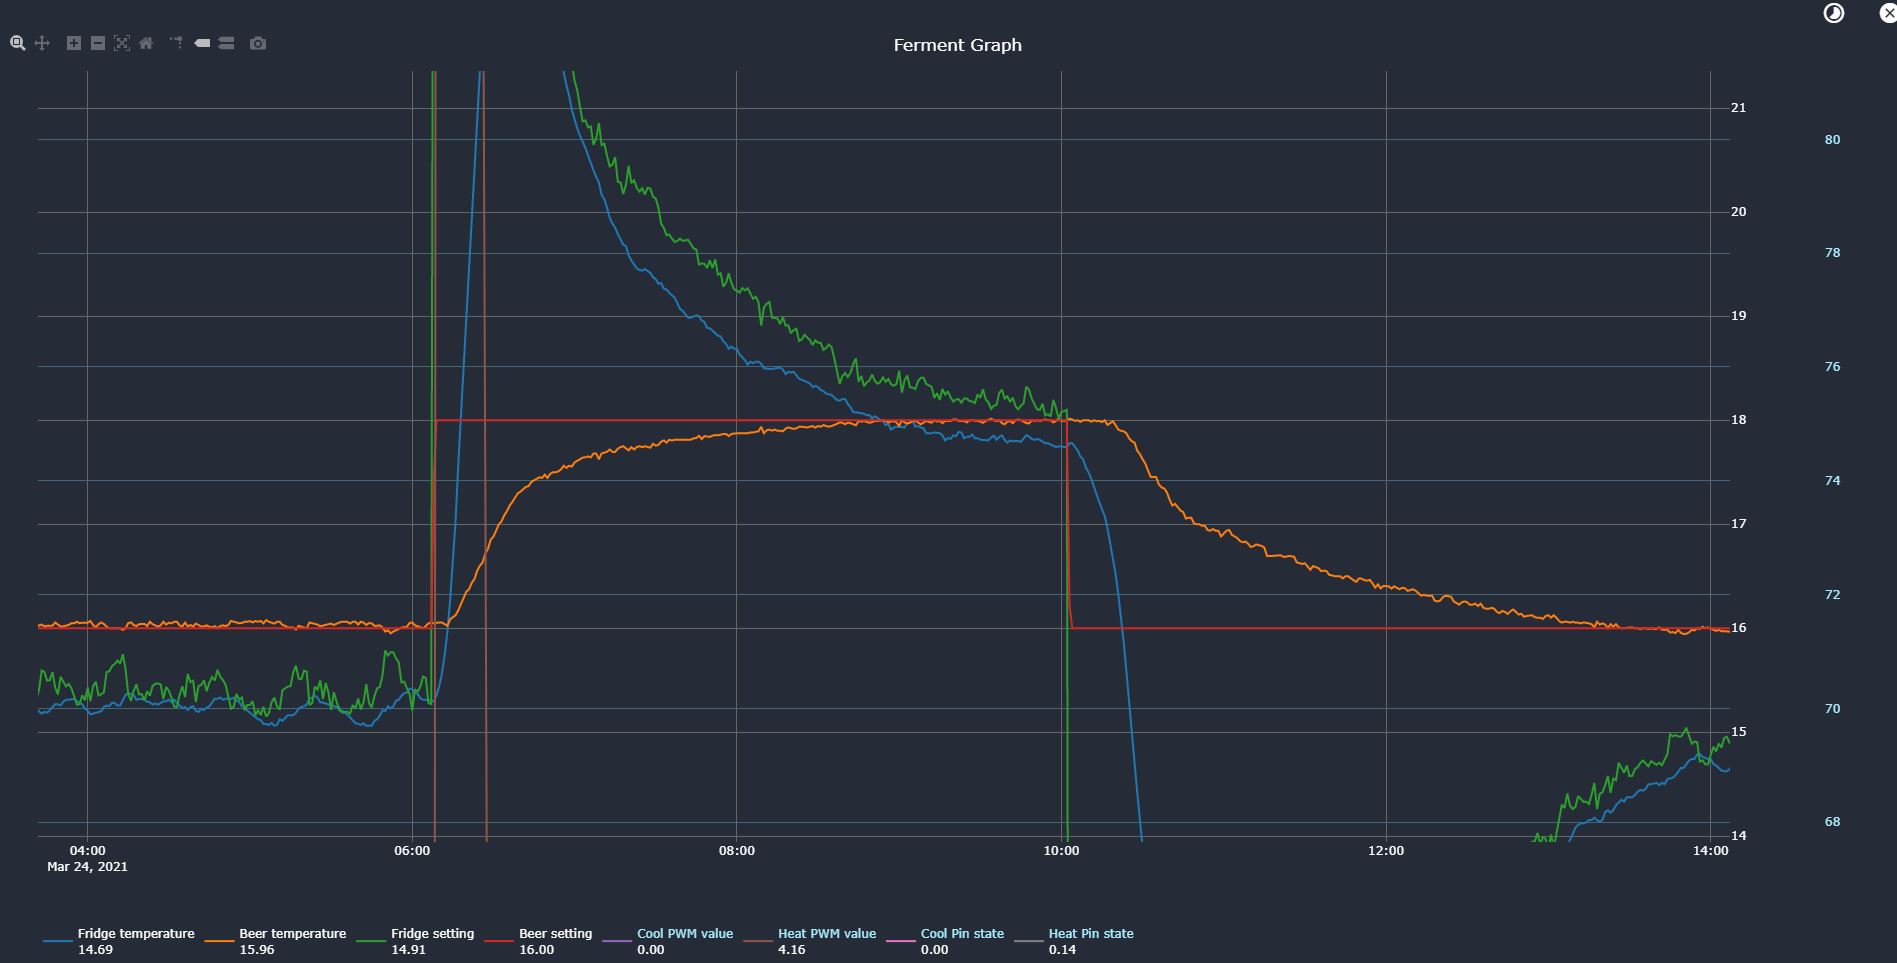
A third option is to go to a more advanced and more complex control scheme, where the fridge temperature is actively managed and the beer temperature indirectly sets the fridge setpoint.
This is described here:
This is more complex though, so if a lower Kp is enough I would try that first.
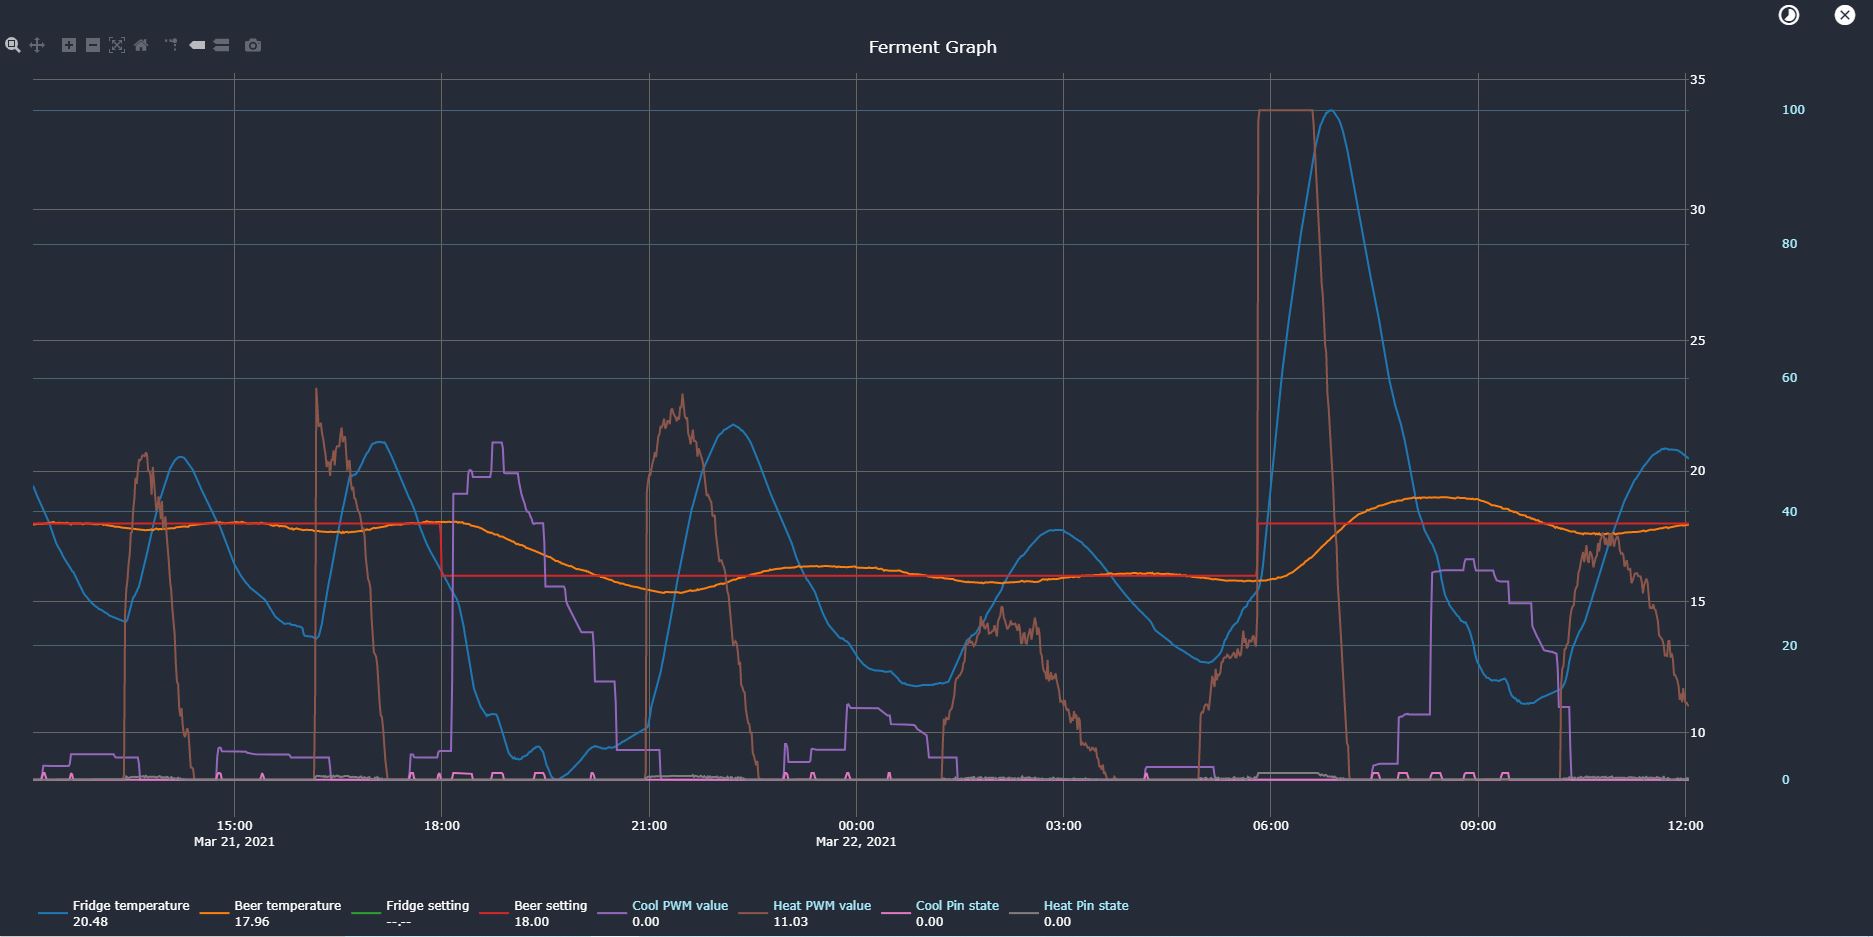
I tried the third option where beer temp indirectly sets the fridge setpoint. So far it’s working great, I’m pretty happy with the result. Looking forward to test it for real. Brew day tomorrow