On the fence about setting up a temperature control fermentation system? It can be a little intimidating at first. So many options and no real guarantees. To those looking for an automated system, I wanted to share my setup and how the BrewPi system has really filled in the missing link.
Let’s start from here… I recently converted my fermentation controller to BrewPi. With my previous system I noticed constant temp over/under shots due to changing weather conditions and the heat generated during fermentation. It became rather frustrating when I could see an otherwise healthy and active fermentation get decimated due to these swings. The problem was not with my equipment or setup really, rather the controller. In short, it was a somewhat dumb controller. Things would turn on and off depending on the temperature was, not what it was going to be. This ultimately led to the undesirable swings. In order to fix this and step up my brewing game, I decided to give the BrewPi Spark 3 controller a shot. Spoiler alert, this has taken my fermentation rig from a so-so setup, to a high-performance system!
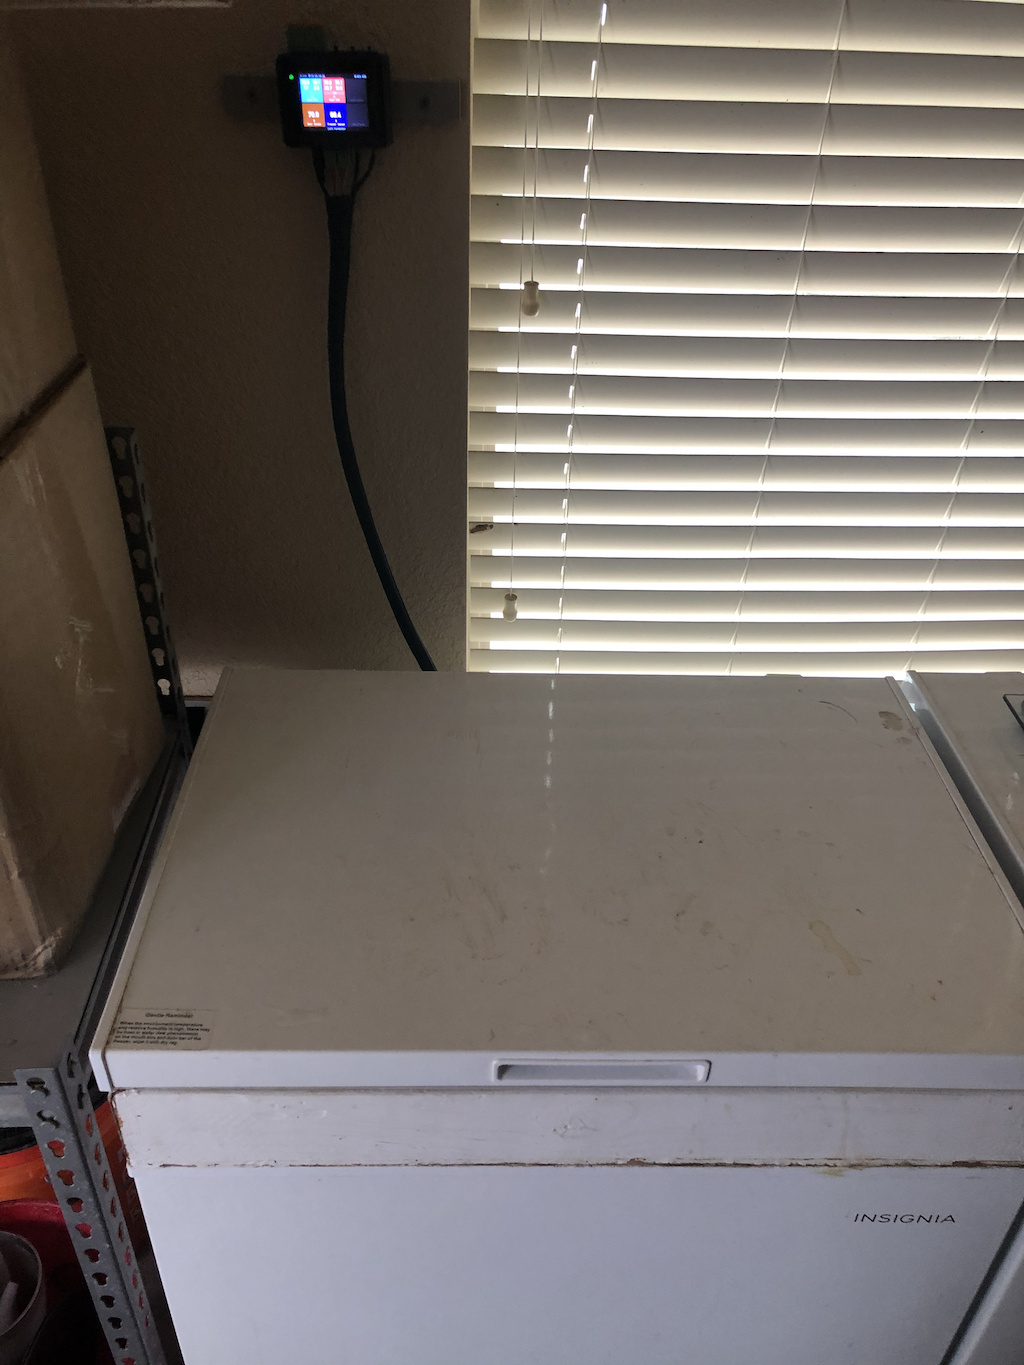
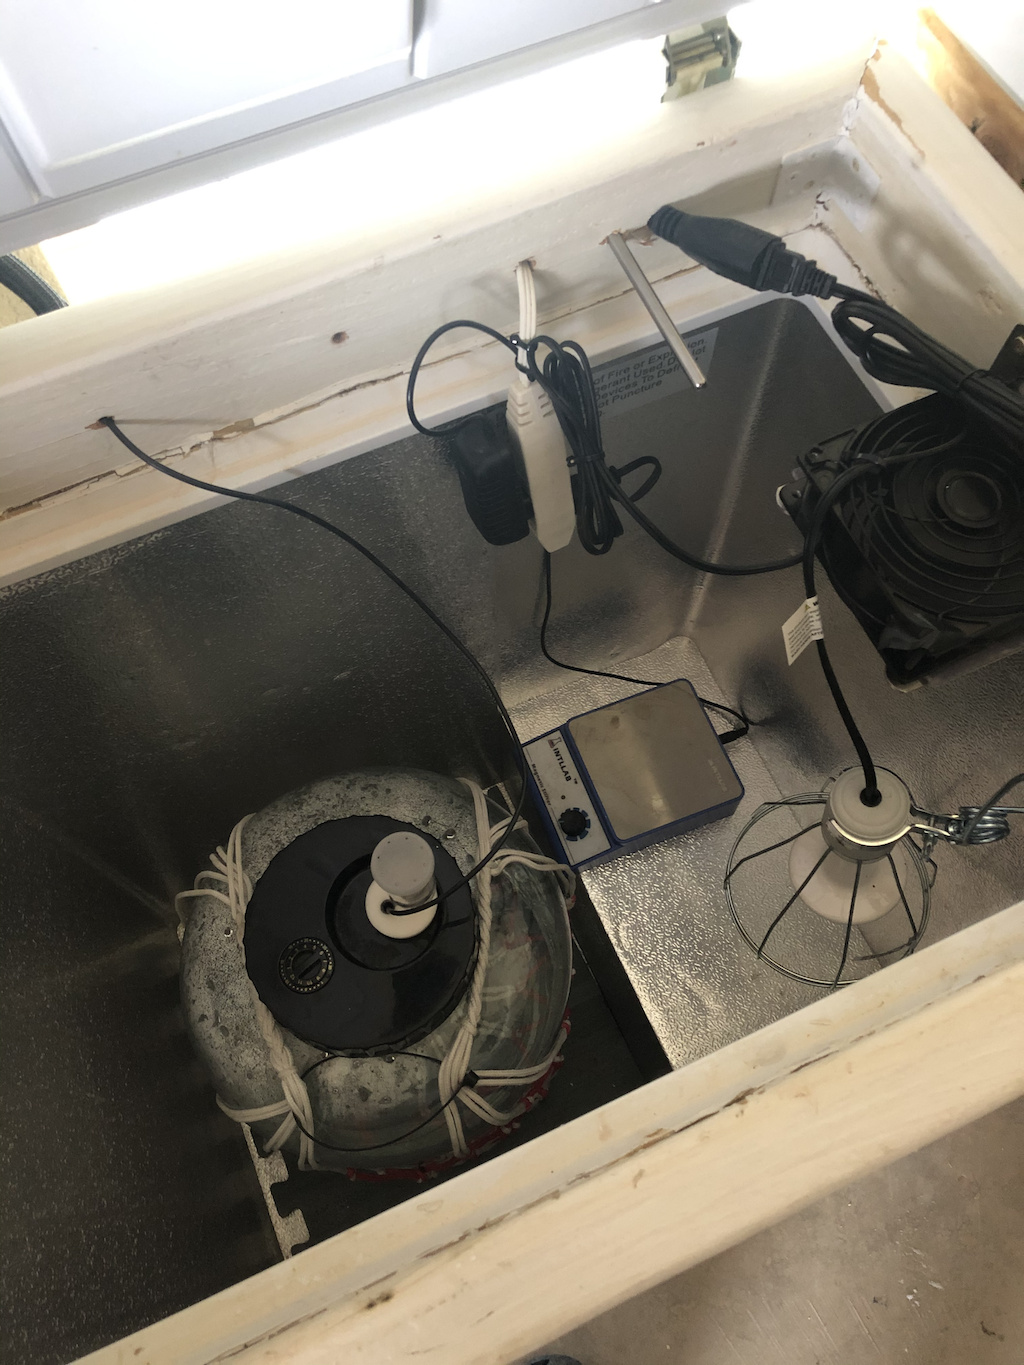
Here is my new setup, it is rather simple. A 5 cu. ft. freezer, a 60 watt ceramic heat lamp, and a fan that runs 24x7. I have two temperature probes, one that goes in a thermowell inside the beer and one in a wall mount thermowell to monitor freezer temperature. The BrewPI controls two solid state relays that simply turn the freezer and the heat lamp on or off. (BTW, I do not use a RaspberryPI, rather a Linux VM that runs from a TrueNAS system. There is another thread on this if anyone is interested.) The only thing I changed on BrewPi was a Mutex timer (from 45 mins to 10), everything else is stock settings. With exception to the VM, the fermentation systems is setup in a small shop just outside my house. It is not regulated with heating or air conditioning, it is at the mercy of mother nature.
I’ve had the system for a couple of weeks now and I wanted to share a recent experience. Here in the states we’ve been going through a rather nasty arctic freeze (once in a lifetime) where the ambient temp has been as low as -12 deg f in my area. In Texas, we’ve actually had rolling blackouts where the electric companies strategically shut off sections of the power grid in order to prevent damage to their system. Throughout this cold snap, I’ve been watching how my fermentation system has been responding, as previously, this would have sent it into a tailspin. I found it all rather interesting and have been truly impressed with the new controls.
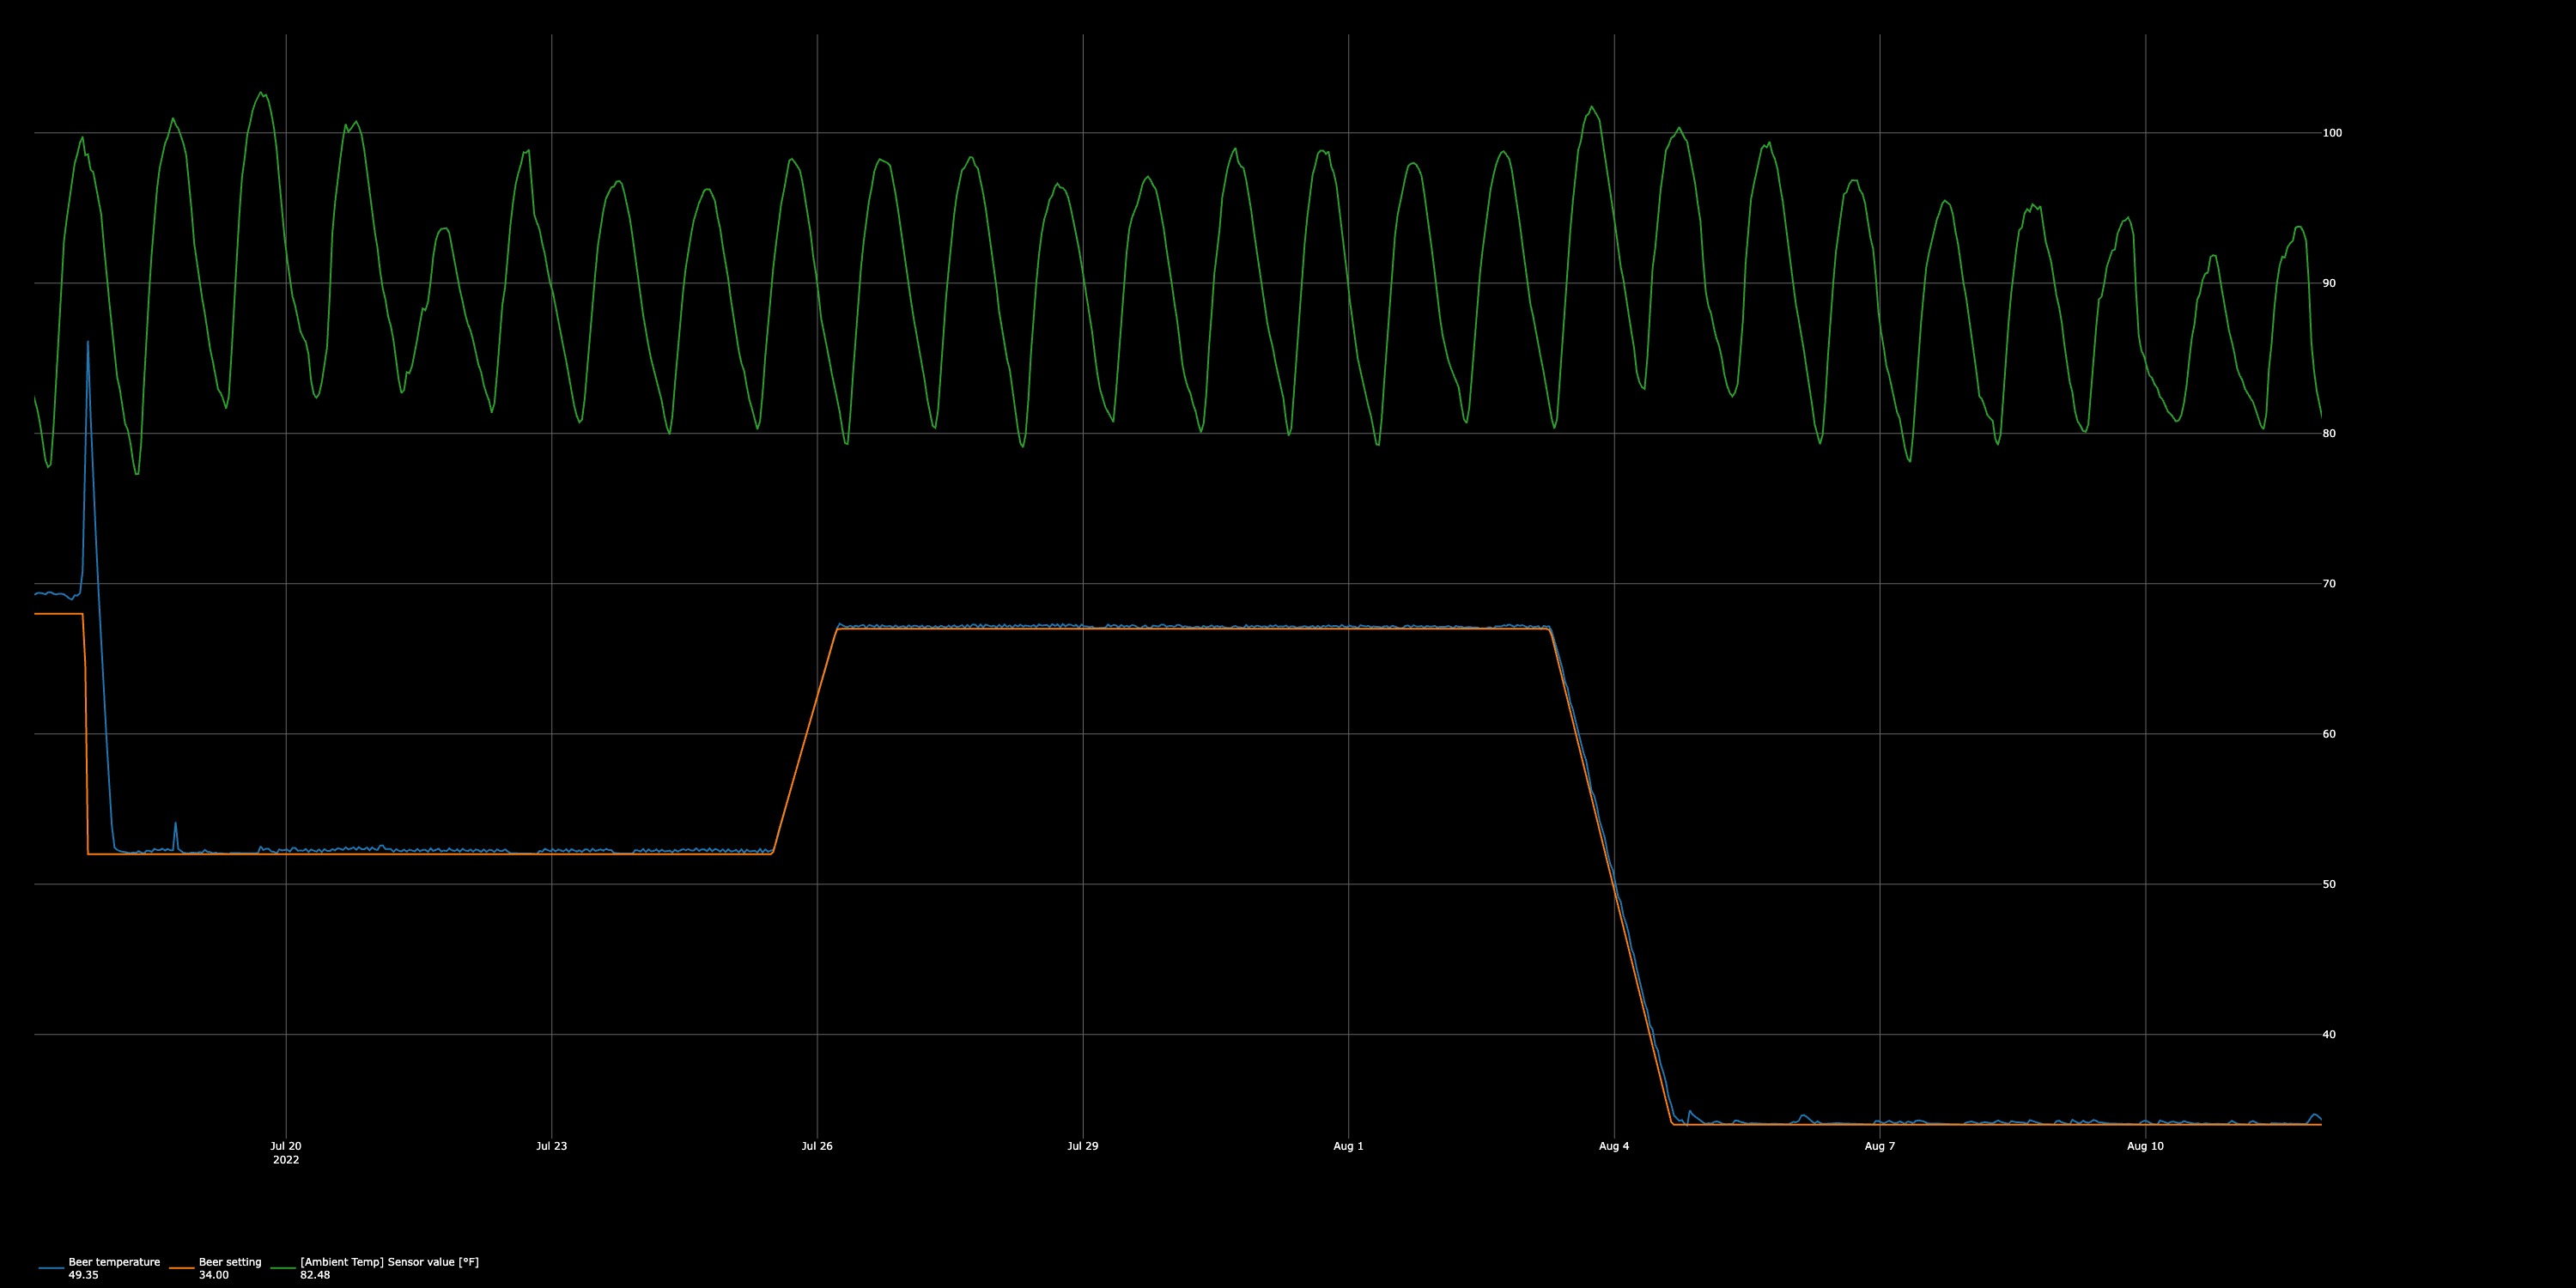
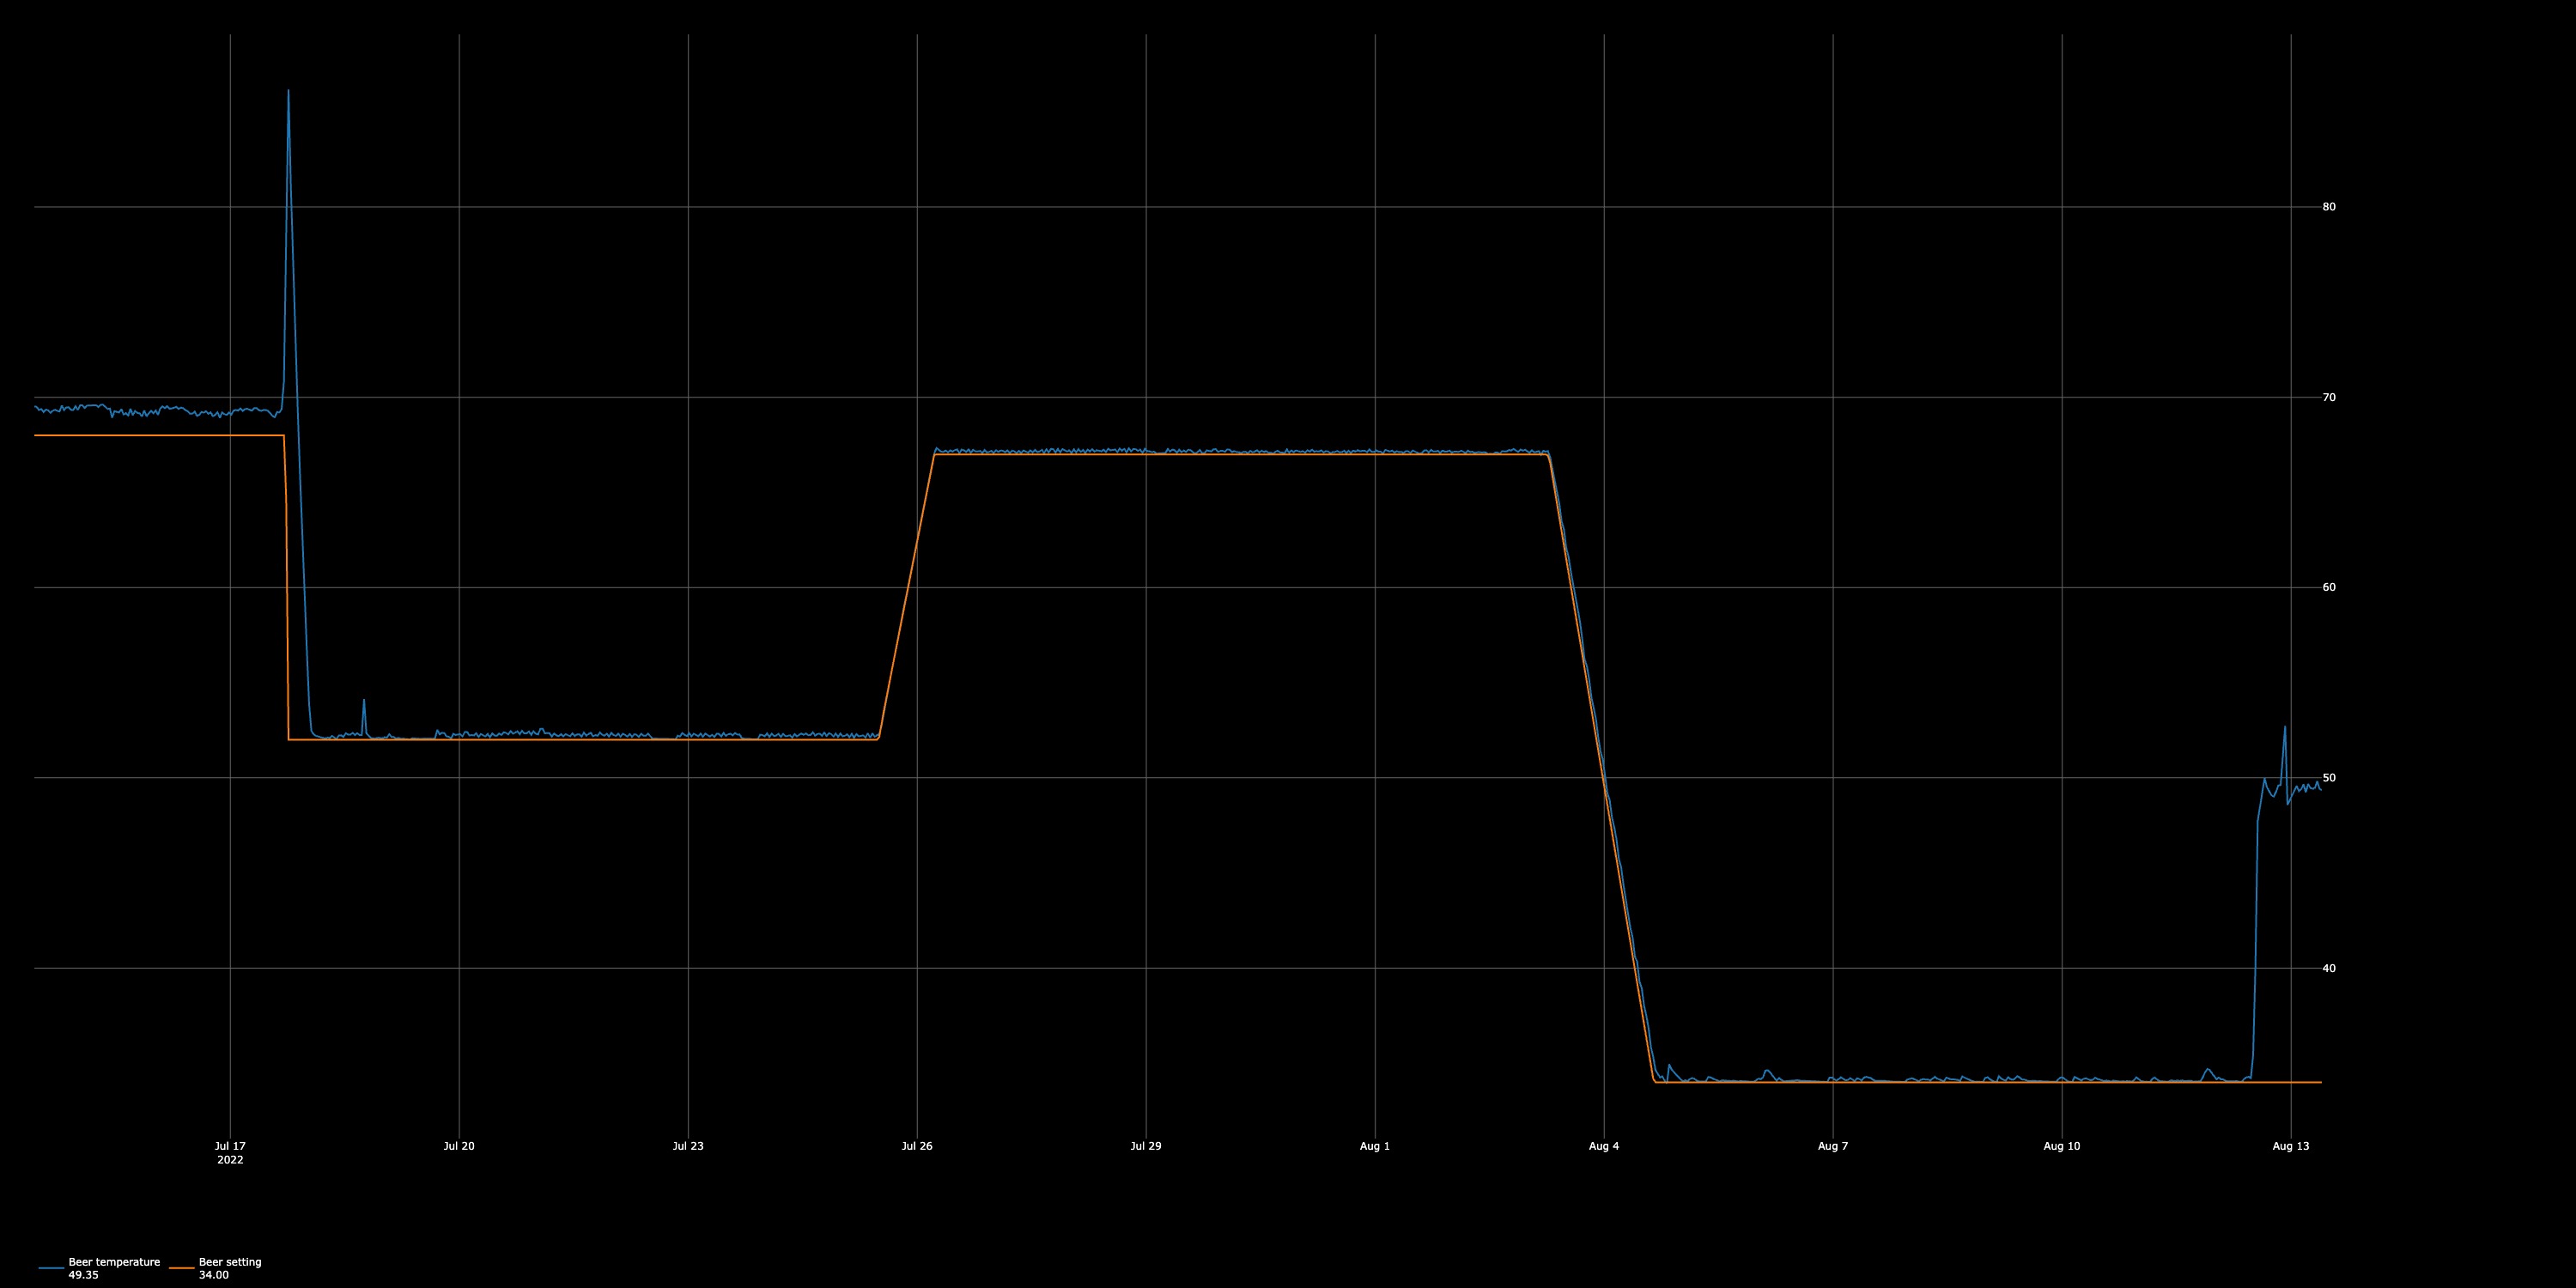
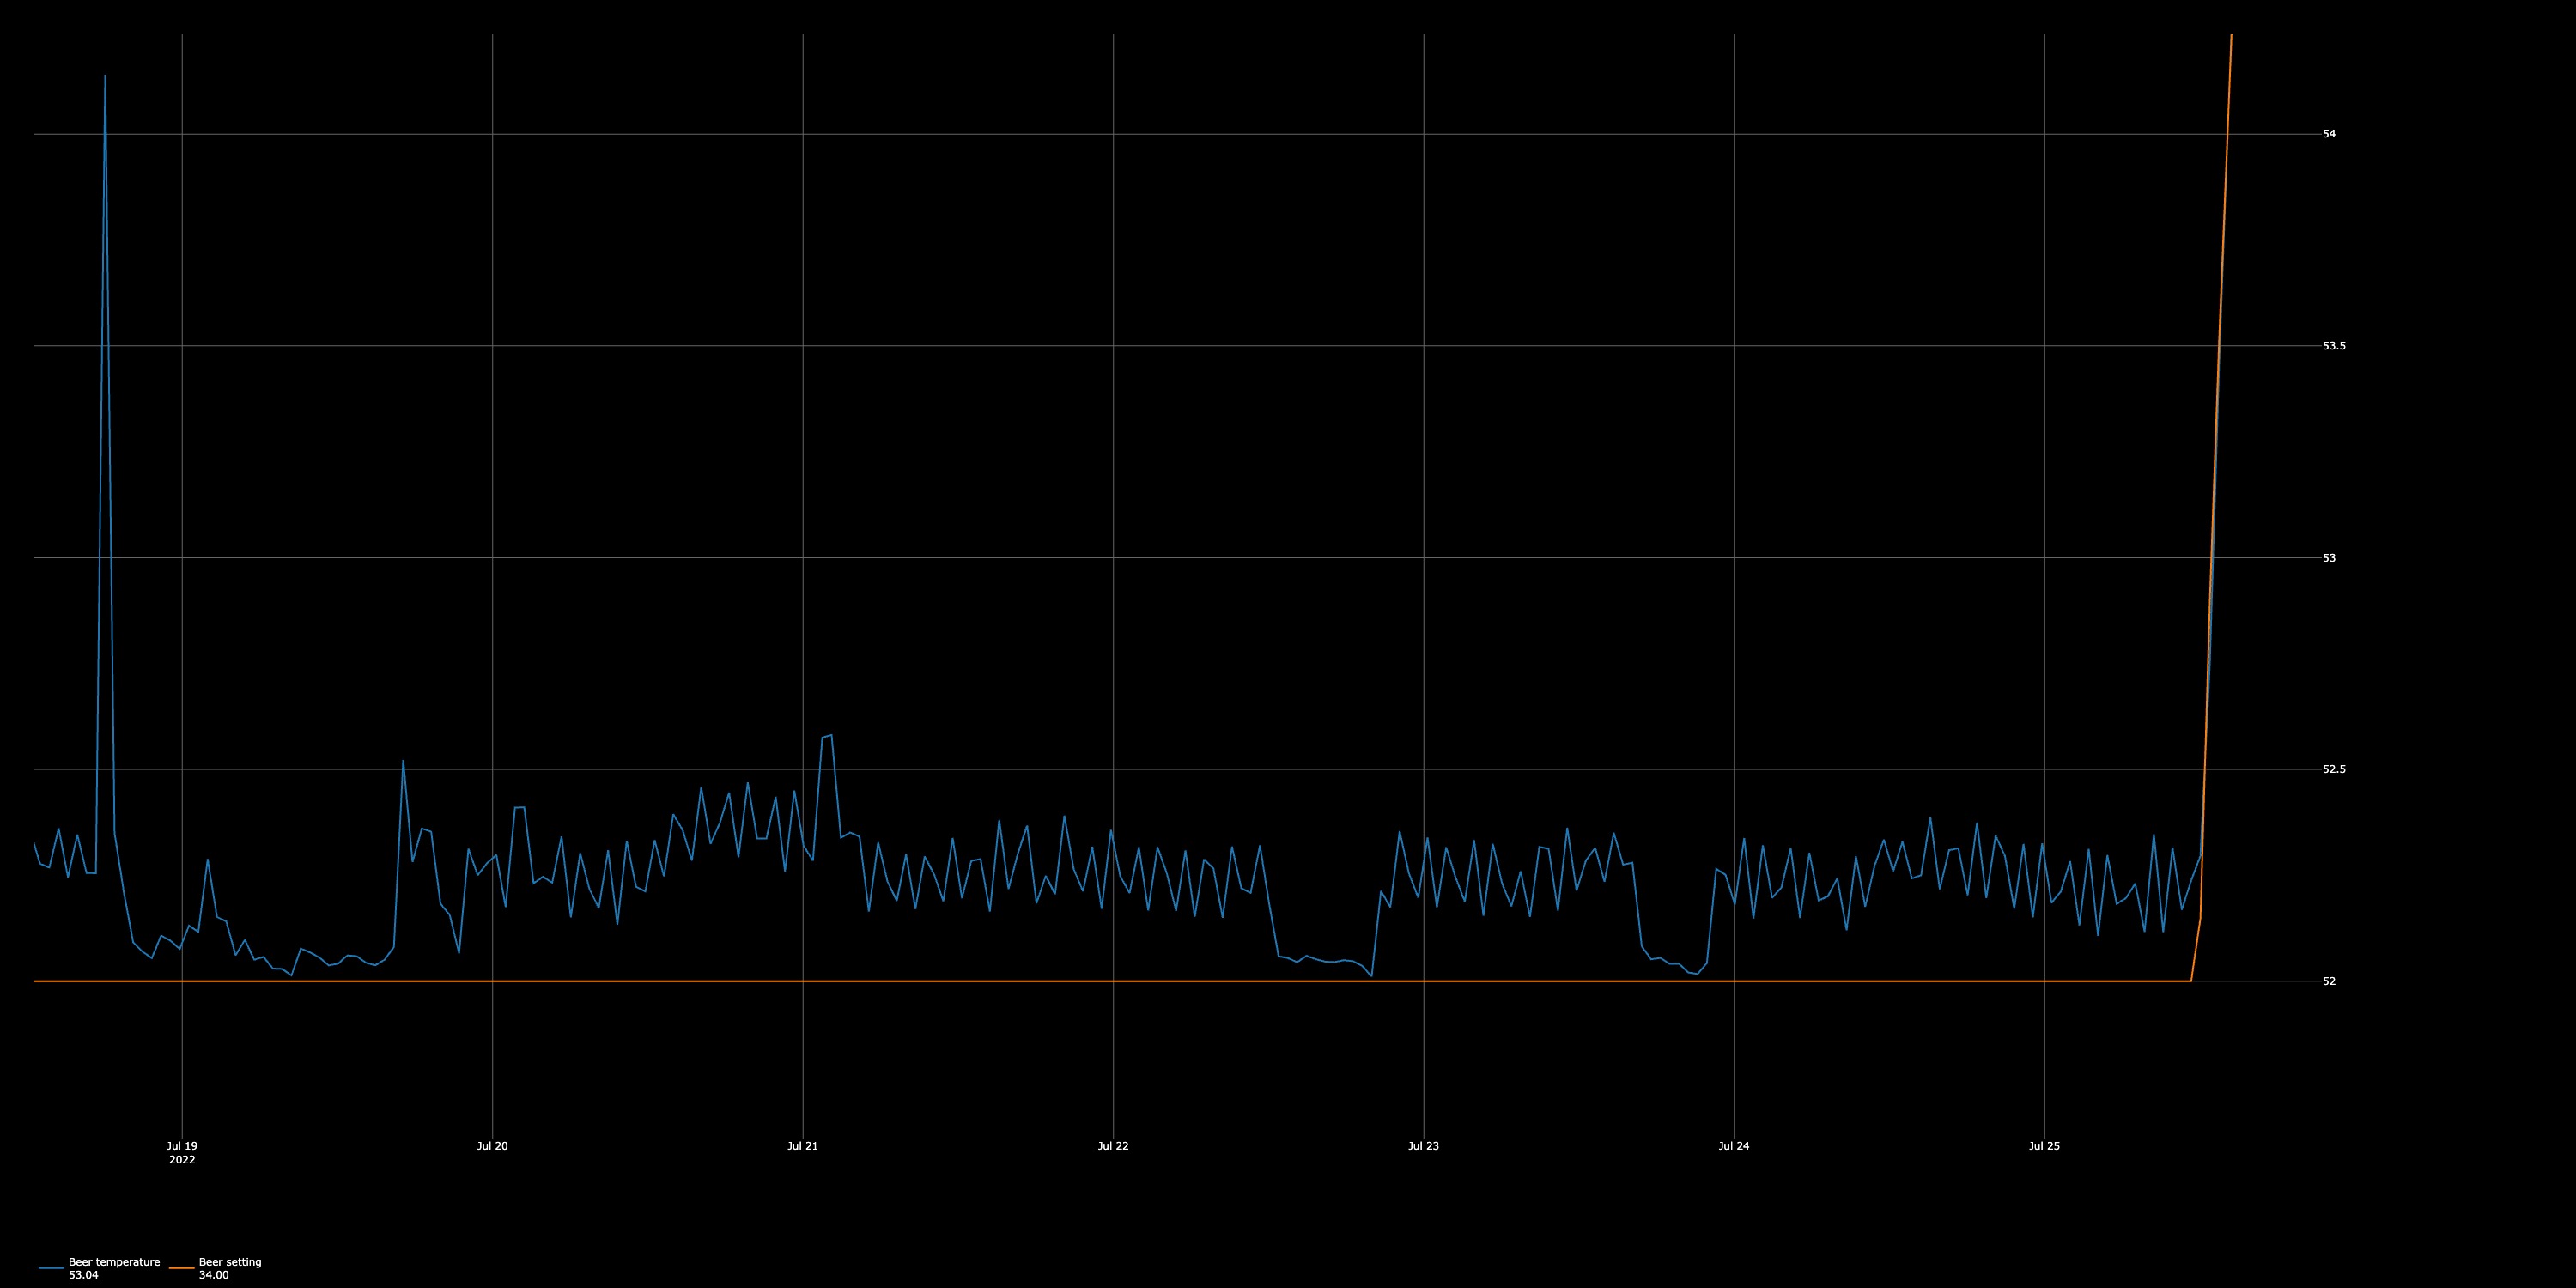
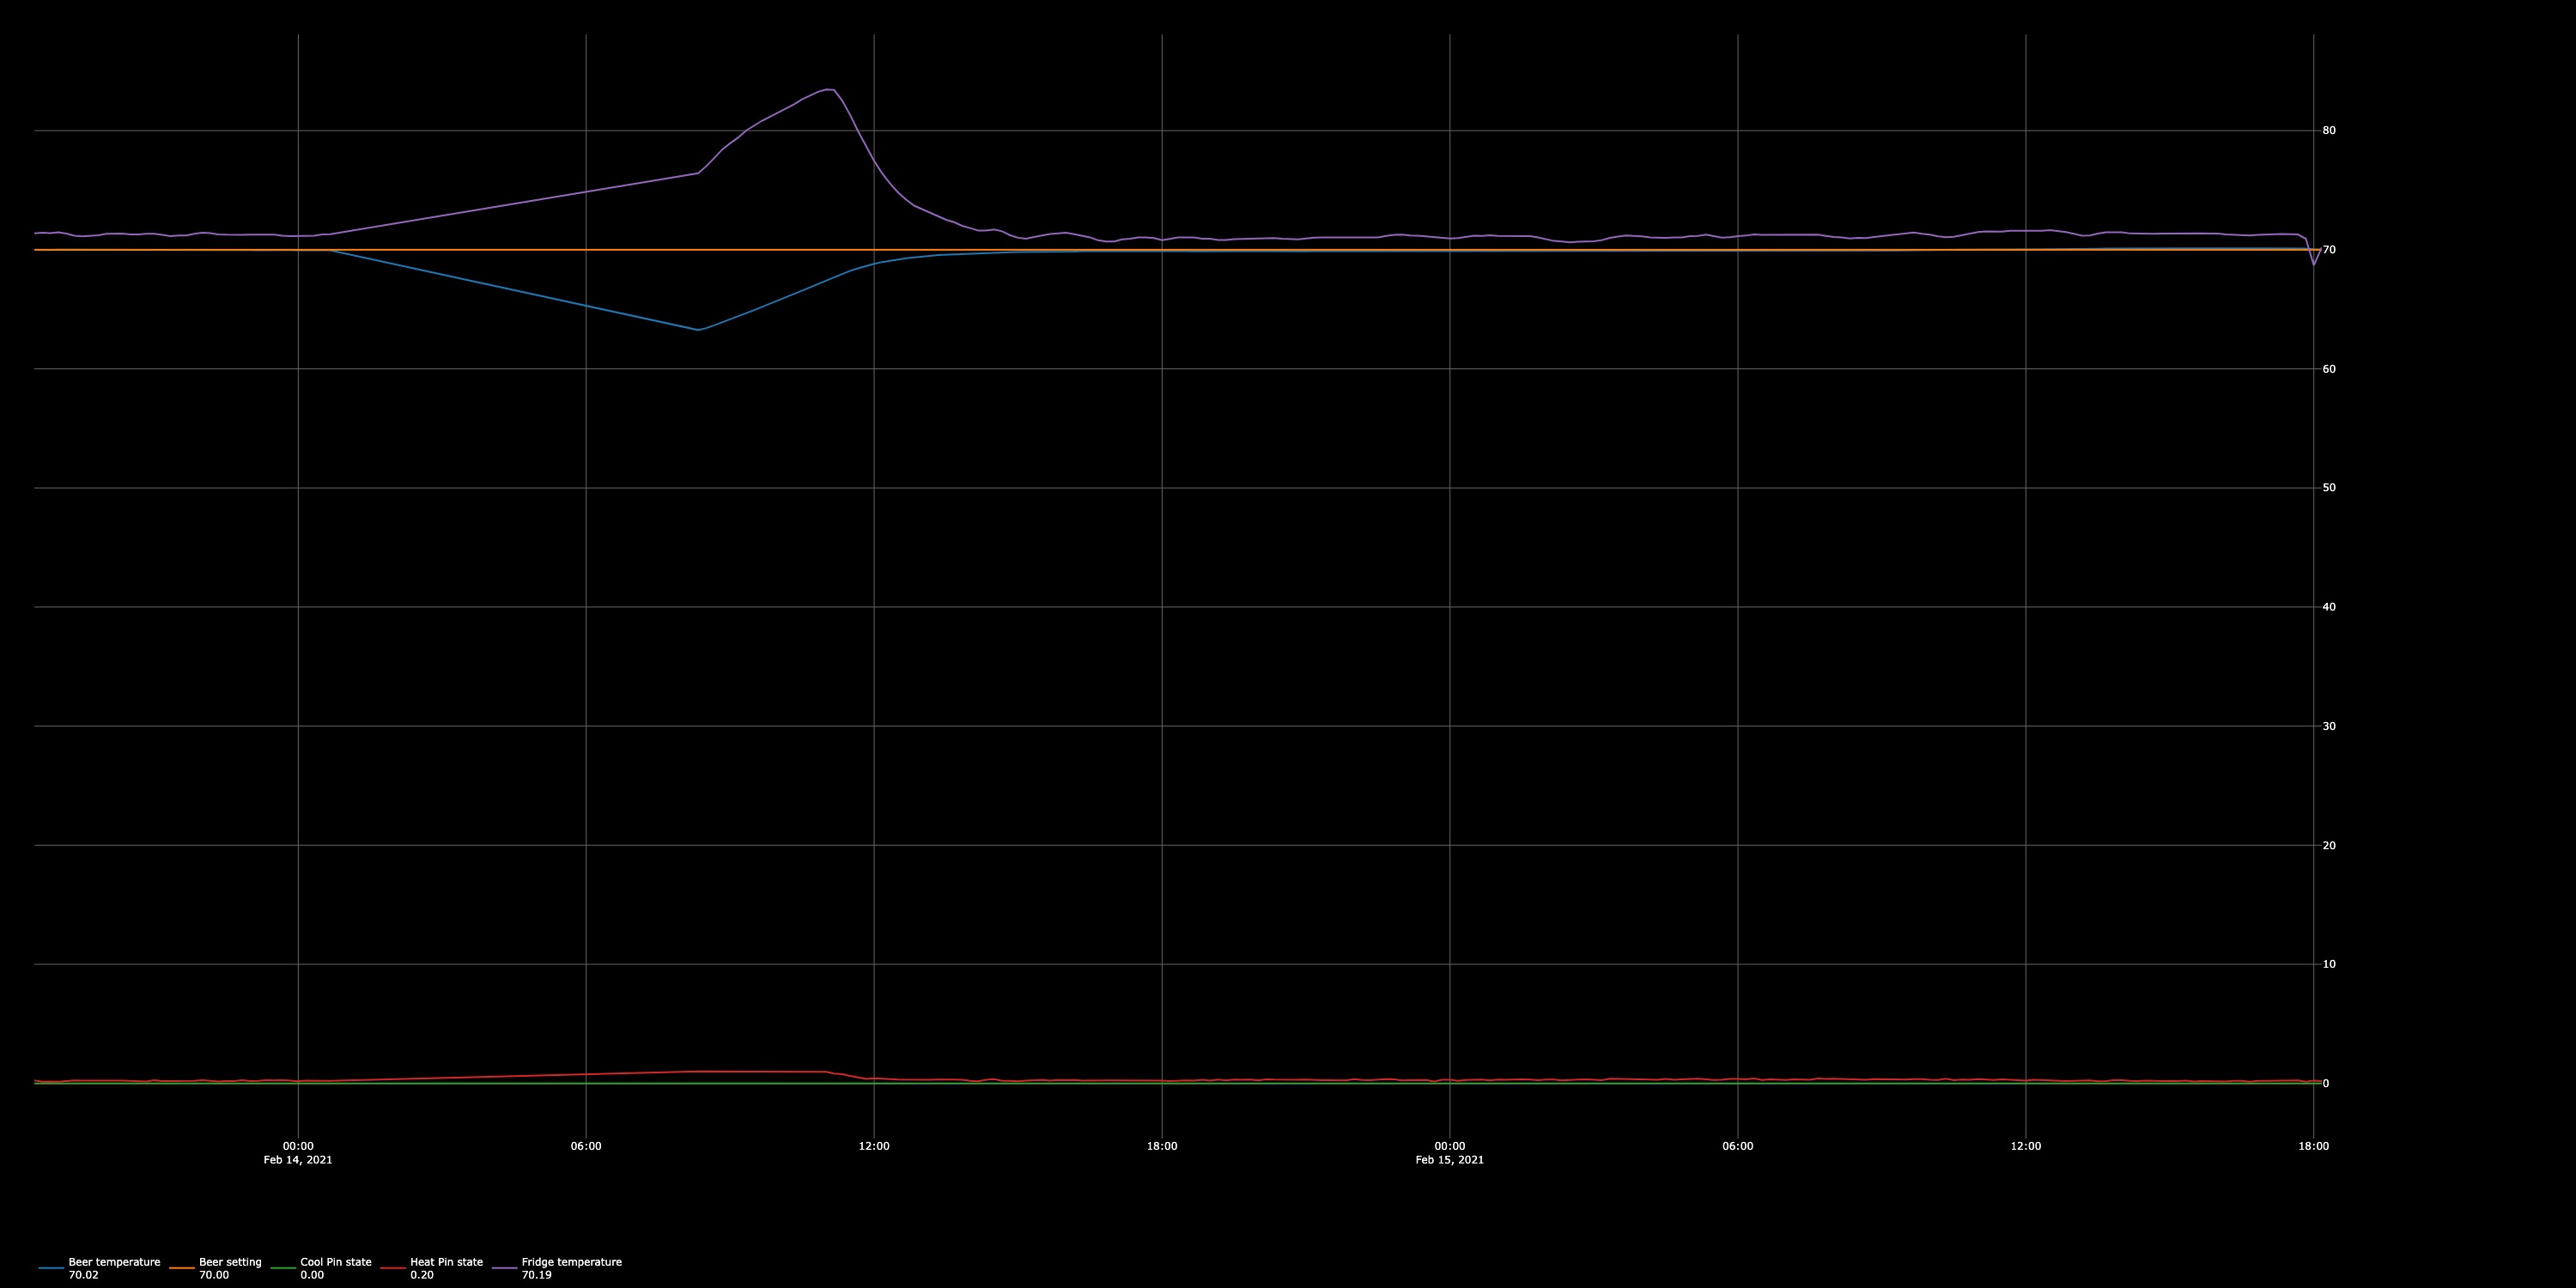
I’ve attached a picture of my graph to show how well the PID control has been performing. I was chugging along just fine, until Feb 14th. You’ll notice on the graph the beer and freezer trends are oddly straight between midnight and approx. 7 am. This is when my section of the power grid was turned off. Thankfully, I was still in a testing mode and have not cooked up a batch of wort yet. I’ve been playing around with random temp swings to see how the system would handle everything (for example, leaving the lid open and chilling the fermenter or boiling water and adding to the vessel, etc.). This outage was, in my opinion, a more natural event. Once power was restored and the BrewPi booted up, the PID’s took over and put me right back to my target beer temp. Great thing was that I did not have to touch a thing! In the future I might play around with higher wattage bulbs to reduce heat times, but I can easily live with these heat times for now. Since this was an extreme situation, I wanted to share the results. Once summer comes about, I’ll update the post with another graph as we start dealing another extreme, 100+ deg f summer days.
For more information on my system, have a look at the pictures below. Although I don’t go into detail about how I assembled all of this (there are youtube videos for that), I did provide a bill of materials for those interested.
BOM (BrewPI)
- 1 BrewPi Spark 3
- 2 OneWire Temp Sensors
- 2 Solid State Relays
- 2 Heat Sinks
- 1 Wall Mount Thermowell
Other BOM
- 5 Cu Ft Freezer [L x W x D, approx 33.5" x 28.66" x 20.6"] (BestBuy Link)
- Keezer Collar [2x4, Paint, Liquid Nails, Screws, etc.] (Lowes or local hardware store)
- 80mm fan (Amazon Link)
- L-Brackets for Fan (Amazon Link)
- Power Cords for Relays [I ended up cutting these power cords and used butt splices to connect ground and neutral wires] (Amazon Link)
- Heat Lamp Fixture (Amazon Link)
- Ceramic Heat Bulb (Amazon Link)
- Wire Loom for Spark 3 Cables (Amazon Link)
- Wire used to connect Spark 3 Controller to the Relays was surplus sprinkler wire I had laying around the house
Fermentation Equipment