Those who were part of the old forum will have seen my fermentation chamber build but I thought I’d share a bit of how my mash build is going.
I started buying equipment for this build in May 2015 so it’s been a long, slow process (having 3 kids under 3 does that to you!).
The basic setup is electric brew-in-a-bag (single vessel). This is mainly because we’re in a rental property and have limited space. I’m shooting for 30L batches so I’ve gone with a 65L pot with a 5500W heating element. I’m in New Zealand and our standard electrical circuits only support 10A@230V. Because we’re renting, fixed house rewiring is not an option so I’m using my stove circuit which is 32A.
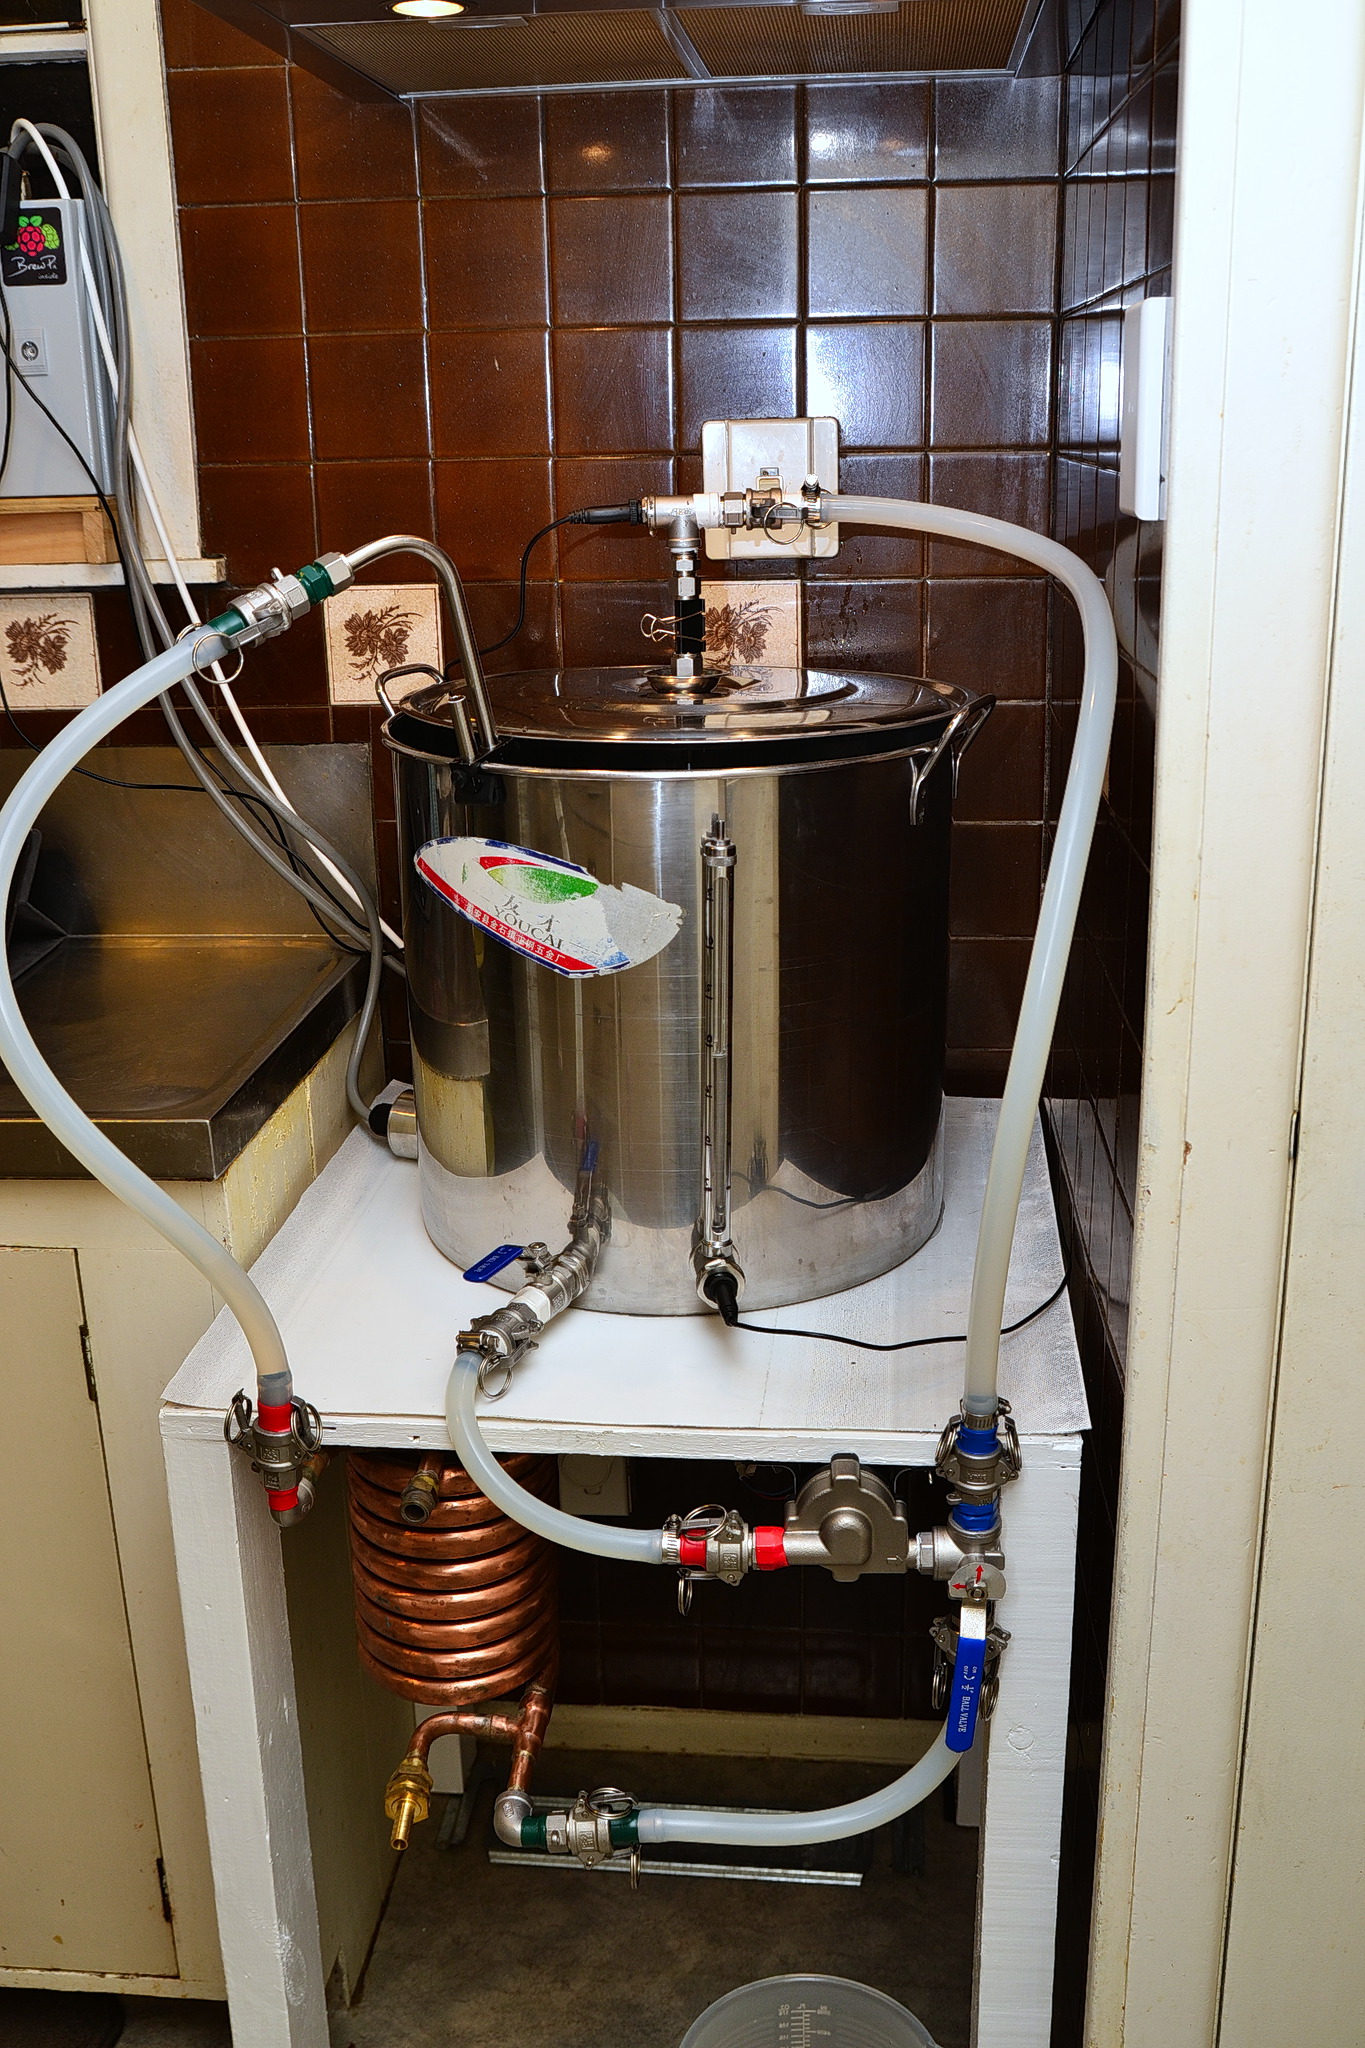
I was originally just going to sit the pot on top of the stove but it was a little too high and close to the extractor range hood. Because of this I decided that I would move our stove into the laundry on brew day (above 1 meter away) and I made a custom table. This also meant I could mount my pump and counterflow chiller underneath the table (pictures later on in the post).
There’s a lot of customization that has gone into this build. First off the controller:
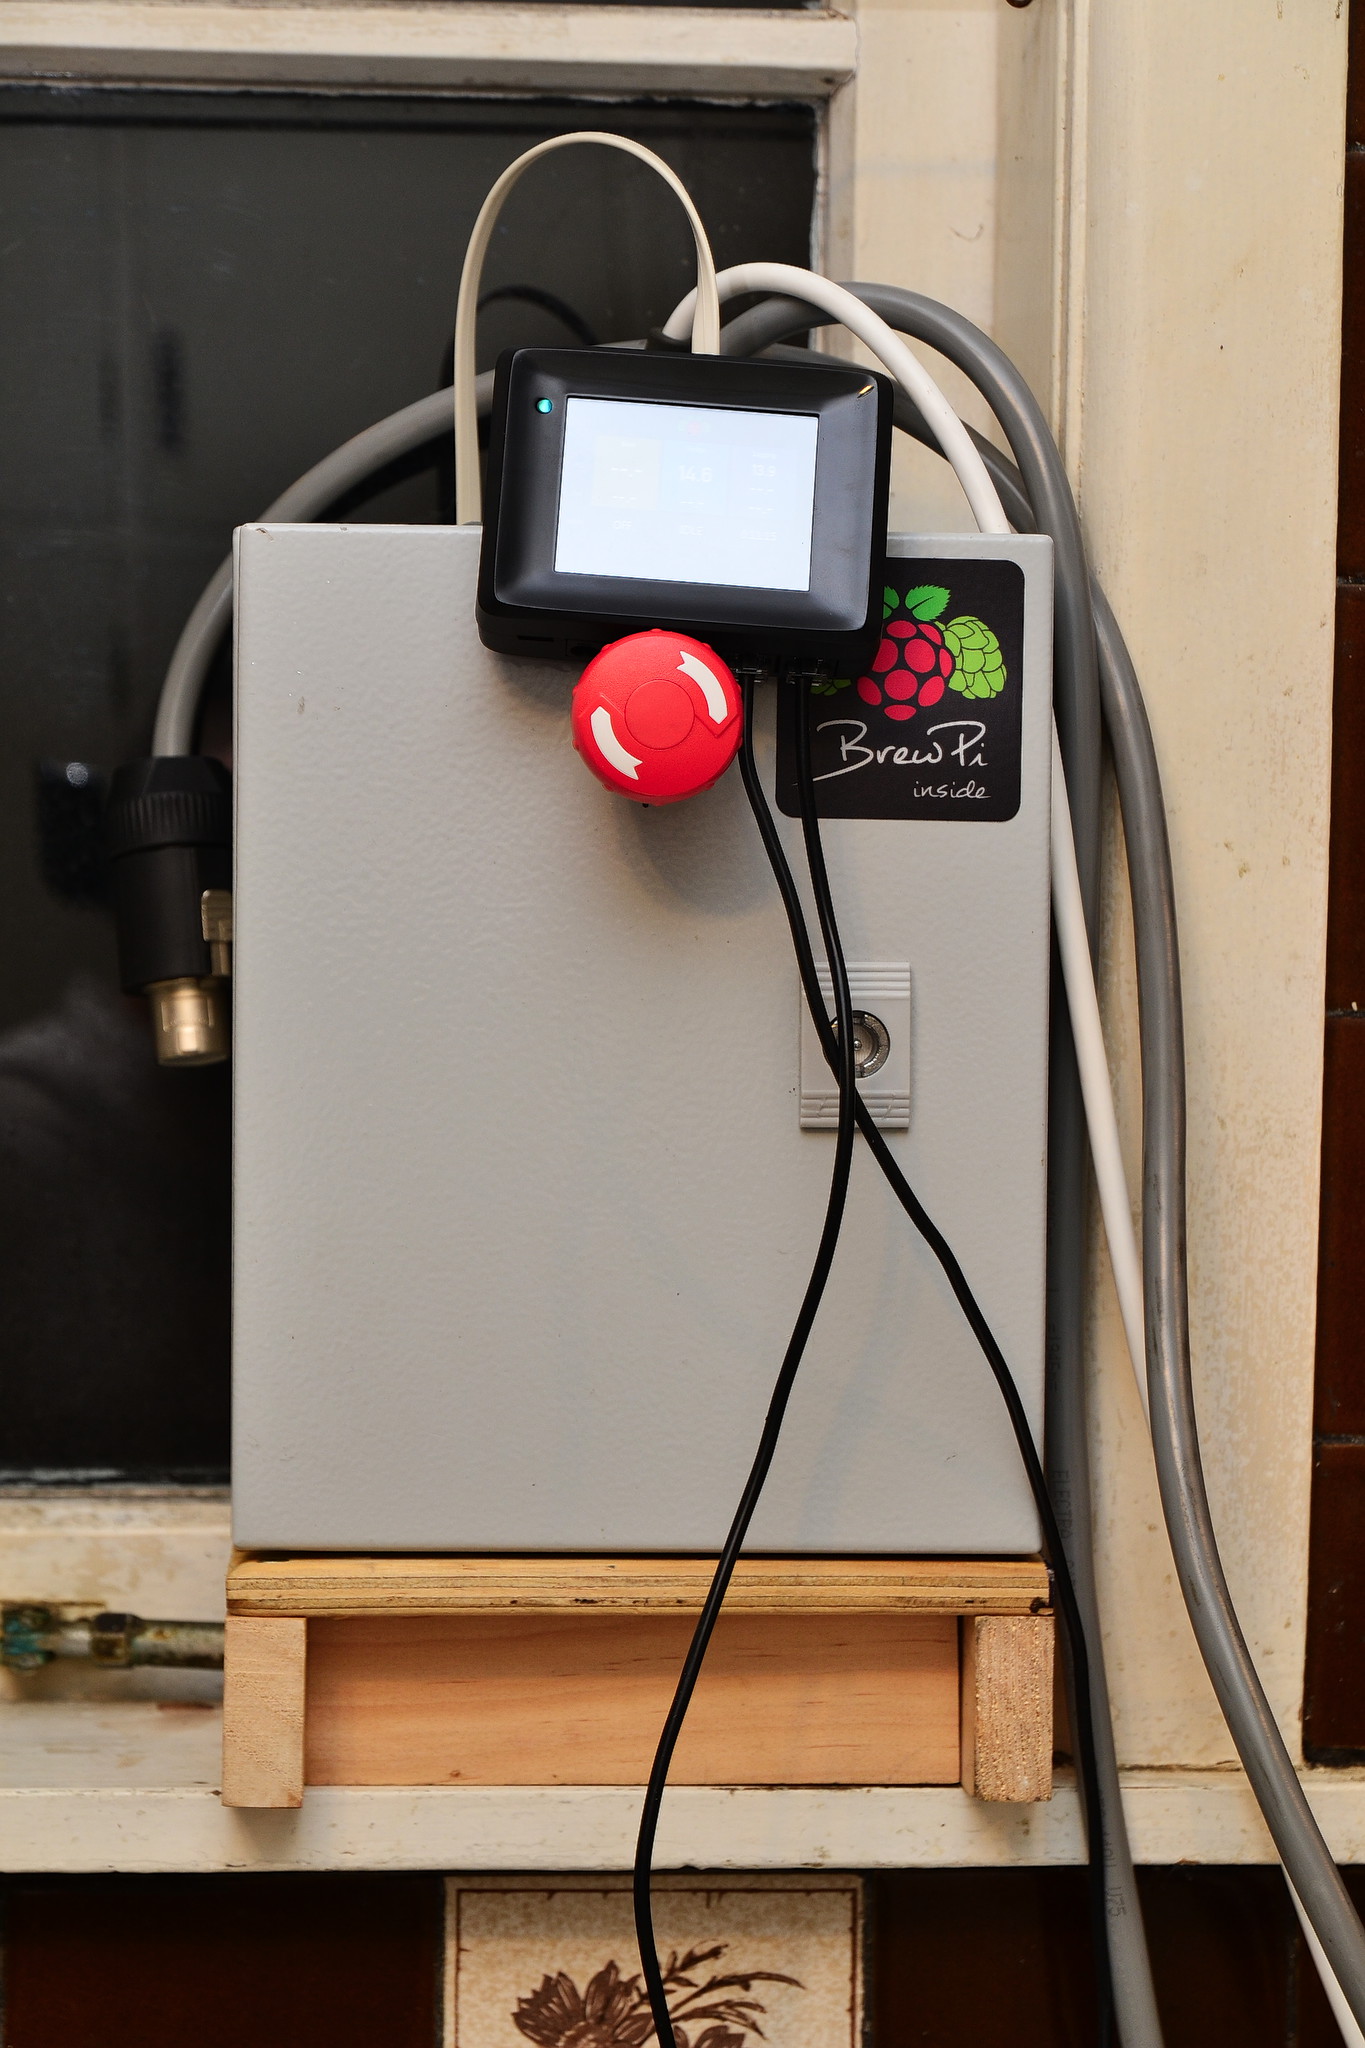
I’m using a BrewPi V3 over wifi. I modified it internally so I can power it with 12V via an RJ12 connector. This means I can have it on the outside of my electrical enclosure and only needed to mill a single hole for the BrewPi (my raspberry pi is located in a different location). I have yet to screw the magnets onto the BrewPi, hence why it is resting on the e-stop switch.
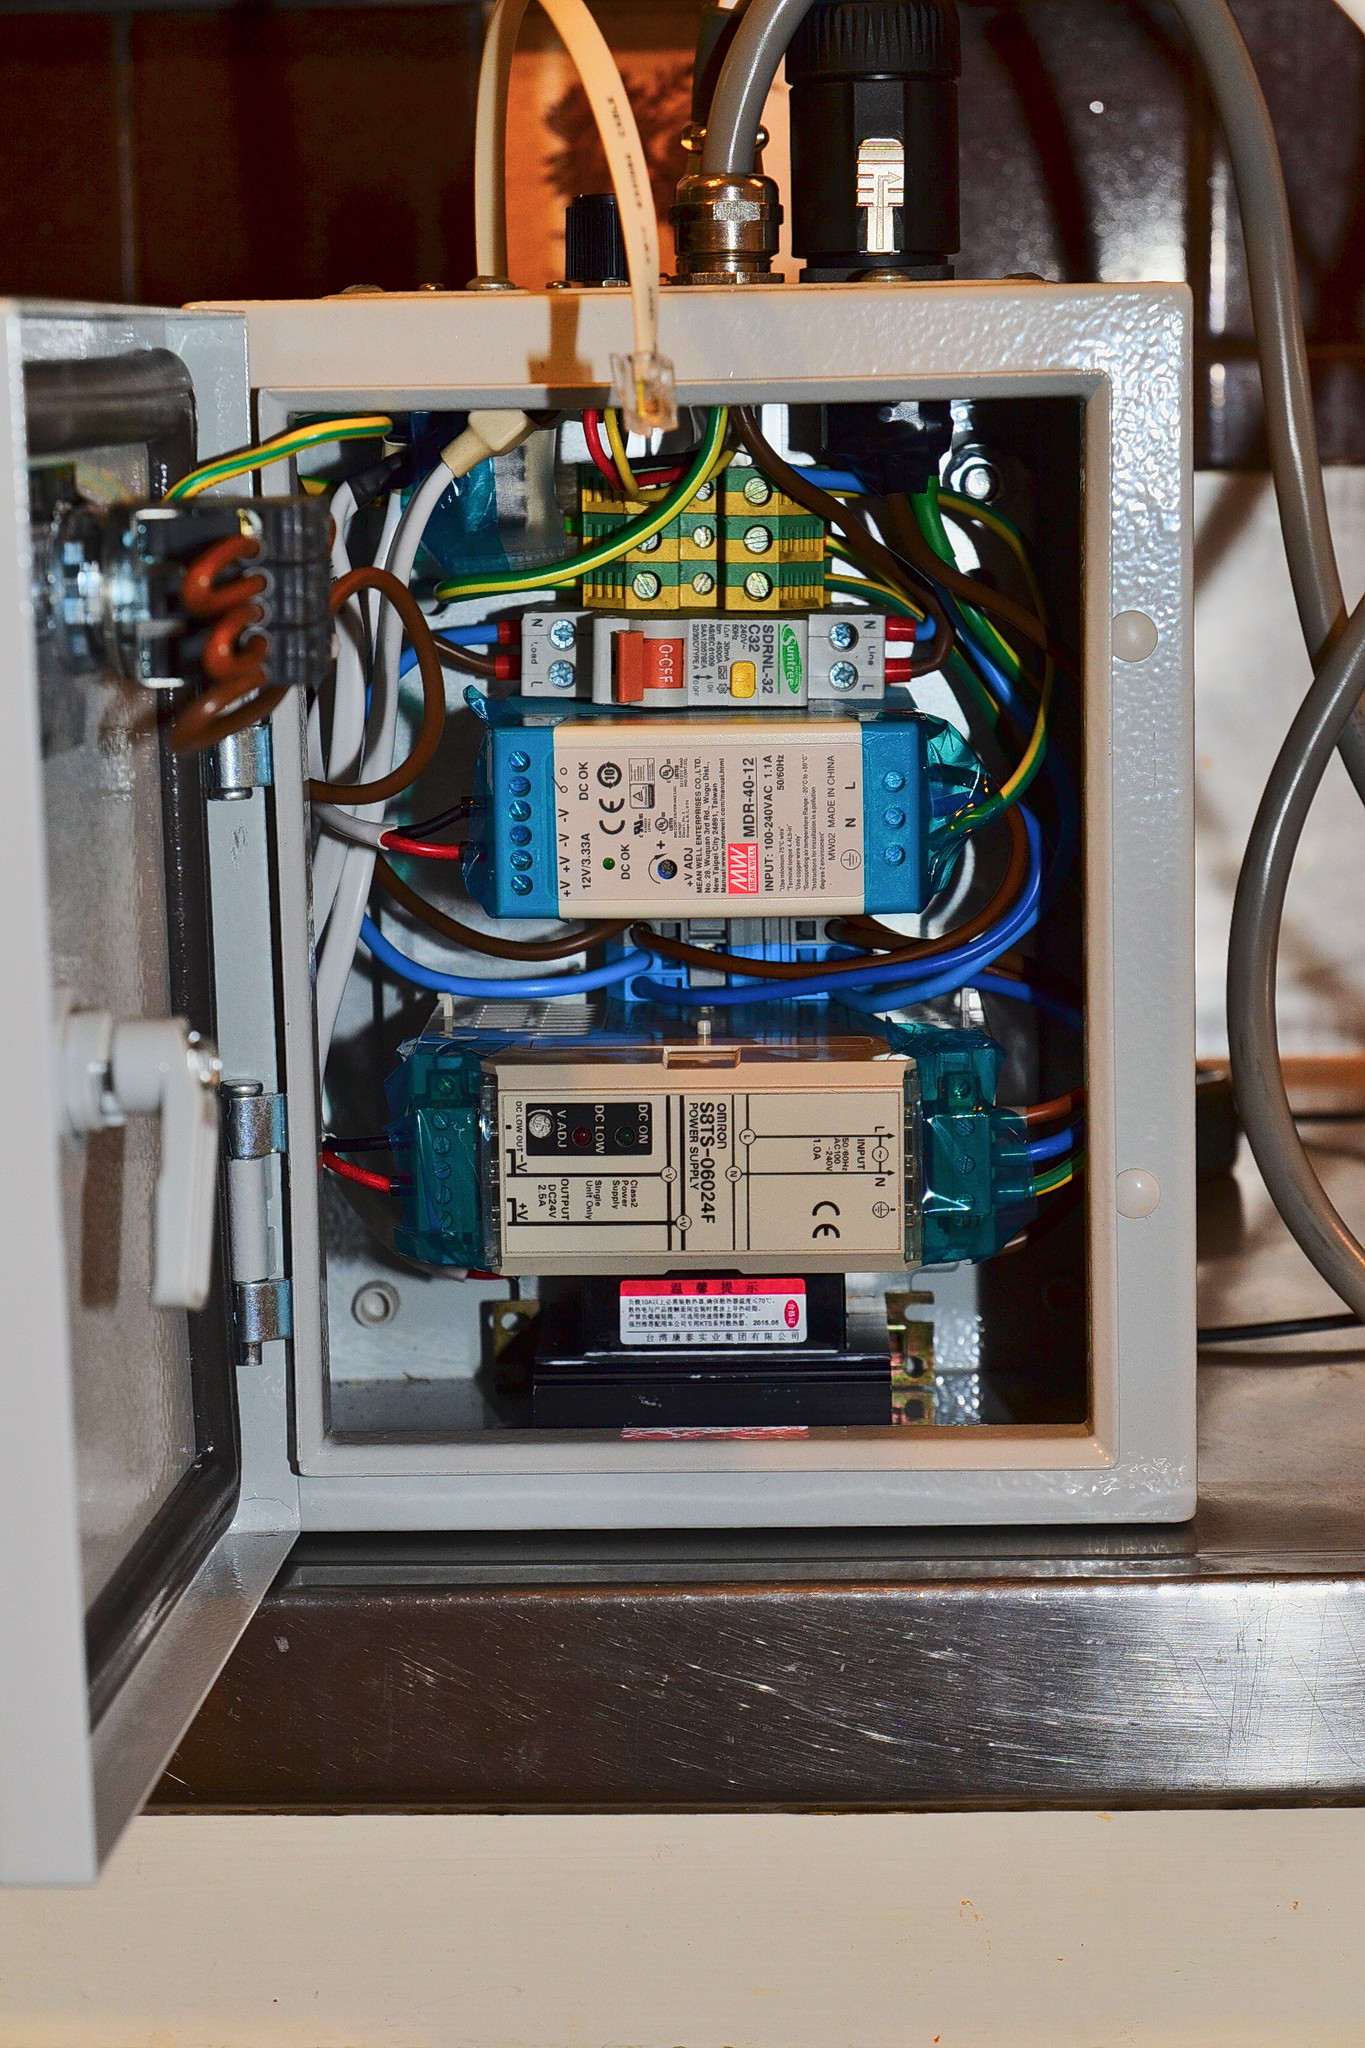
Internally the enclosure is pretty simple. It consists of:
- 32A RCDB
- Into an e-stop switch (the big red one)
- 12V 40W supply (currently only for BrewPi):
https://www.aliexpress.com/item/Original-Meanwell-MDR-40-12-40W-12V-mean-well-Din-Rail-Power-Supply-DC-OK-relay/32663726261.html?spm=a2g0s.9042311.0.0.27424c4dIFw31c - 24V 60W supply for my pump
- 40A SSR for my heating element (mounted to a DIN mount heatsink that presses up against the bottom of the enclosure)
- The RJ12 connector is mounted on a little custom board which has a DS2413 1-wire to I/O IC. This is to allow the SSR for the heating element to be switched. It also has a 12V input.
- I am waiting on a 3 way illuminated 5V switch which I will place on the low voltage side of the SSR. This will allow me to switch the heating element between on/off/auto.
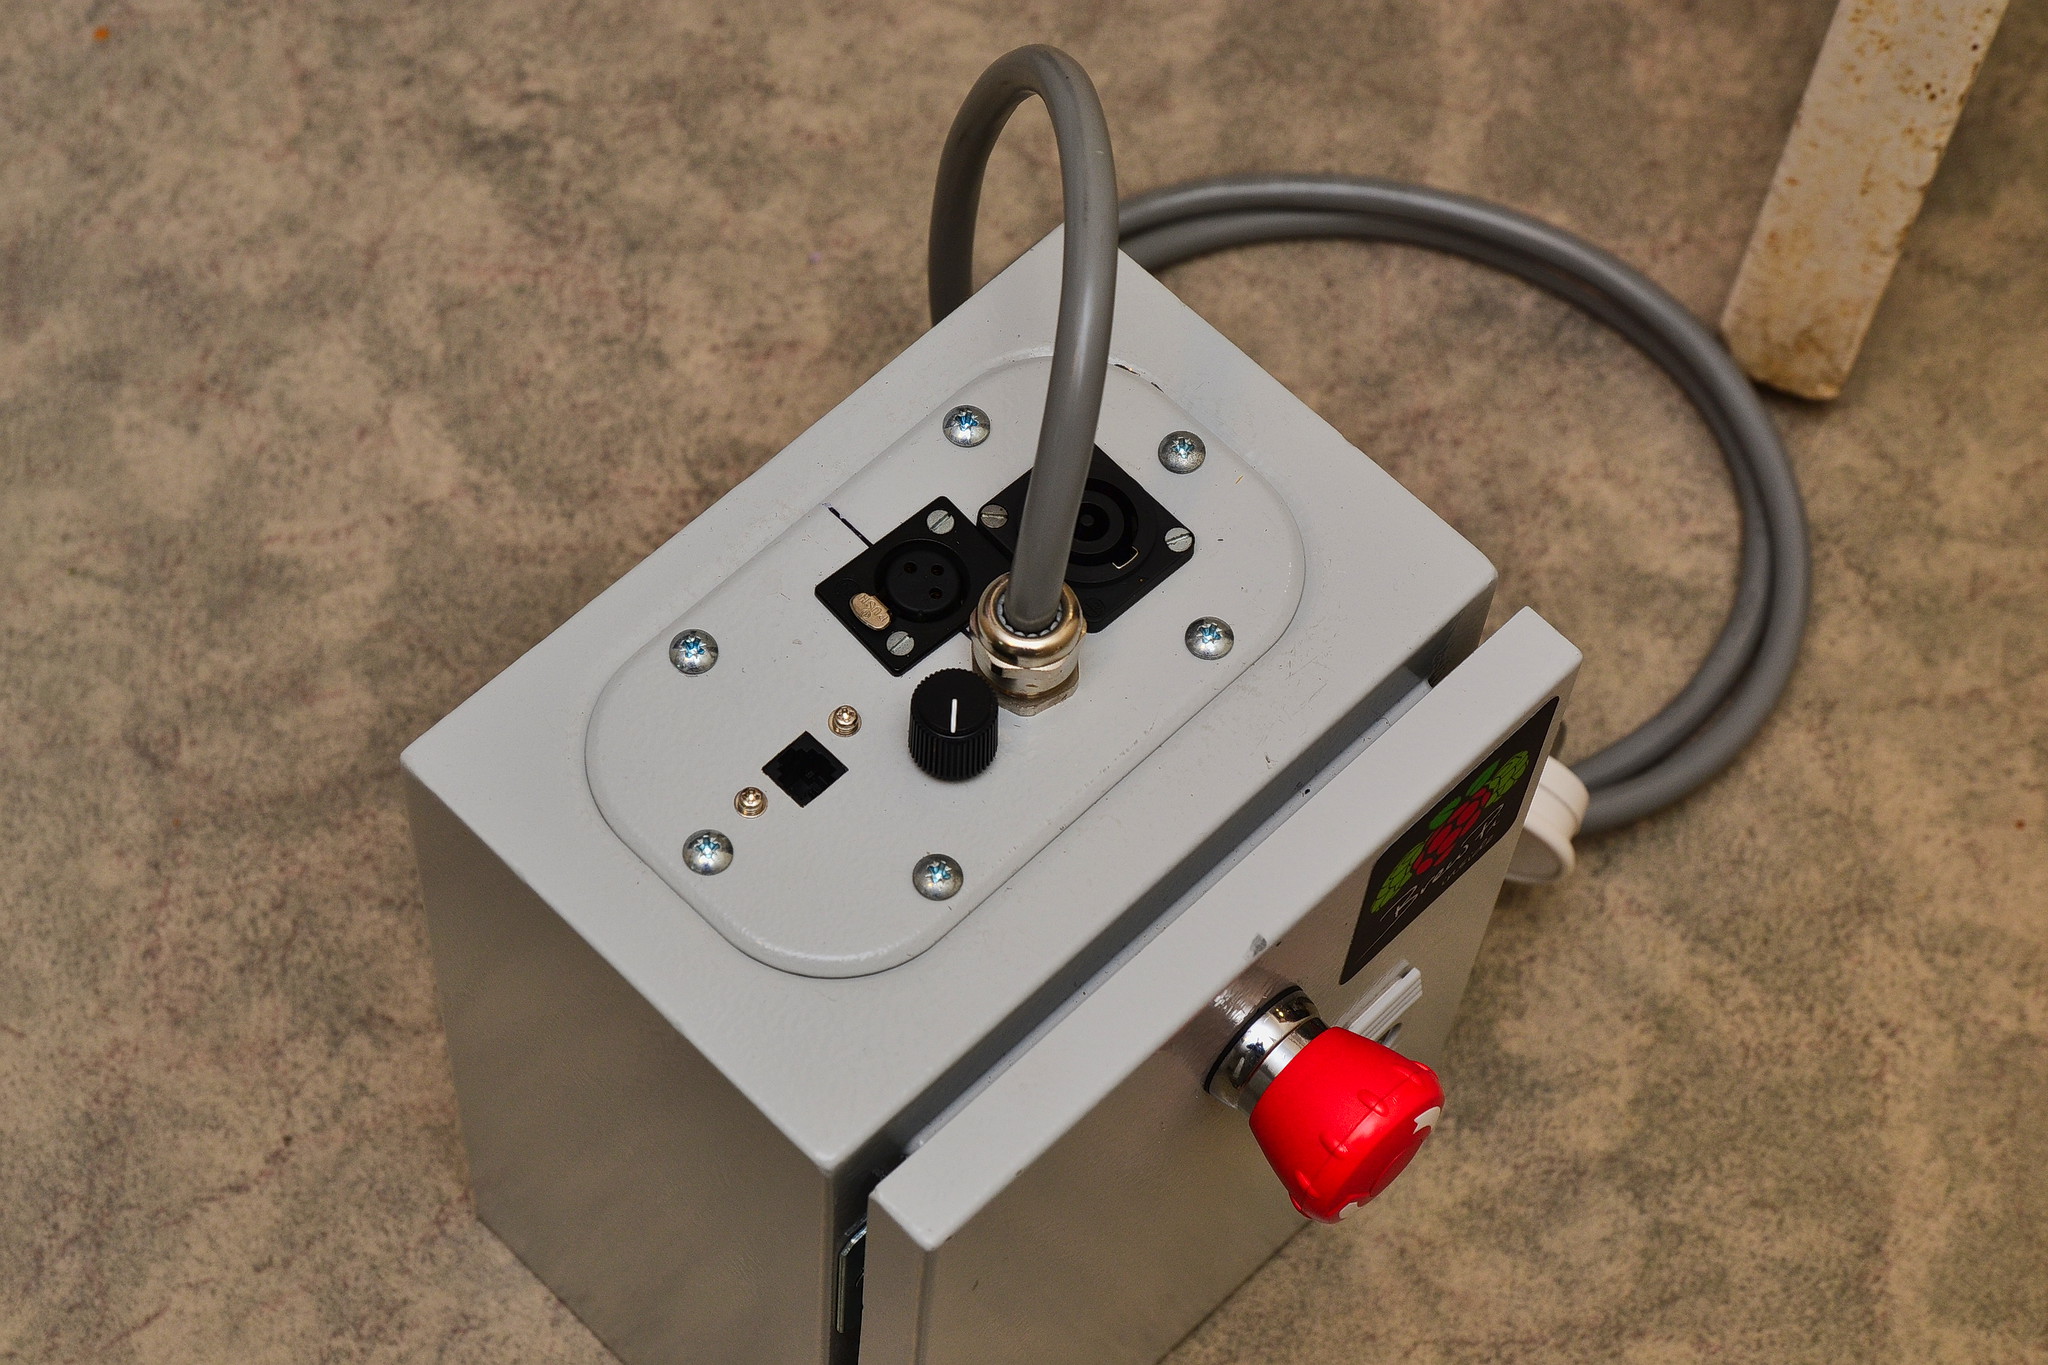
- I am using a 24V DC pump from the BrewPi store and am using @Elco’s pot adjuster circuit to change the speed (you can see this on the top
- The pump uses a 3-way XLR connector
- For the heating element connector I am using the Neutrik PowerCON 32A barrel connectors:
http://www.neutrik.com/en/power/powercon-32-a/
My pot:
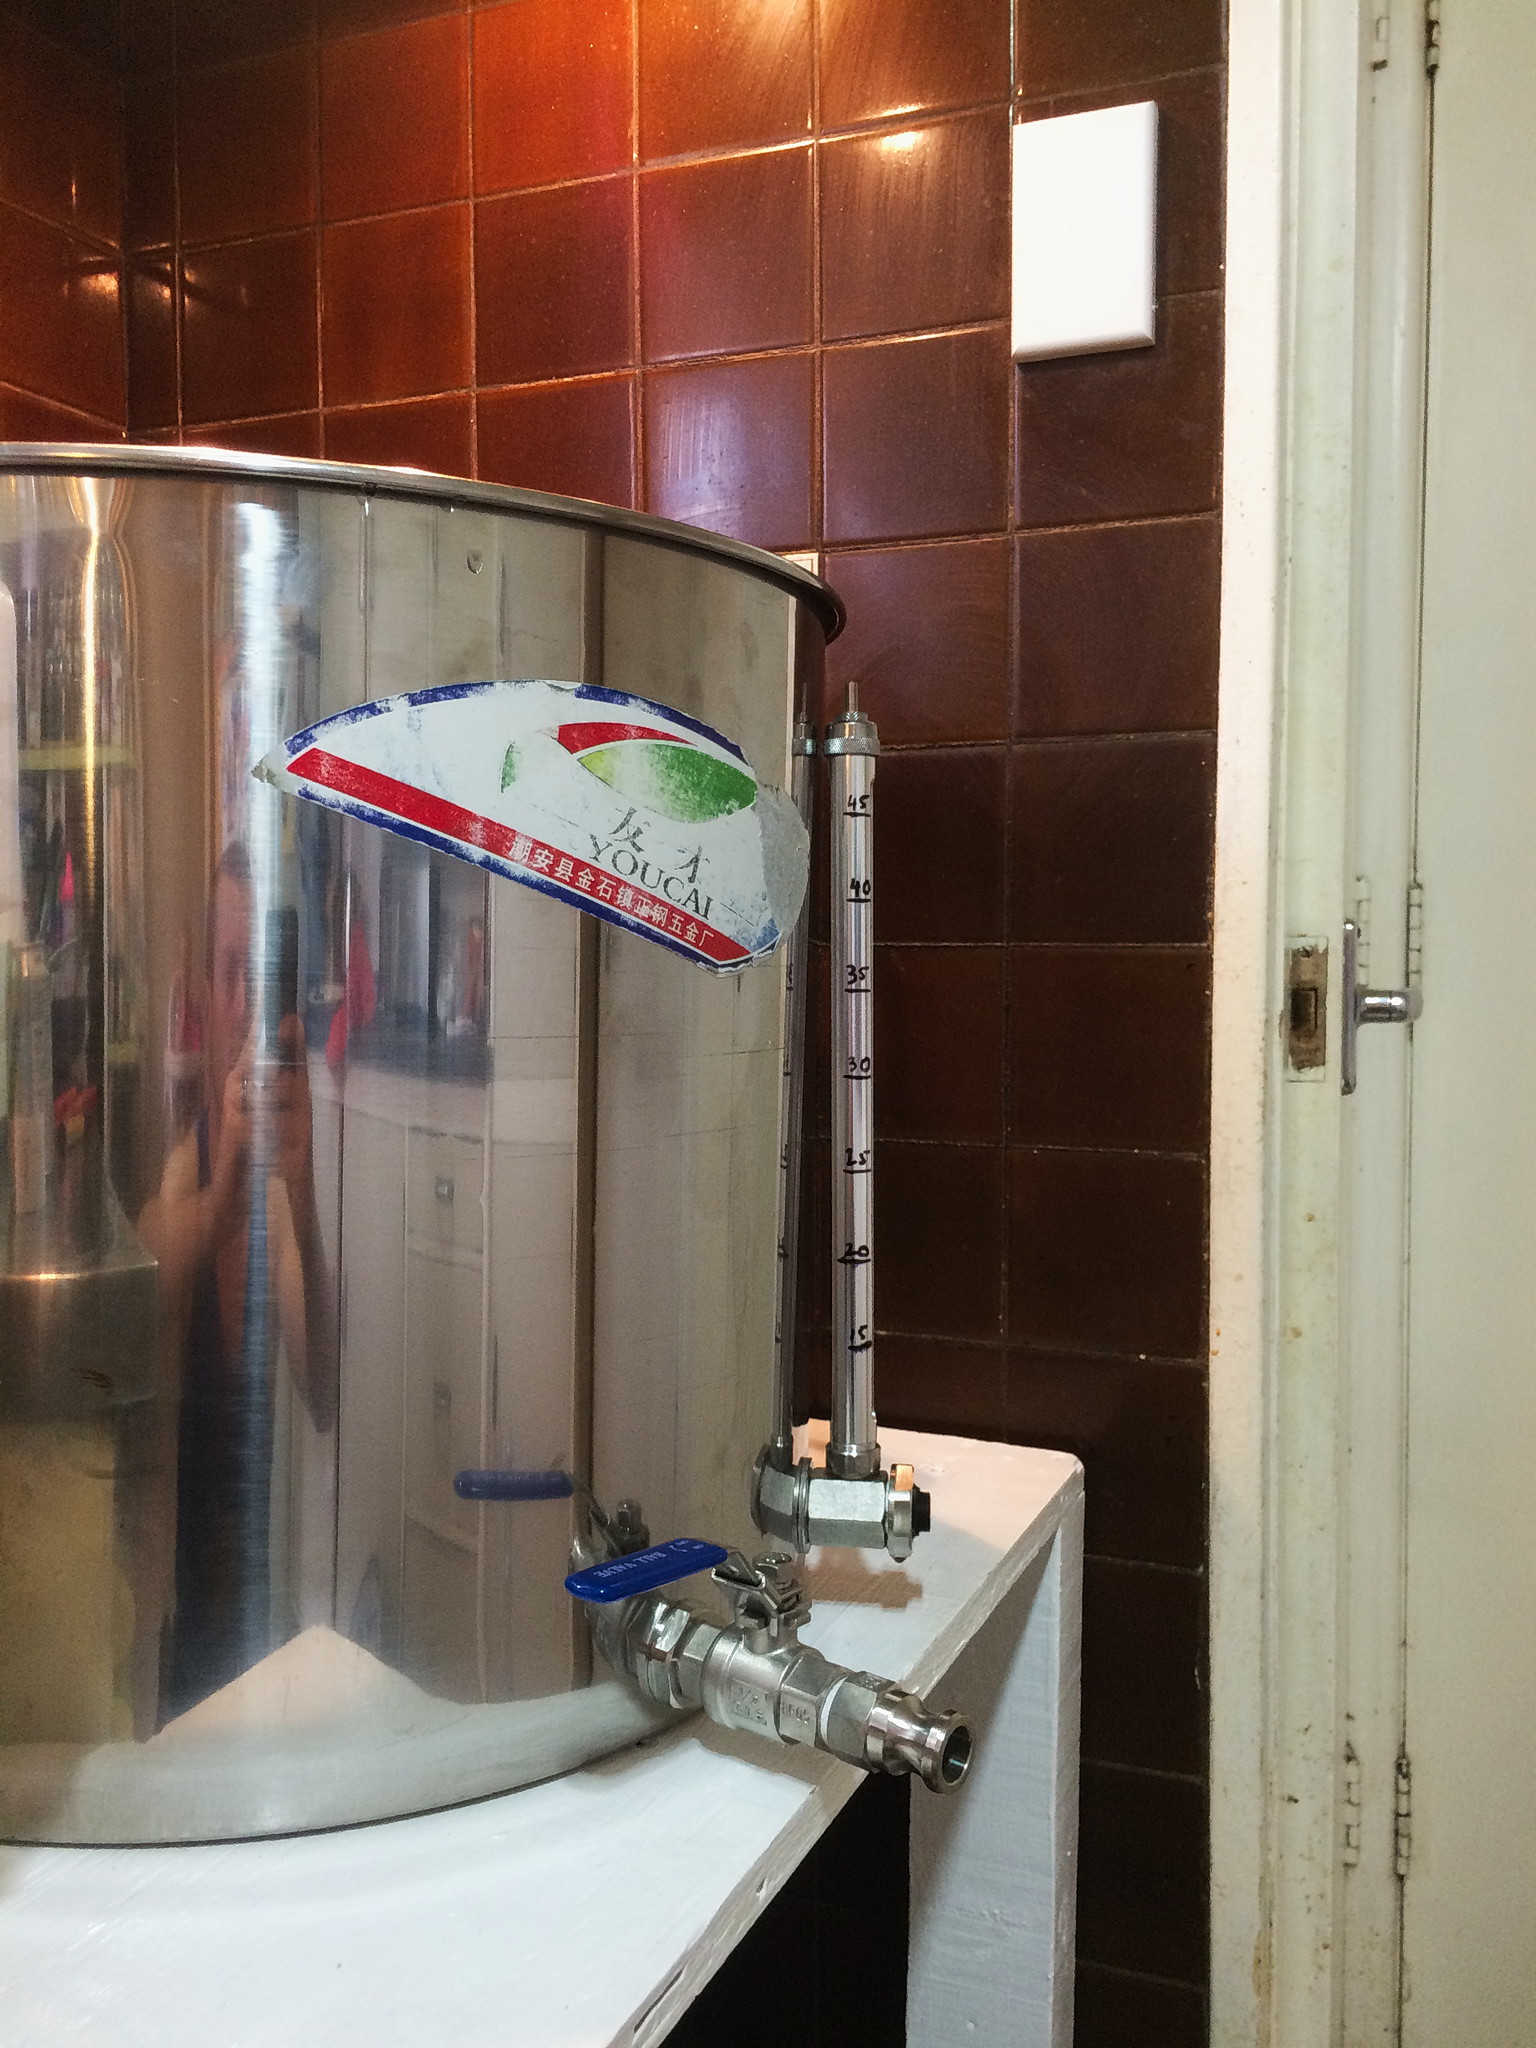

• 65L (cheap thin walled kind)
• 5500W Camco ripple heating element mounted in BrewPi enclosure:
• T-piece for Site glass (have yet to get some proper labels printed for it) and a BrewPi 60mm flanged temperature sensor (I’d prefer a longer sensor but this will do).
• BrewPi dip tube attached to ball valve.
• I’m using all Camloc attachments.
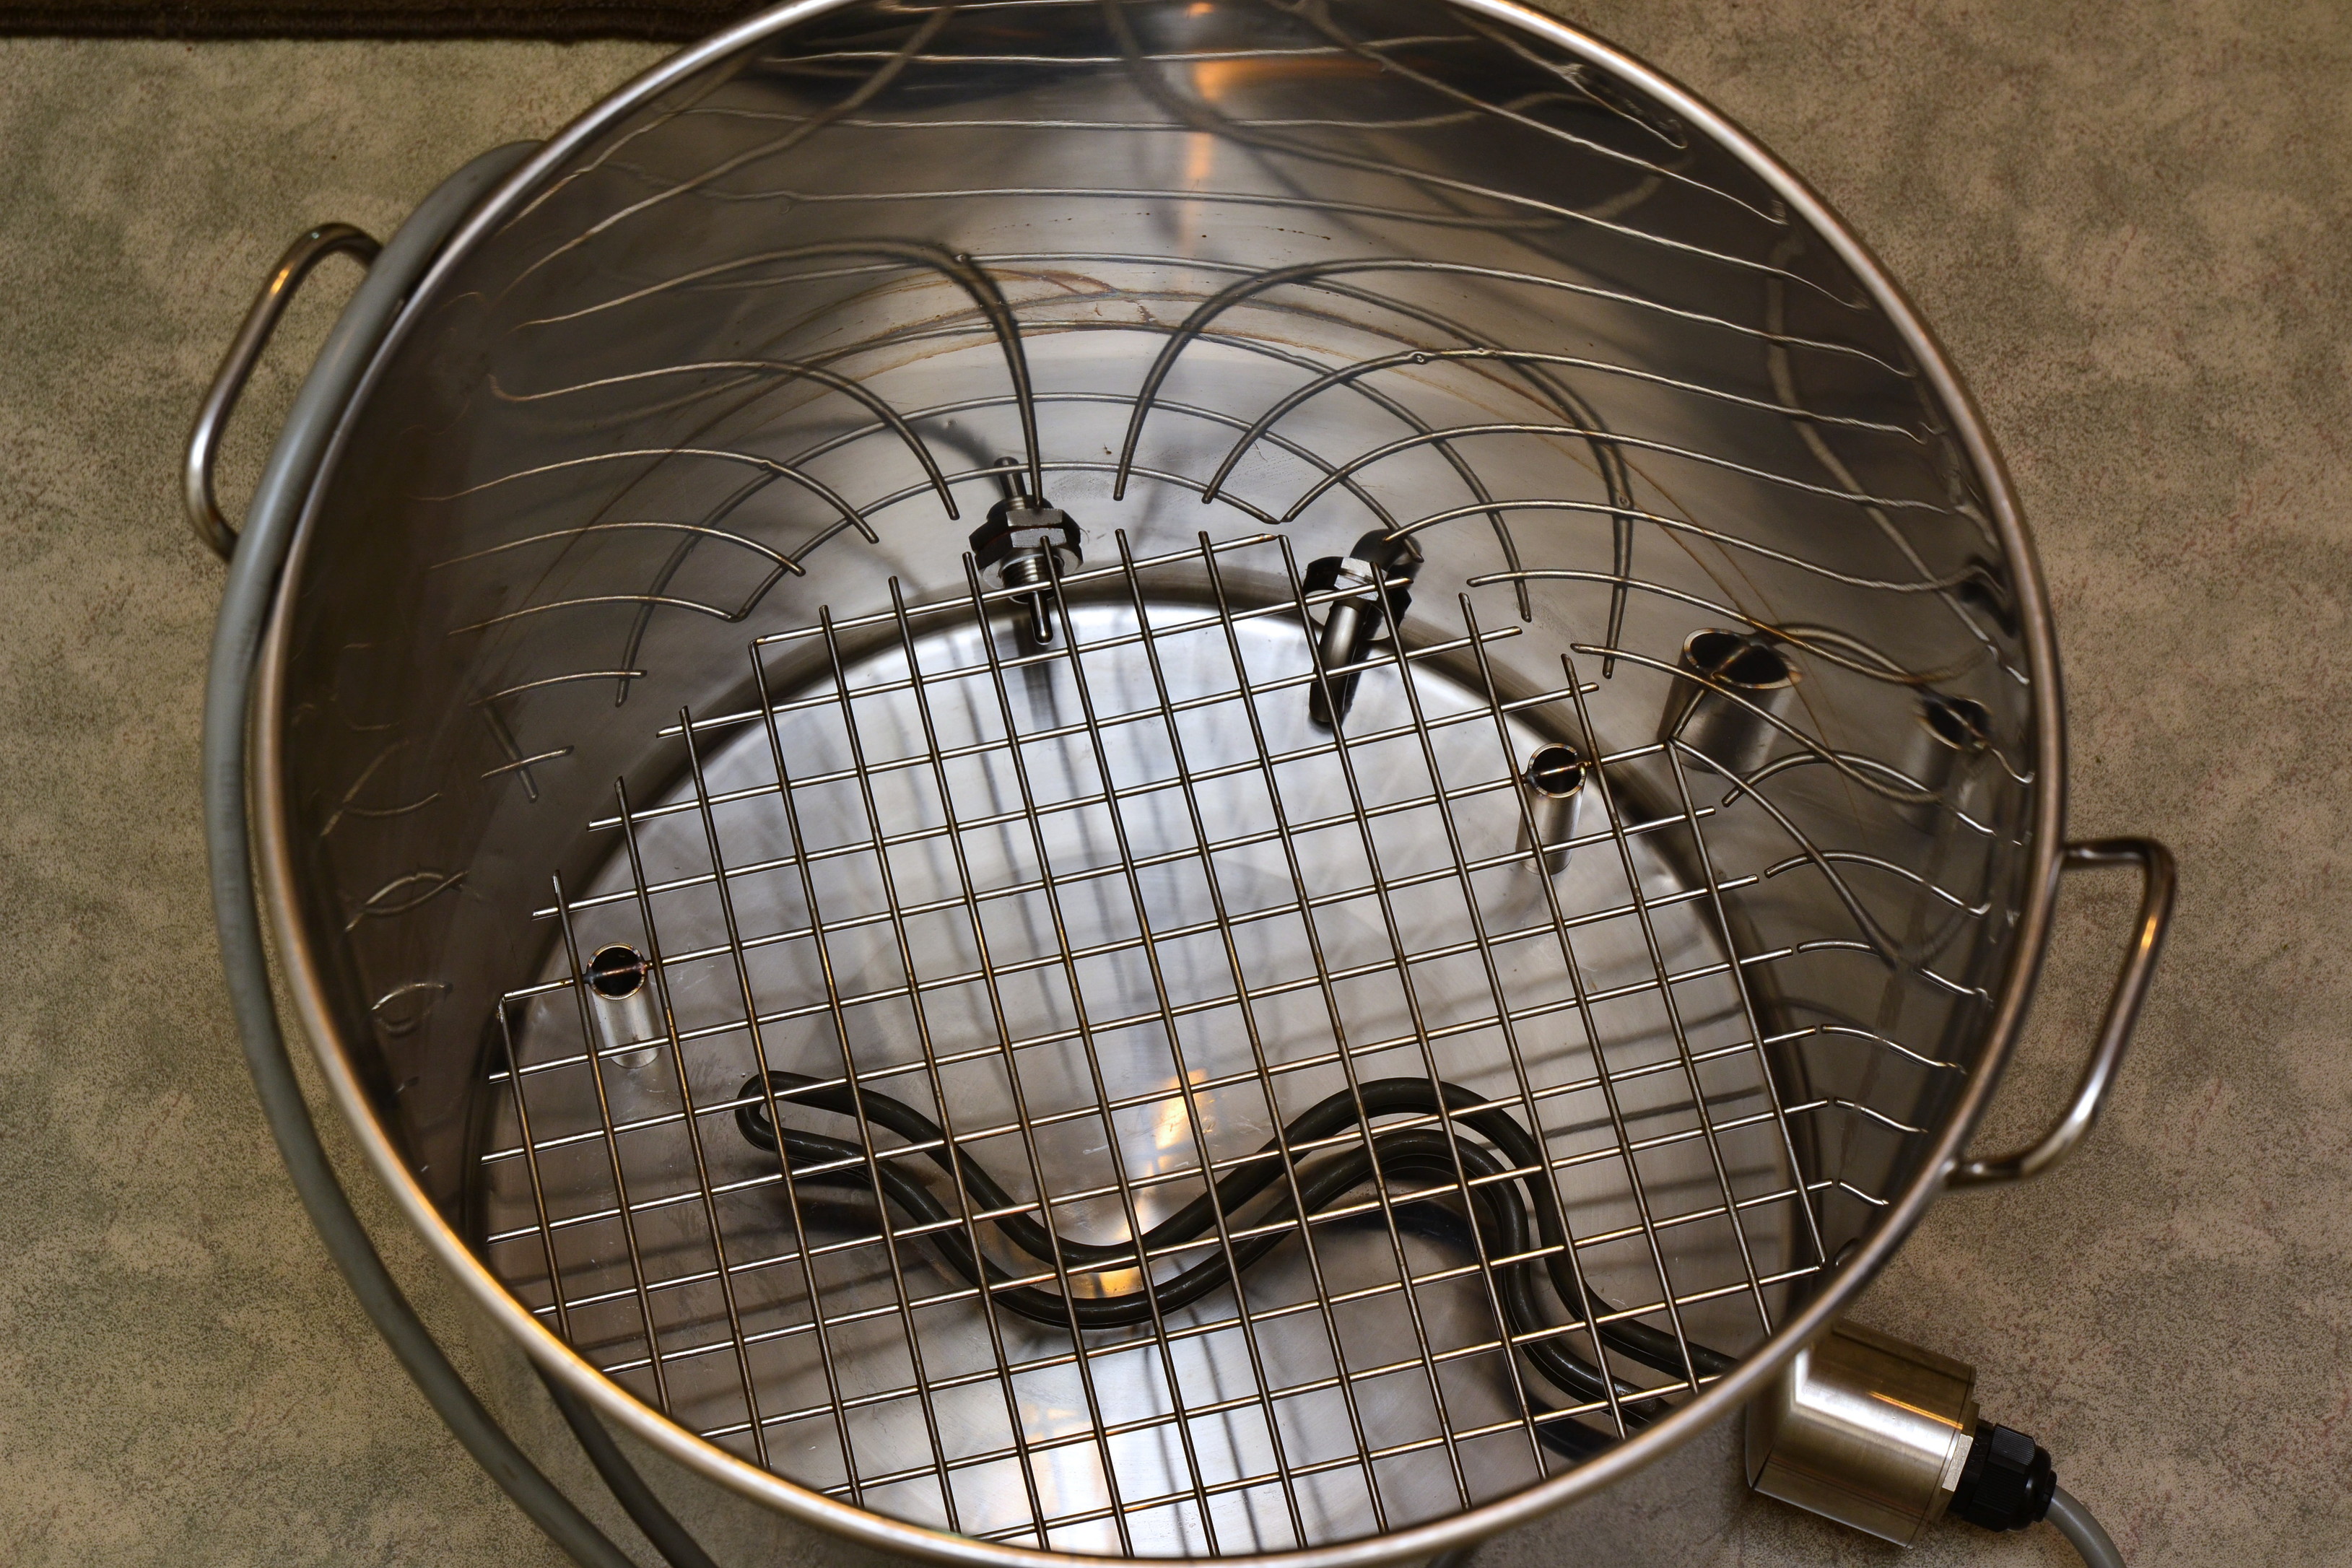

Inside the pot I also have a custom made grill that sits just above the element to ensure the grain bag doesn’t touch the element. This is removed at the end of mash before boil. I am going to make up some hooks to hold this grill near the top of the pot so I can rest the grain bag there during sparge/draining.
!
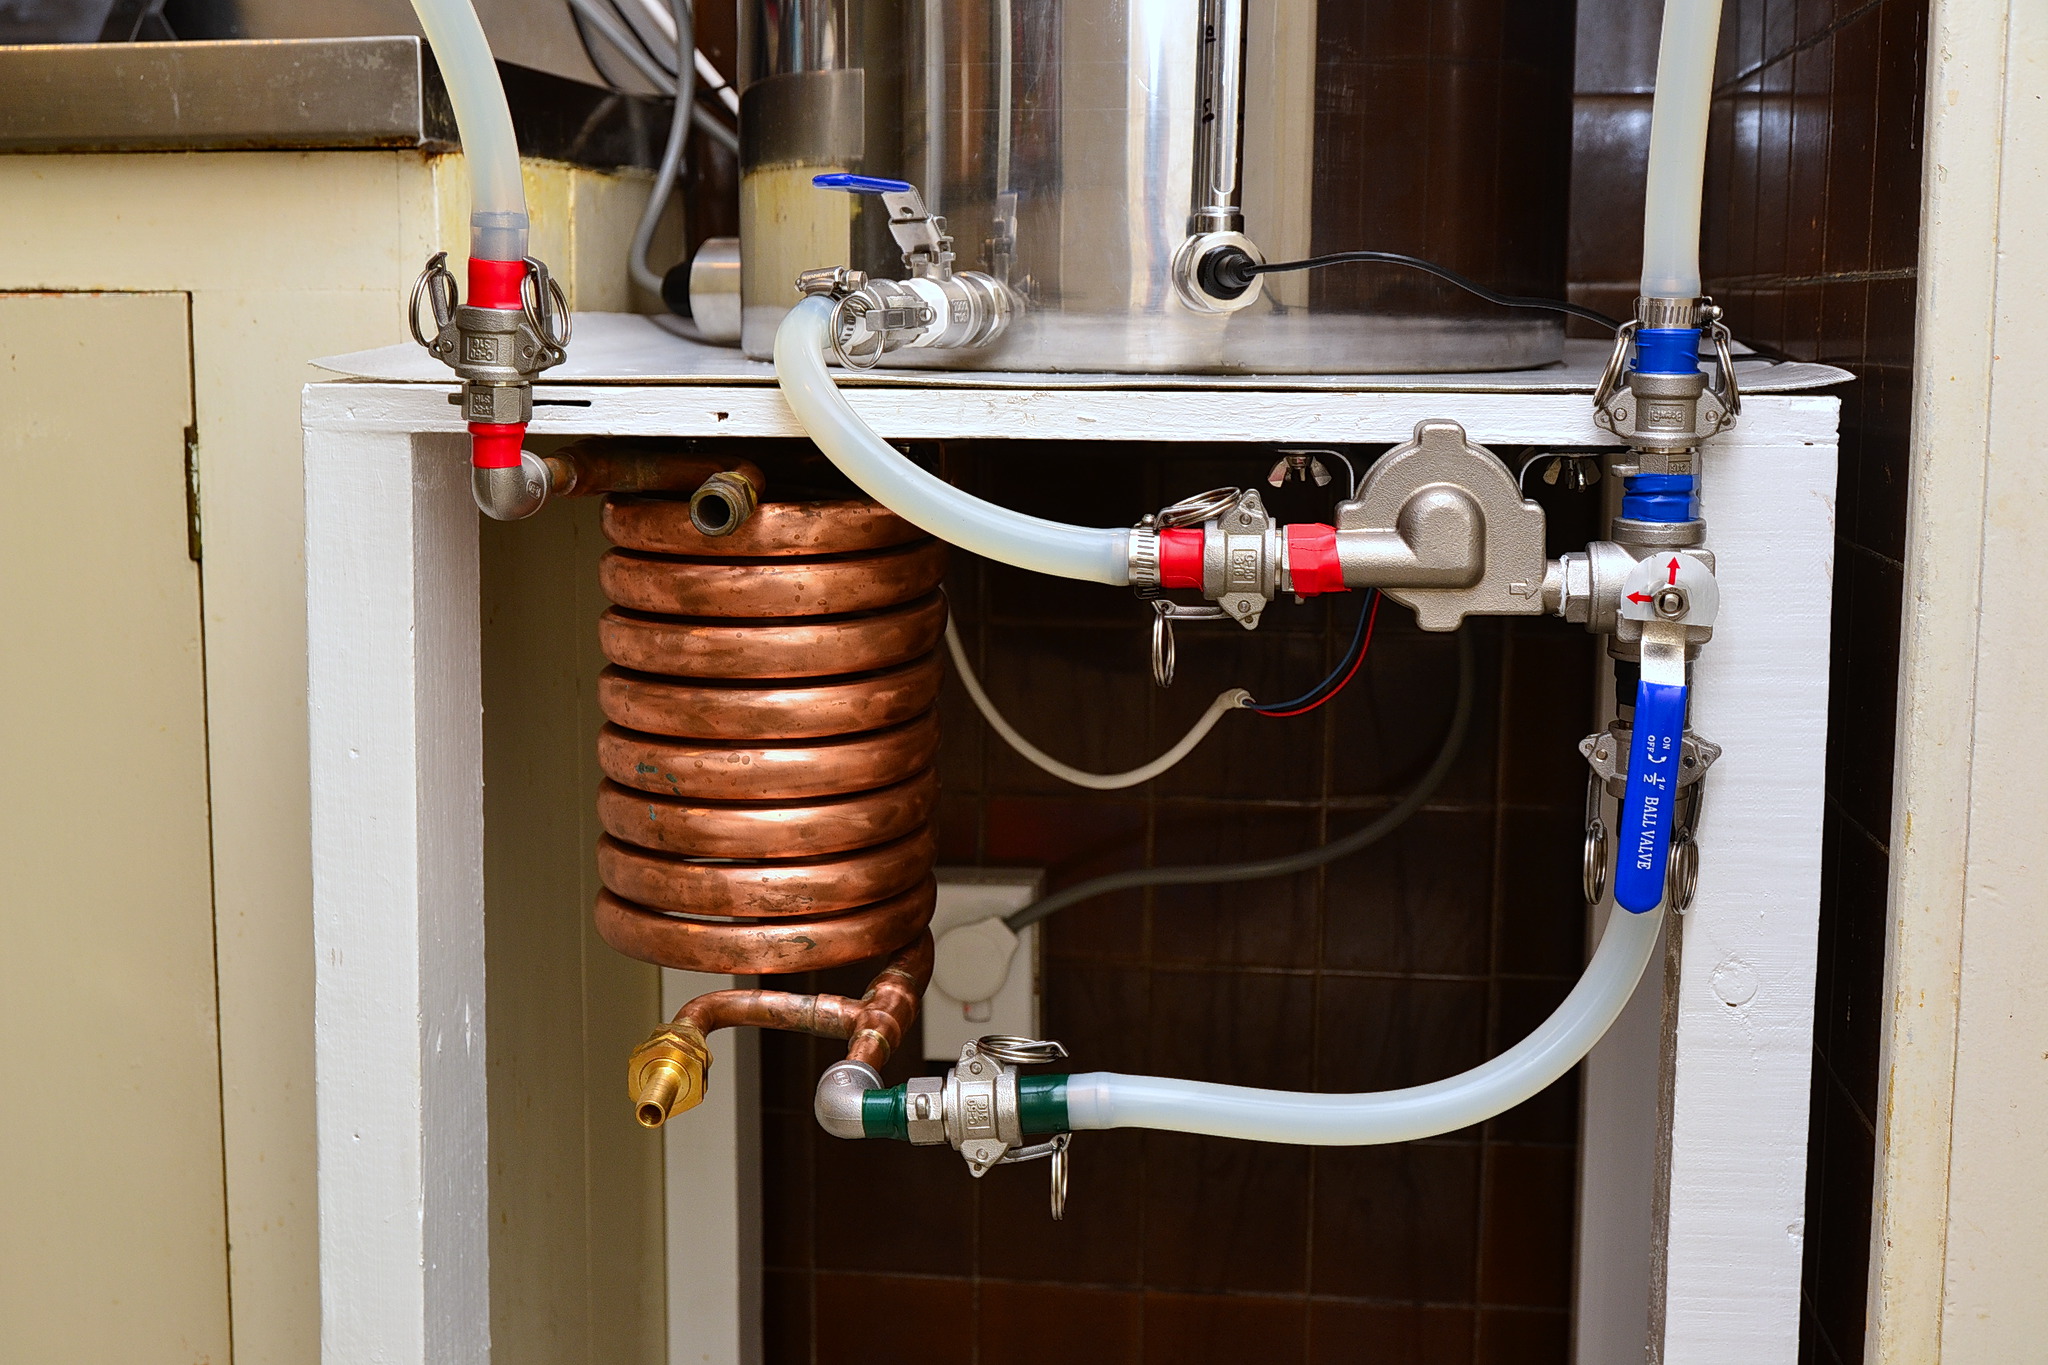
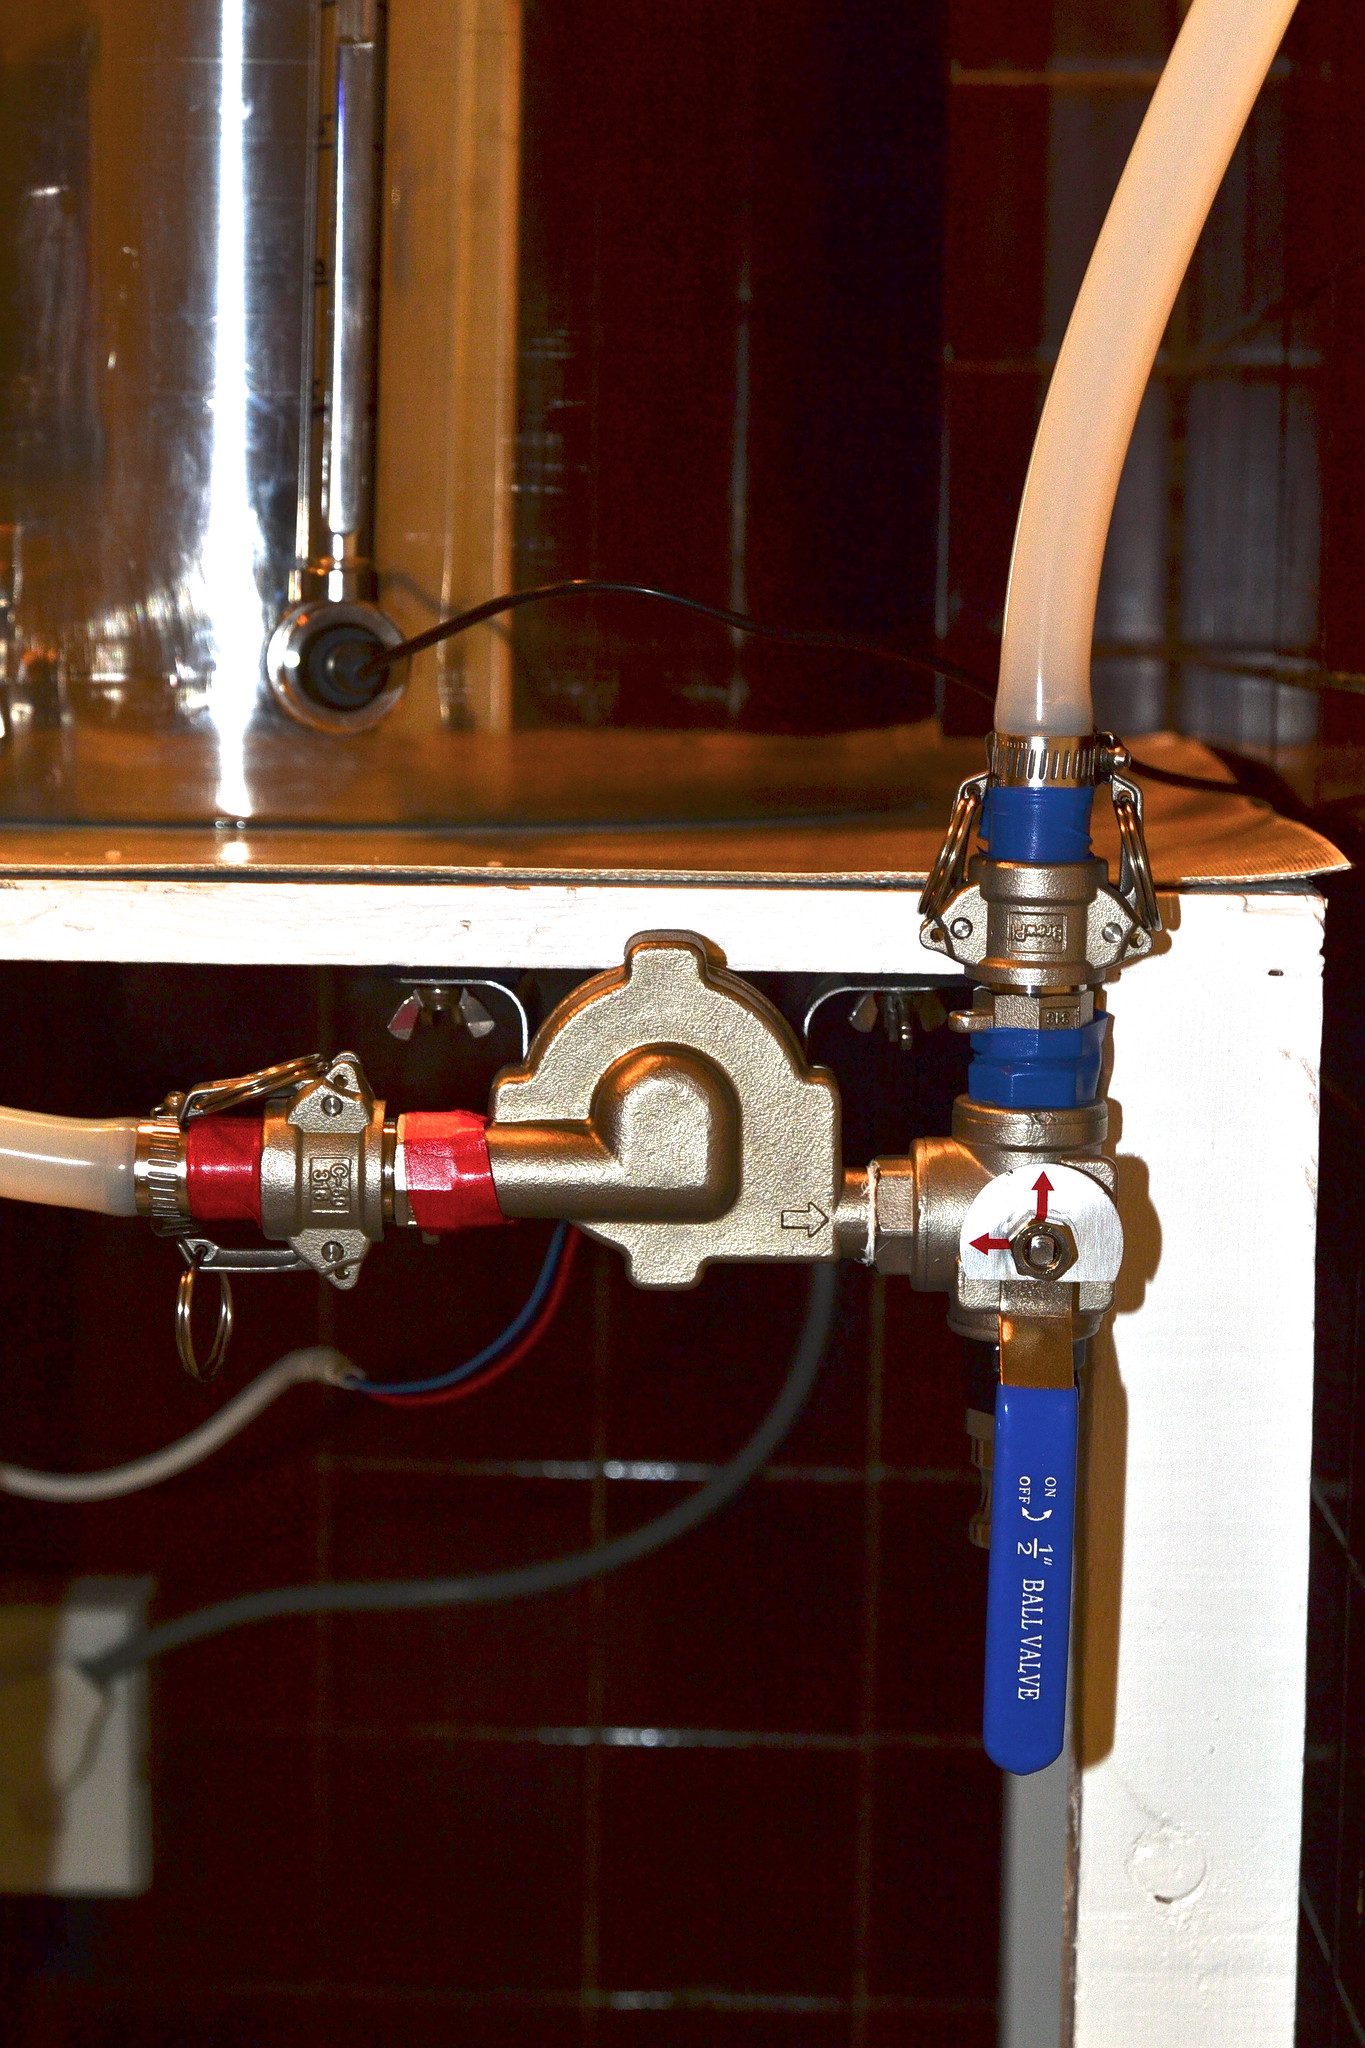
Coming out of the pot I go into the pump. This then goes into a ‘T’ ball valve that routes in an ‘L’ shape:
This allows me to switch between routing up to my lid/spray attachment or down to my counterflow chiller:
I found out the hard way that trying to disconnect and attach tubes with very hot liquid is not the best idea! This also allows me to easily prime the pump.
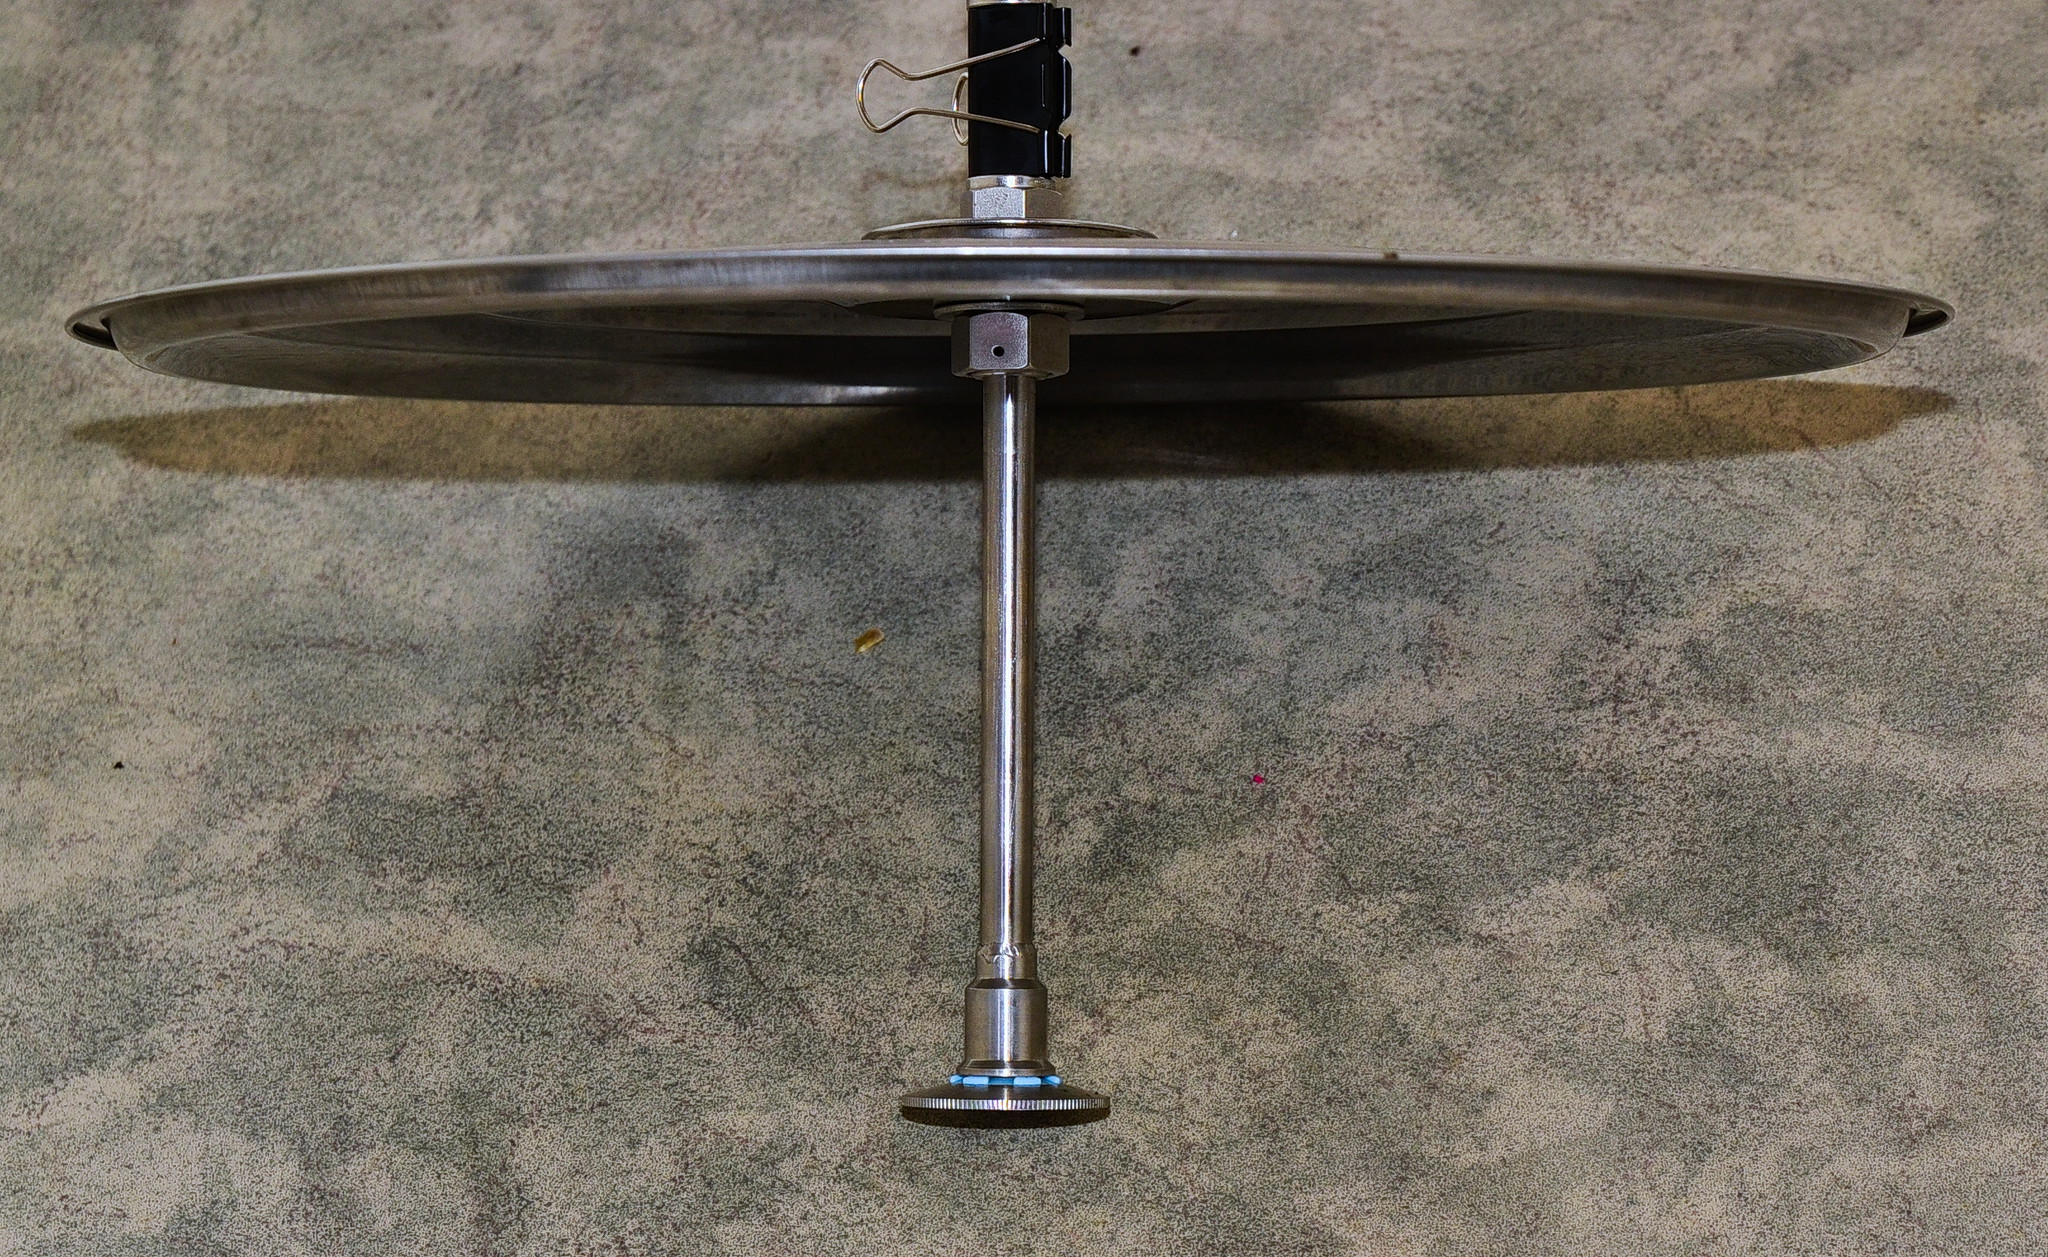
The lid:
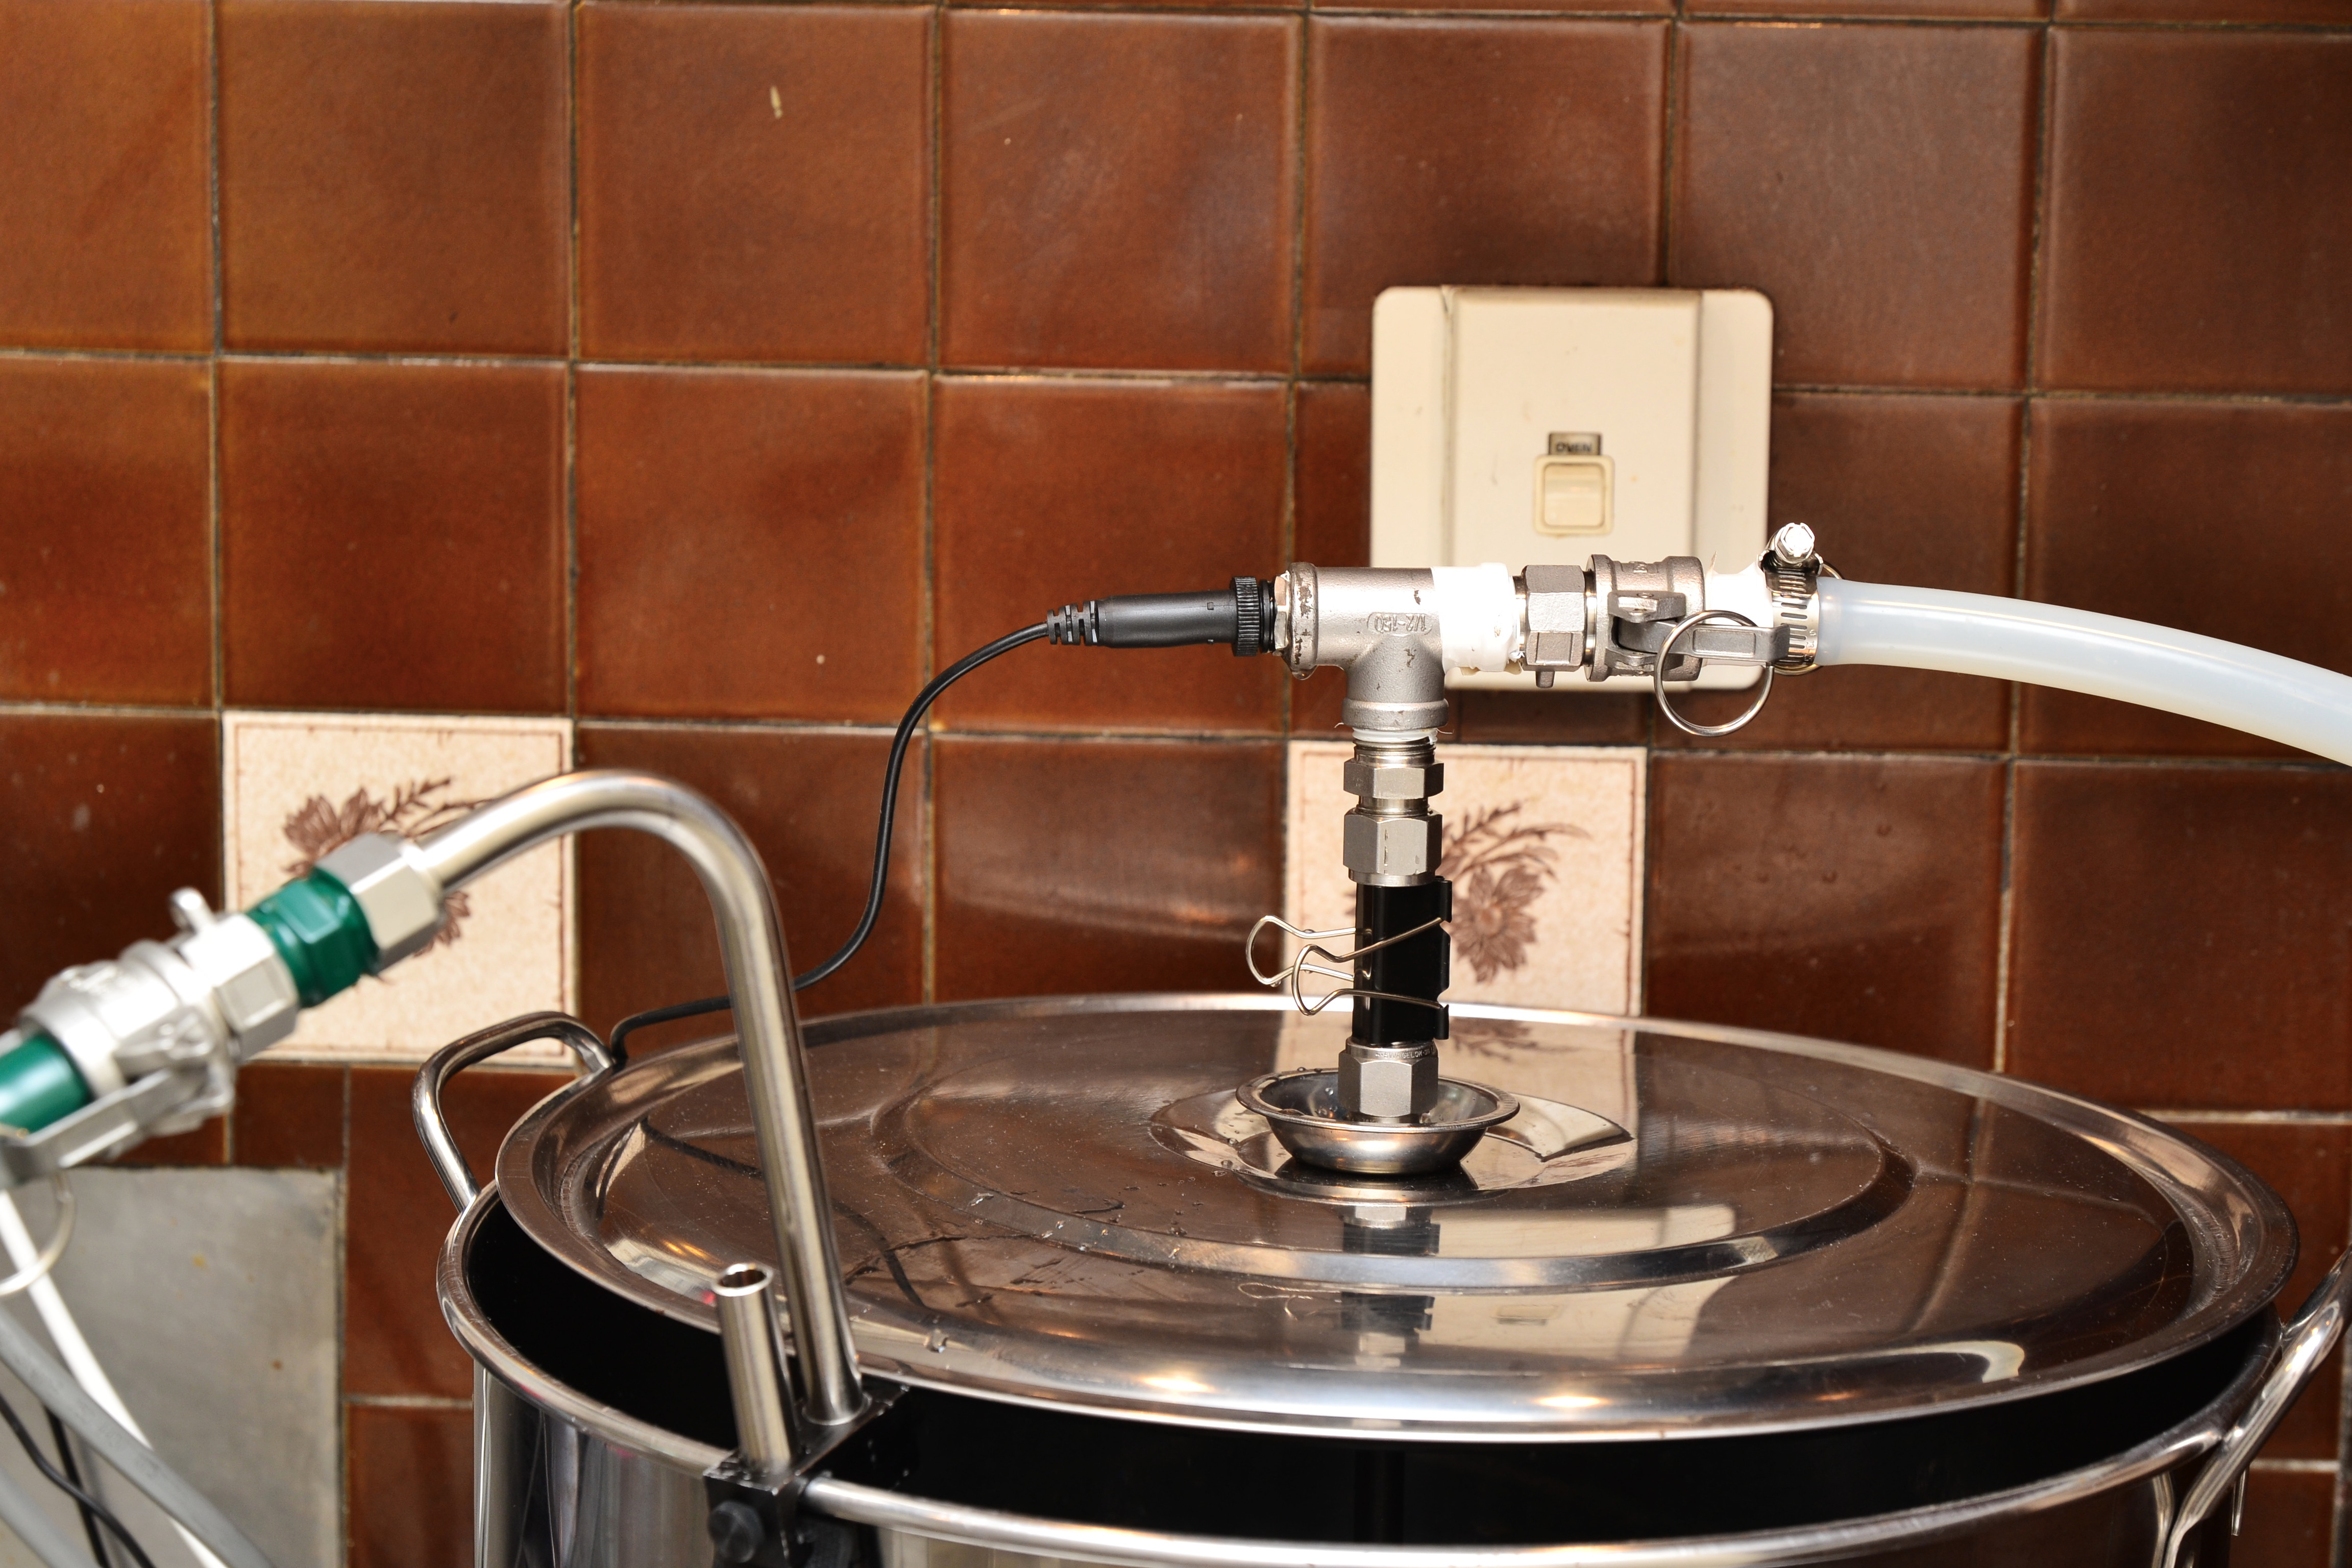
The return from my pump goes into a T-piece which houses another BrewPi short threaded temperature sensor. This is just for logging so I can compare temperature differences to the one inside in my pot used for control.
The pipe that goes through the lid can be adjusted up and down to sit just above the liquid level. This is done using a modified compression fitting that has been drilled right through and has a rubber O-ring inside. It doesn’t quite hold it so I also use the bulldog clip.
On the end of the pipe there is a spray nozzle. For this I purchased a SS Brewtech sparge arm and cut the nozzle off and welded it to a new pipe:
Whirlpool tube:
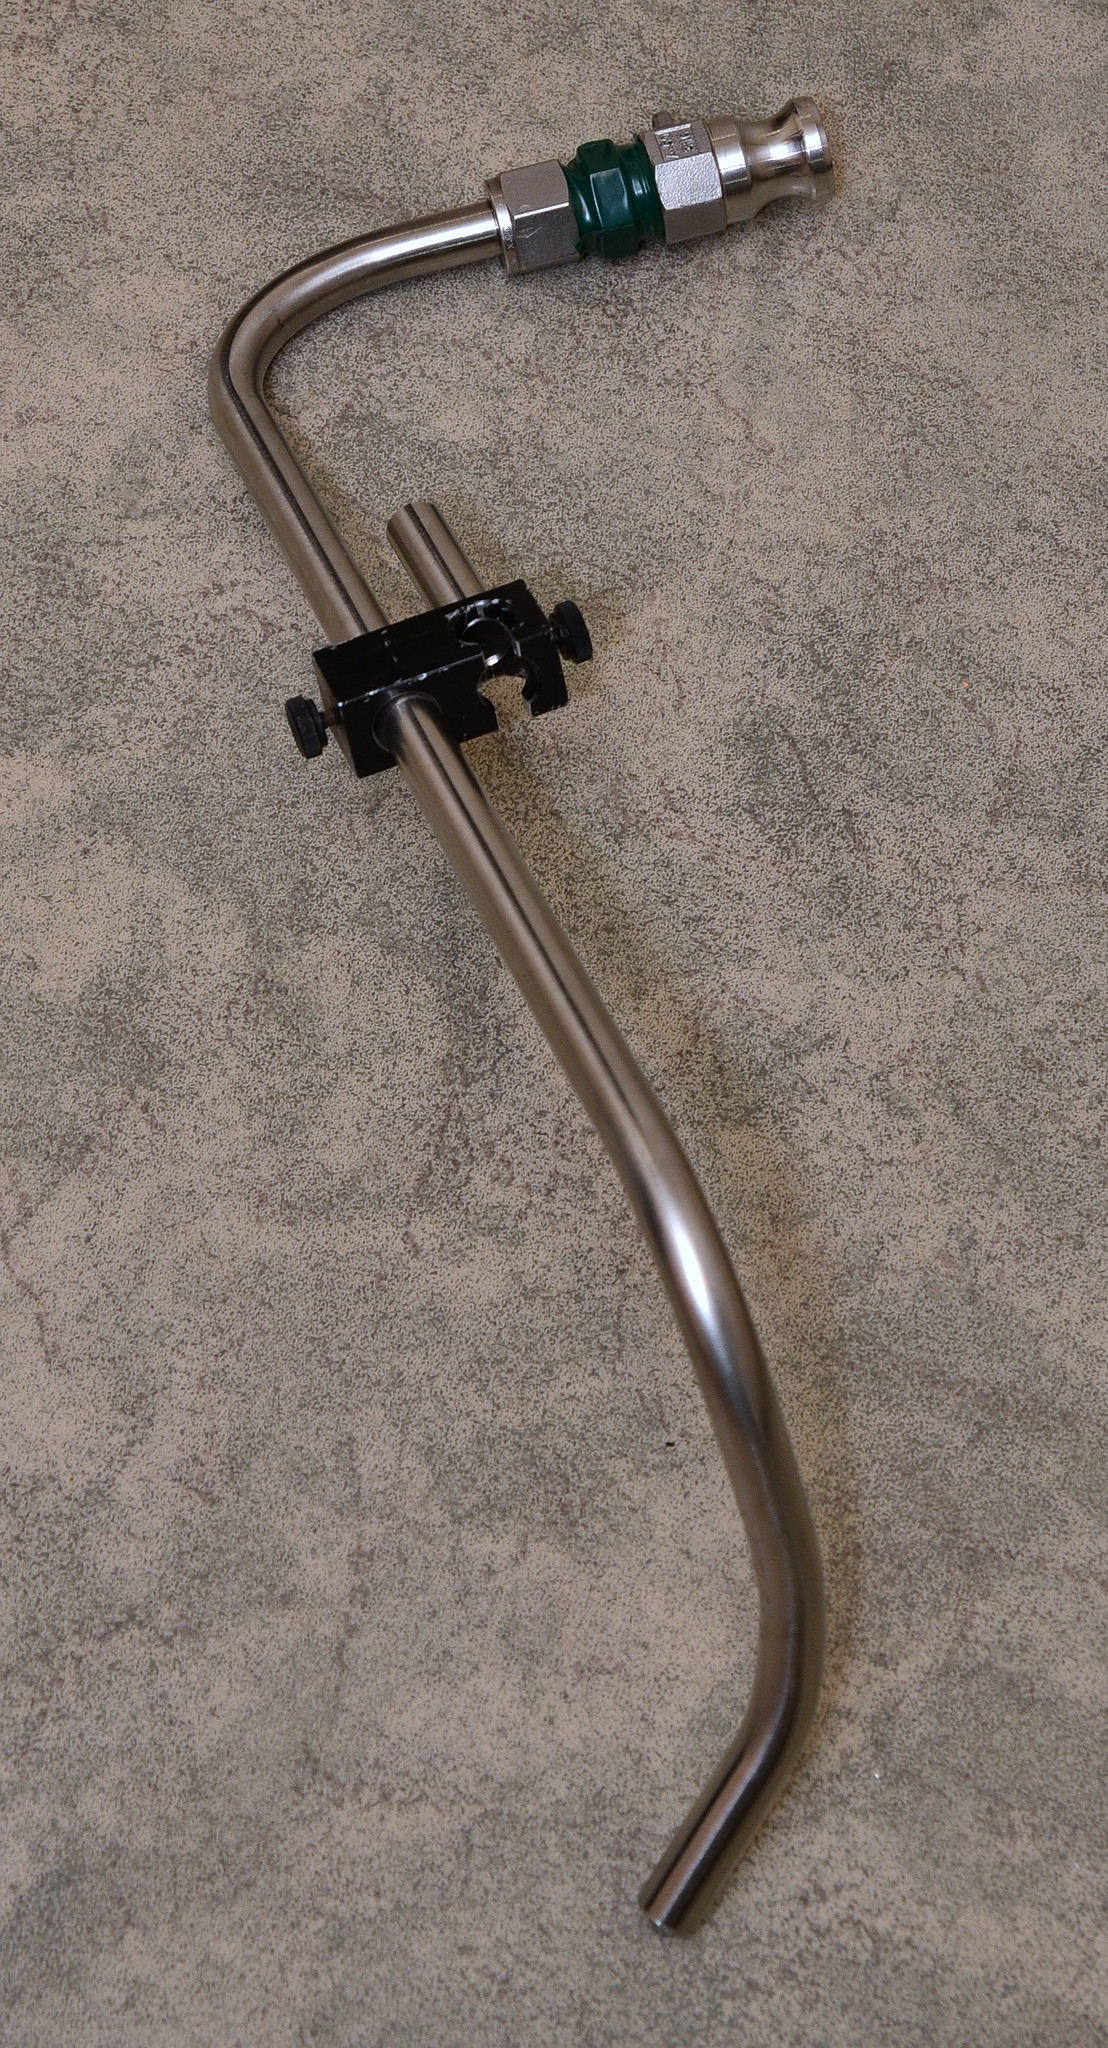
This is also custom made. The attachment bracket needs some work but is functional. It also allows the tube to be raise and lowered to sit just above the liquid level.
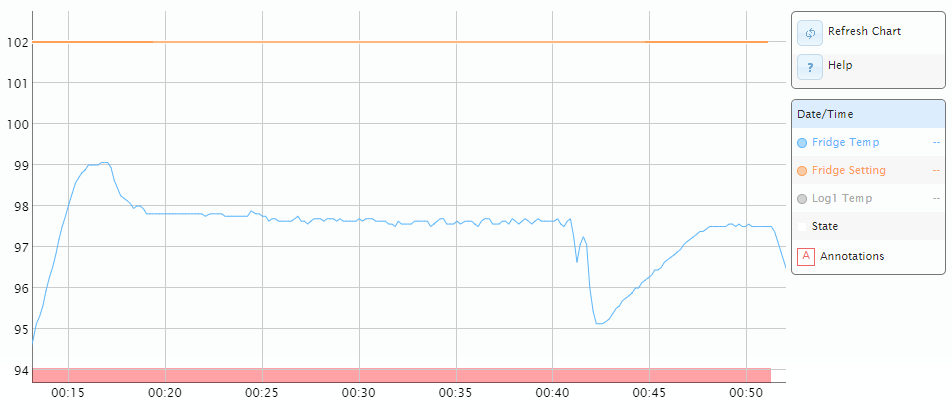
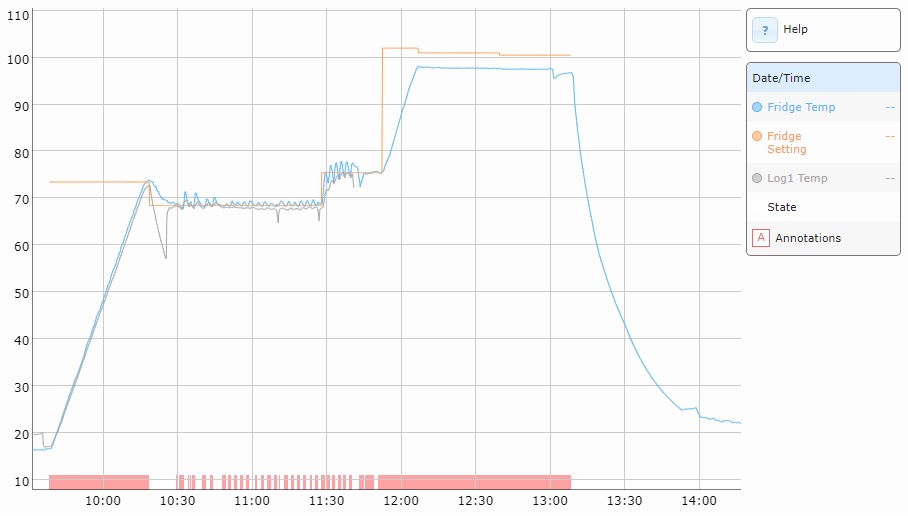
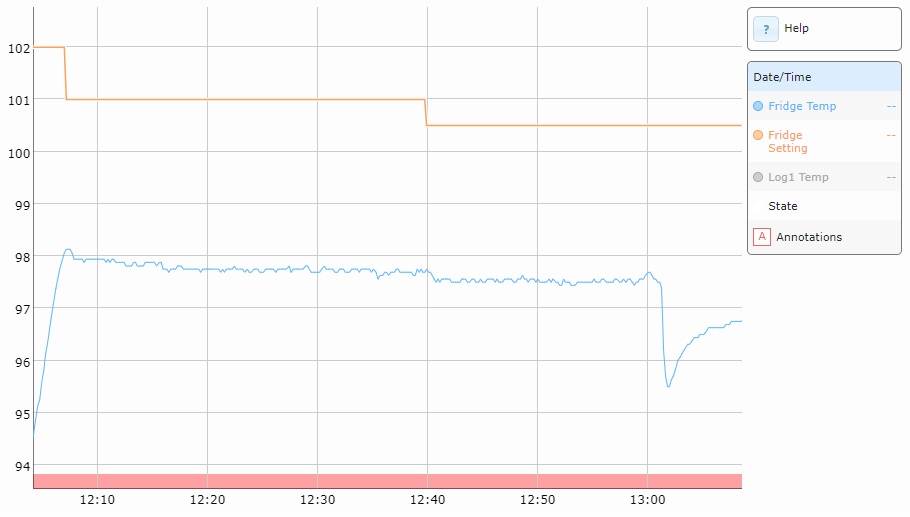
I have yet to actually use this setup to brew anything. On the weekend I ran a water test to make sure the process works and I don’t have any leaks. I also turned the element fully on and tested how long it took to get to 100°C from tap water temperature (winter here at the moment). I then routed it through my counterflow chiller to test that. I haven’t got the cold side of the chiller properly attached yet so it wasn’t working very efficiently:

It took about 45min to get from 16°C to boil then about 25min to actively cool down to 32°C (after a bit of messing about with trying to attach the cold side of the chiller).
Some things I want to do before brewing:
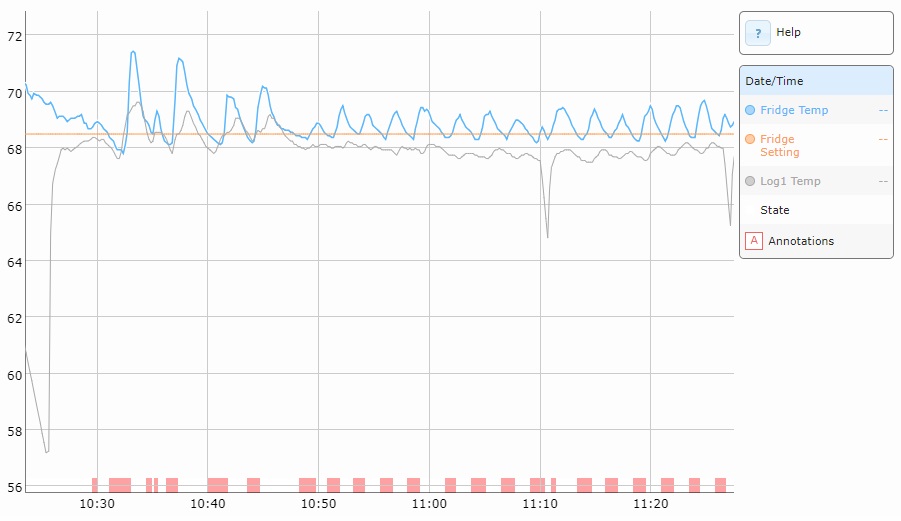
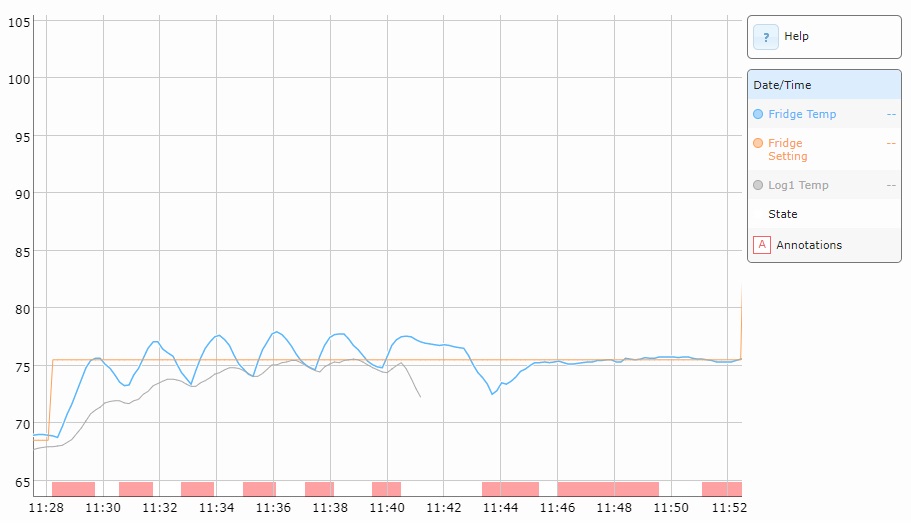
- Tune the BrewPi control settings. First I’ll try with the settings recommended here Using BrewPi 0.4 for mashing and do a mock mash and boil with water.
- Find some chemicals to give my counterflow chiller a good clean out. From what I can see it looks pretty dirty inside (any suggestions?).
Sorry for the lengthy post! Hope it’s helpful for some.
By the way I think it’s always a good idea to have some helpers along the way: