Hello!
I don’t know if this is the right place in the community to ask this, if I’m getting confused that a moderator is moving the post to its place:
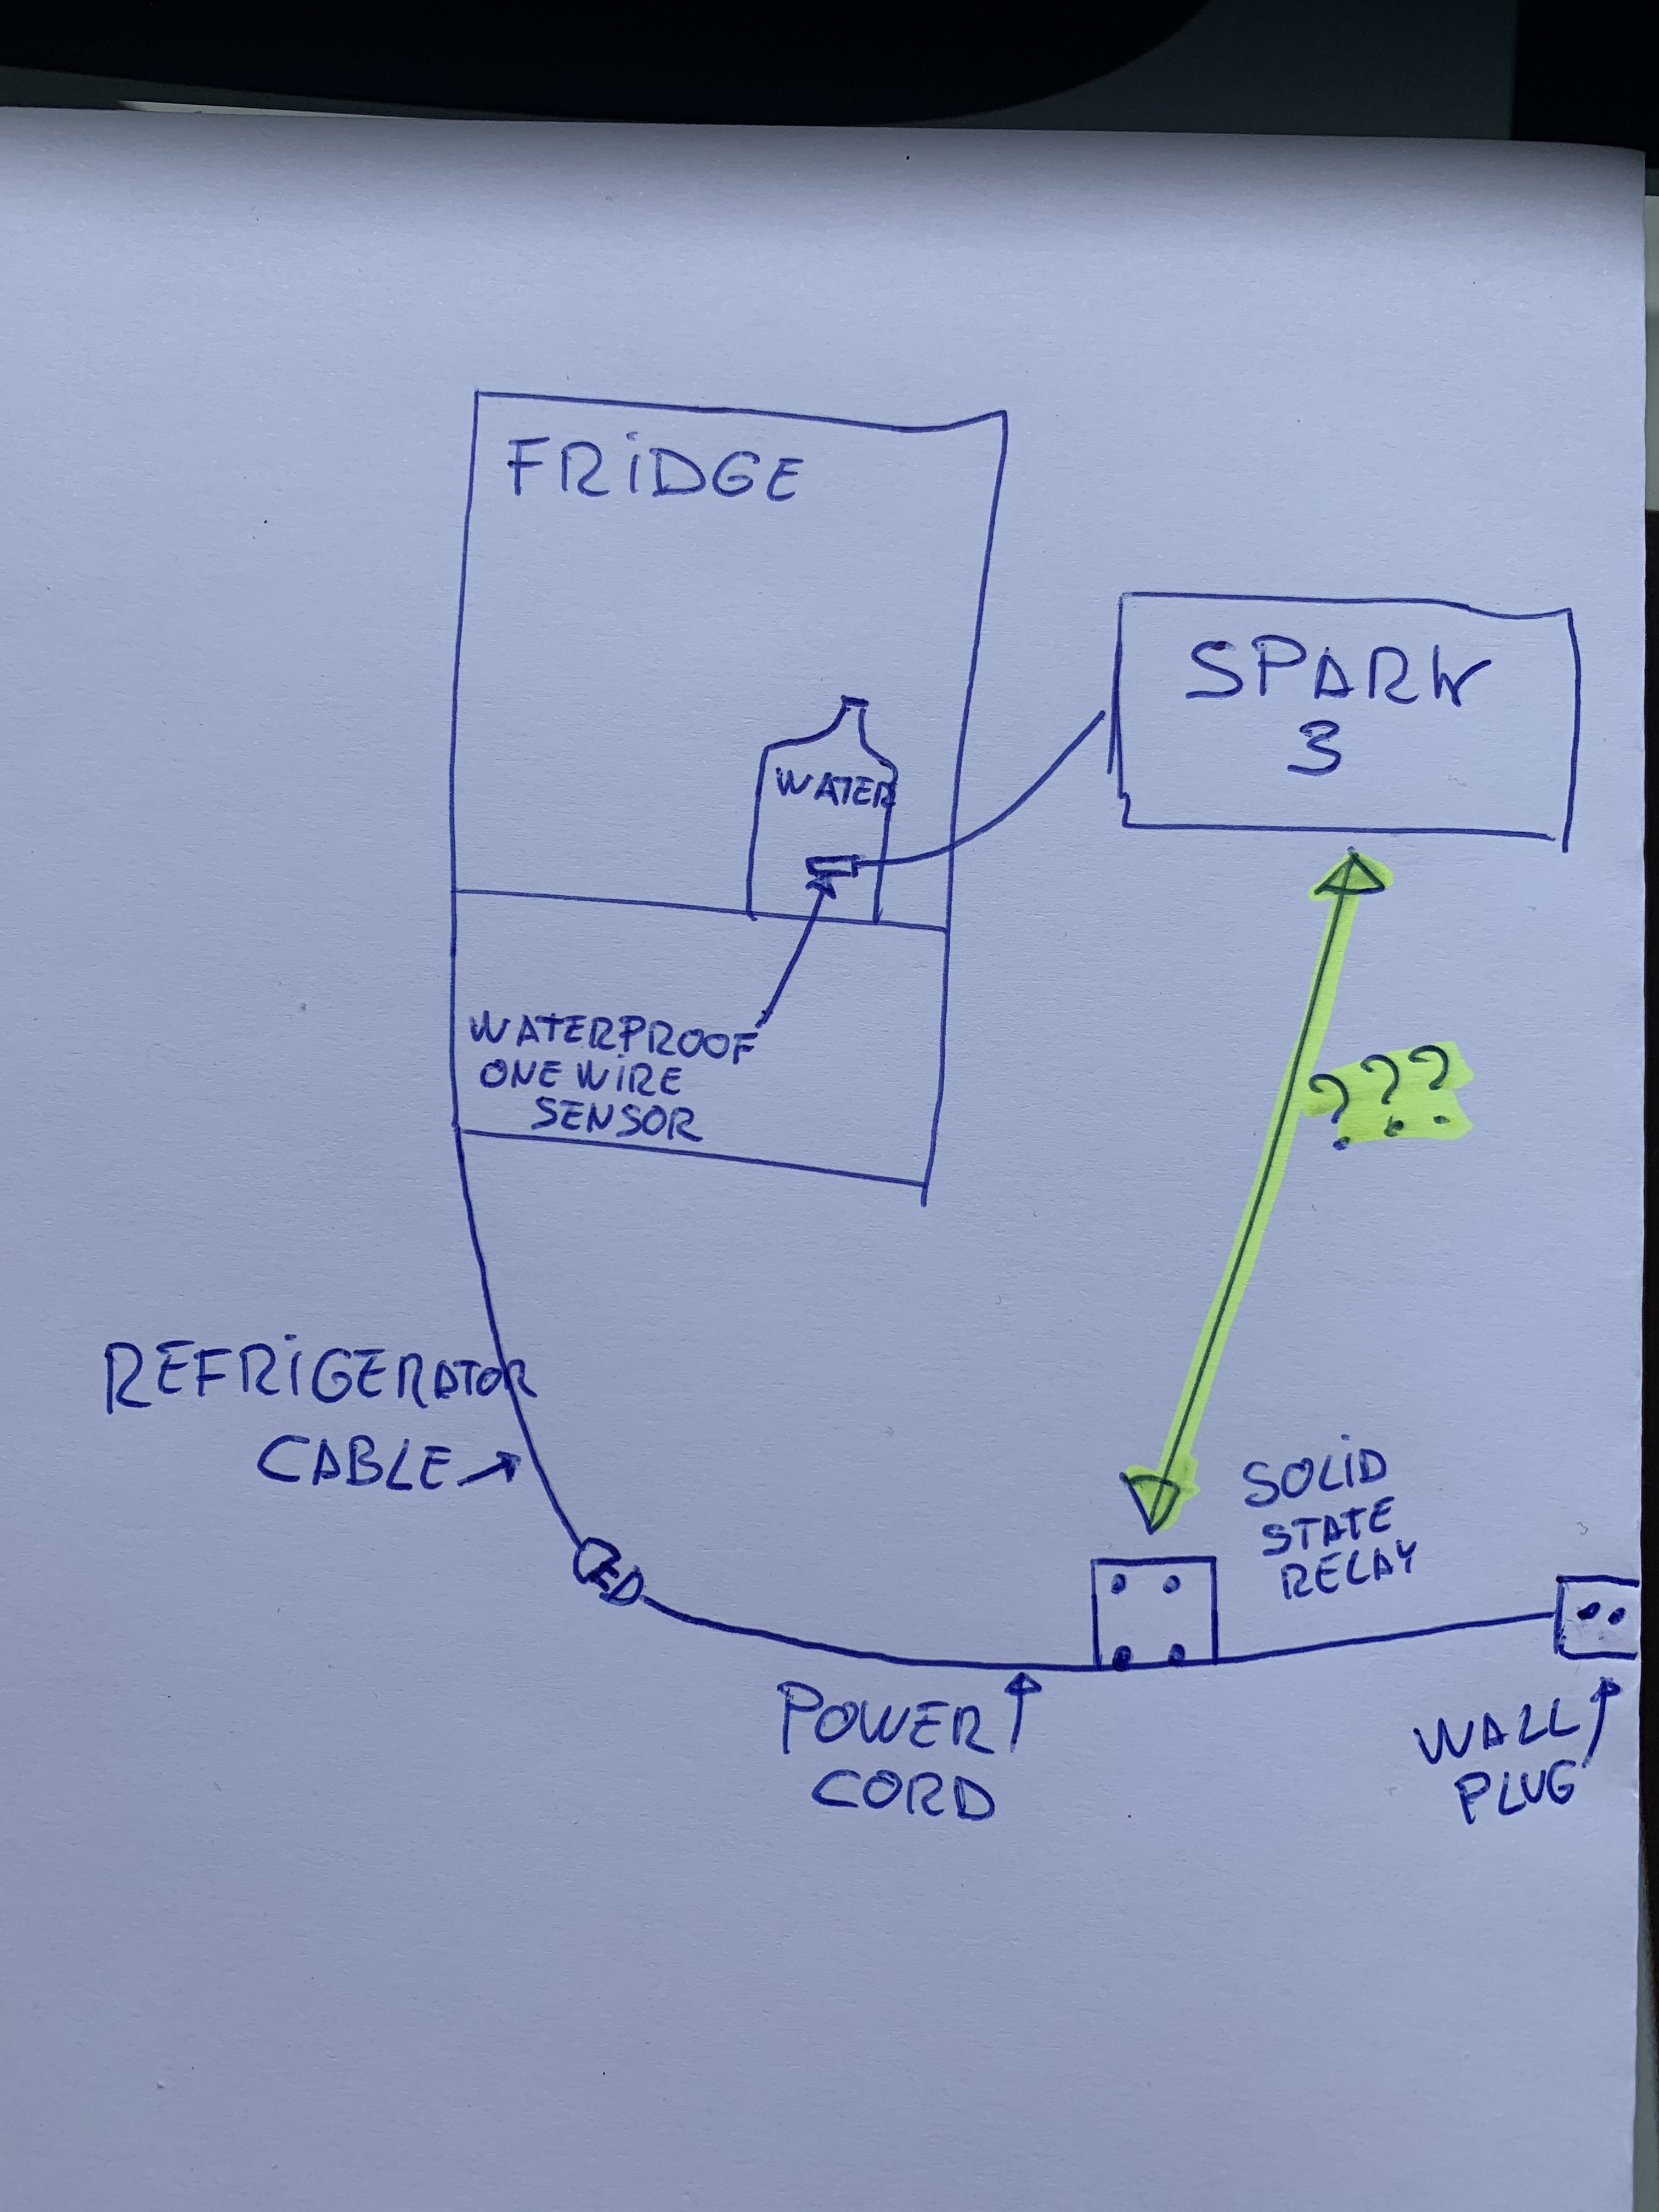
I want to add a fridge control to my Spark system. The Spark is to be a substitute for the Unitank’s FTSS driver.
I just want to be able to have control of the fridge to cool. It is a refrigerator in which I want the temperature to be 4 degrees. The probe would be inserted in a bucket of water so that it is kept at 4 degrees.
I have been reading the tutorial to hack the fridge, but I have many questions:
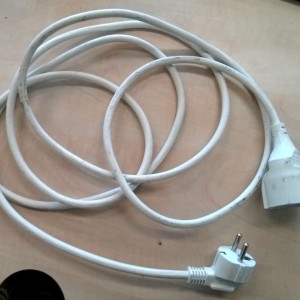
1.- This cable is plugged into the electrical network, and the refrigerator is plugged in at the other end?
2.- What is the black cable seen in the photo?
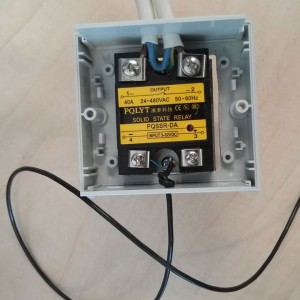
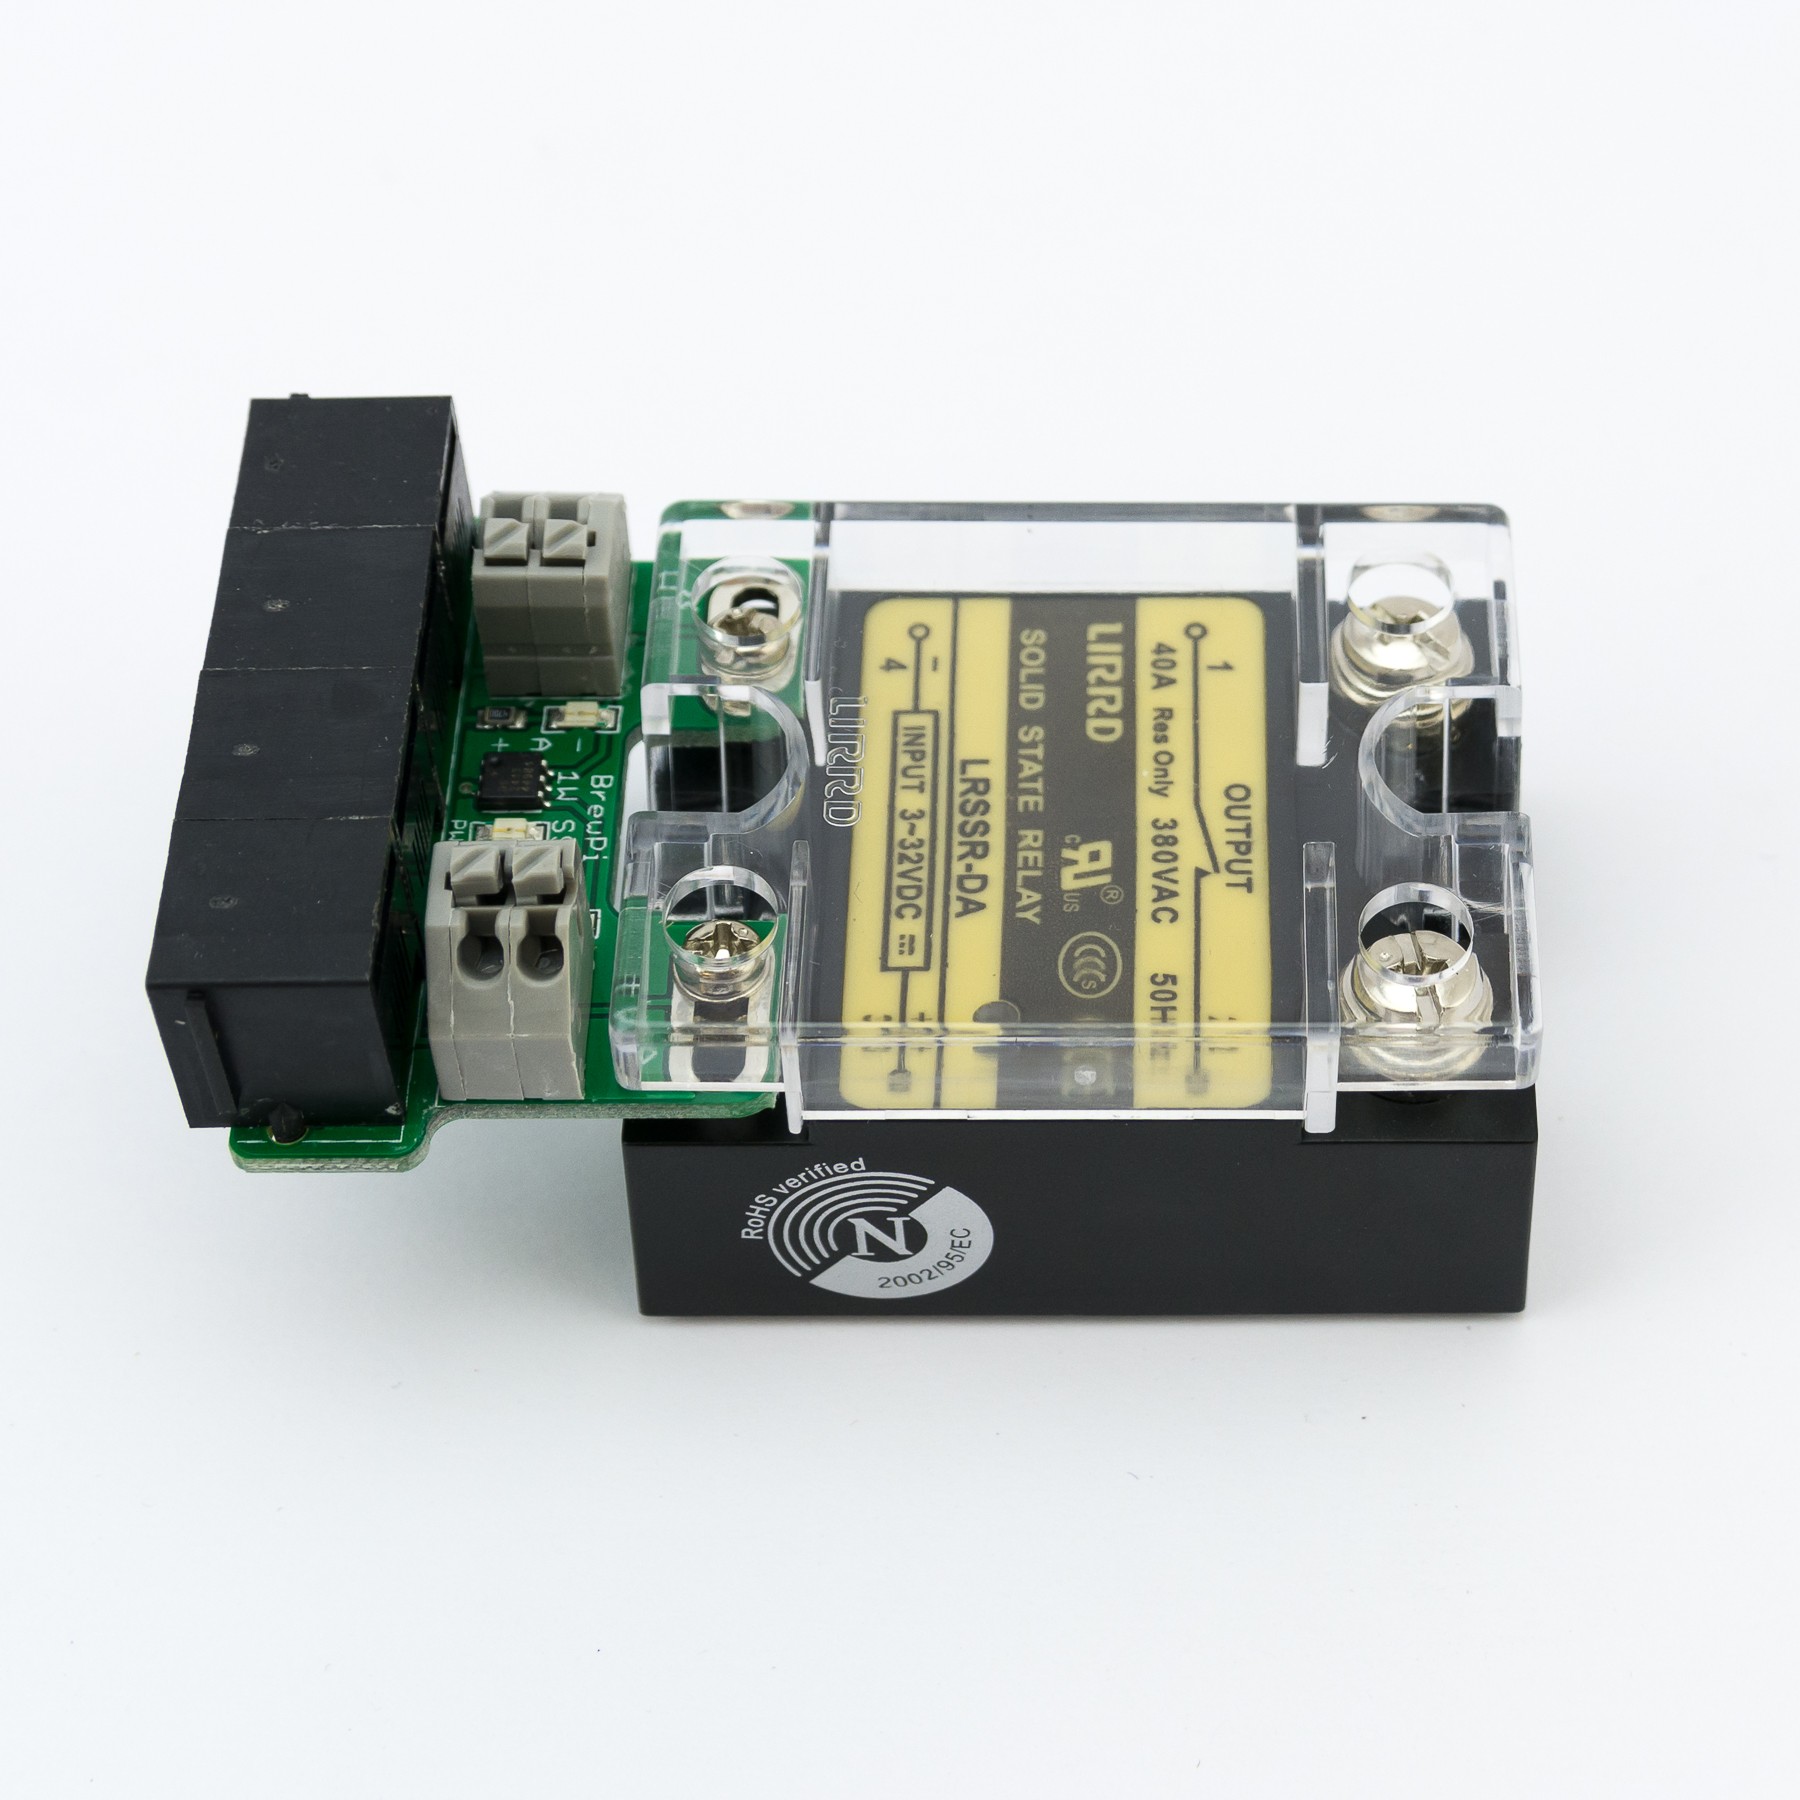
3.- How do I connect the SOLID STATE RELAY (SSR), 10A to the Spark?
I am doing it right?
I am Spanish and I am using the google translator, my level of English is not good.
Any ideas or any other tutorial?
Thank you!
You’re right: the white cable is between the wall socket and the fridge.
The black cable is what connects the Spark to the SSR. It is the on/off switch for the SSR. The SSR only connects the circuit in the white cable if the black cable sends the ON signal.
On the Spark side, the black cable is plugged in using one of the green connectors.
Thanks for the reply, but I still don’t understand it correctly.
1.- At one end of the SSR a power cable must go as shown in the photo. IT IS UNDERSTOOD
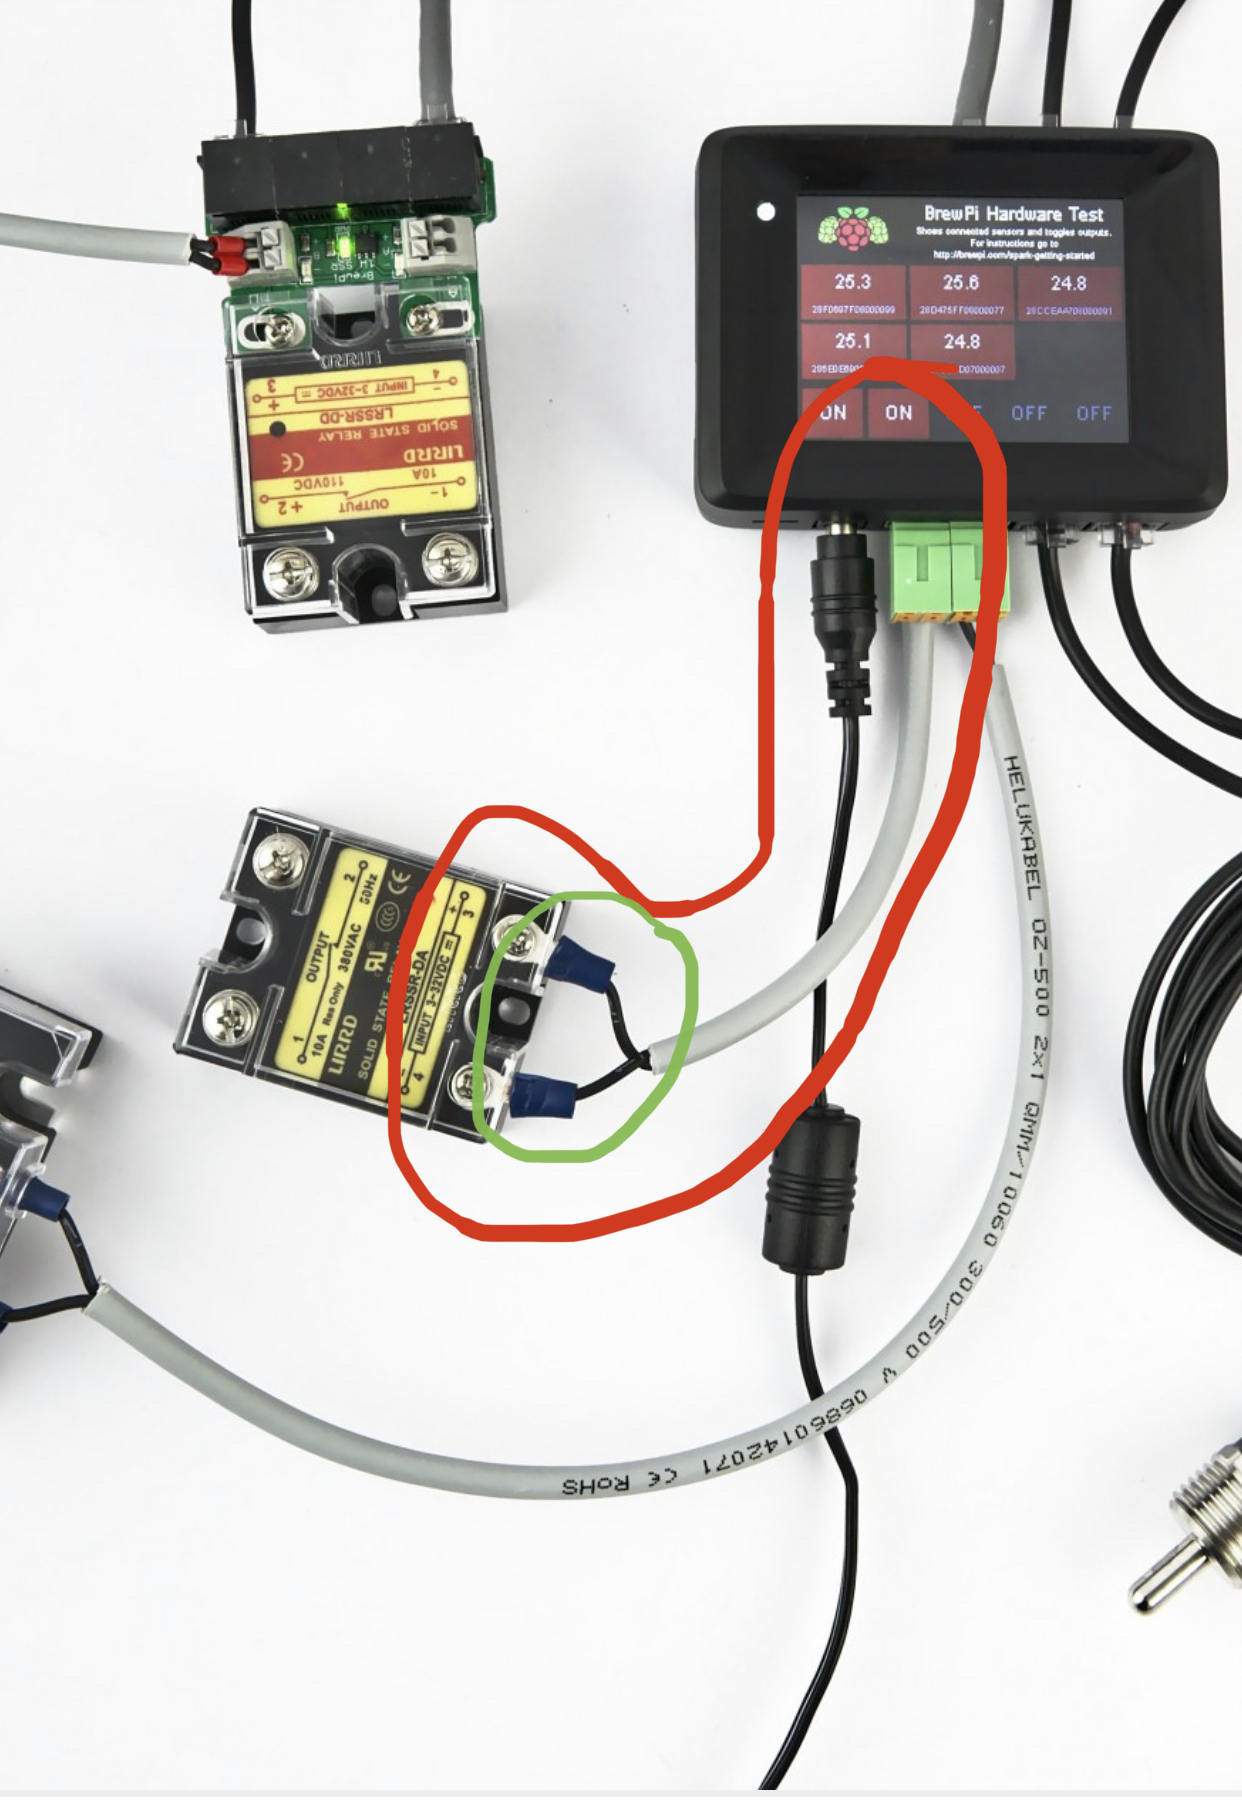
2.- At the other end of the SSR, do I have to make the same connection as the one seen in the photo?
Is this cable?
https://store.brewpi.com/temperature-control/cables/flexible-2-wire-1mm2-cable
How many cables are there, one or two? I don’t understand it well.
Thanks
Yes, the Spark connection is as in this photo.
That cable from the store would work.
There are two cables connected to the SSR. One for power, one to the Spark (for control).
In the power cable are three wires: brown, grey, and yellow/green. The fridge hacking guide shows you how to connect the power cable to the SSR.
In the control cable are two wires. The SSR has positive/negative pins, and the Spark has positive/negative pins. Use the two wires to connect positive to positive, and negative to negative.
Brewblox is not the only one to use SSR switches. You can probably find a Spanish video/guide for connecting SSR cables. The only difference will be the green connector that is plugged into the Spark.
Thanks, I think I’m getting it.
Something else has occurred to me:
Can I connect a BREWPI ONEWIRE SSR EXPANSION BOARD to the SRR, and then connect it to the Spark with an RJ12 cable?
Would it be possible this way, or is it better to connect two cables to the green connector?
Thanks
Yes, that works. The A port on the extension board will then control the SSR.
You can connect OneWire Temperature Sensors or other extension boards in the three other ports.
There is no “better”, but avoid very long RJ12 cables.
Thanks again!
Now I have understood.
Three more questions:
1.- Which SSR do I need?
10A or 40A?
2.- What is port A of the EXPANSION BOARD? Is it marked on the EXPANSION BOARD?
3.- The temperature sensor, where should I connect it?
To Spark, or to the Expansion board?
Thanks again, very grateful for the help.
- 10A.
- Ports are marked on the expansion board.
- Spark is better. Use the expansion board if all slots on the Spark are full.
Edit: we completed some preparations for running Brewblox without a Spark. I’ll make a new topic with instructions.
This will not control your fridge, just show the UI.
Edit 2: Feature preview: Spark firmware simulator for Raspberry Pi
1 Like