I will receive very nice thermowell sensors tomorrow, a new design with flange.
I would stick to using 2 sensors. That way you can let T2 be the fridge temperature, and let it be a bit above your target mash temperature to reach your setpoint quicker.
Assign T1 as beer temperature. The beer-to-fridge PID will determine your fridge/RIMS setpoint, so the target for T2.
You can set the maximum difference with the beer setpoint in advanced settings.
Your heater H1 will be driven by the fridge setpoint and T2. Because you are only heating a very small volume, make Kp smaller than the default, my guess is about 10. I think Ti 300 and Td 60 would be a good first try.
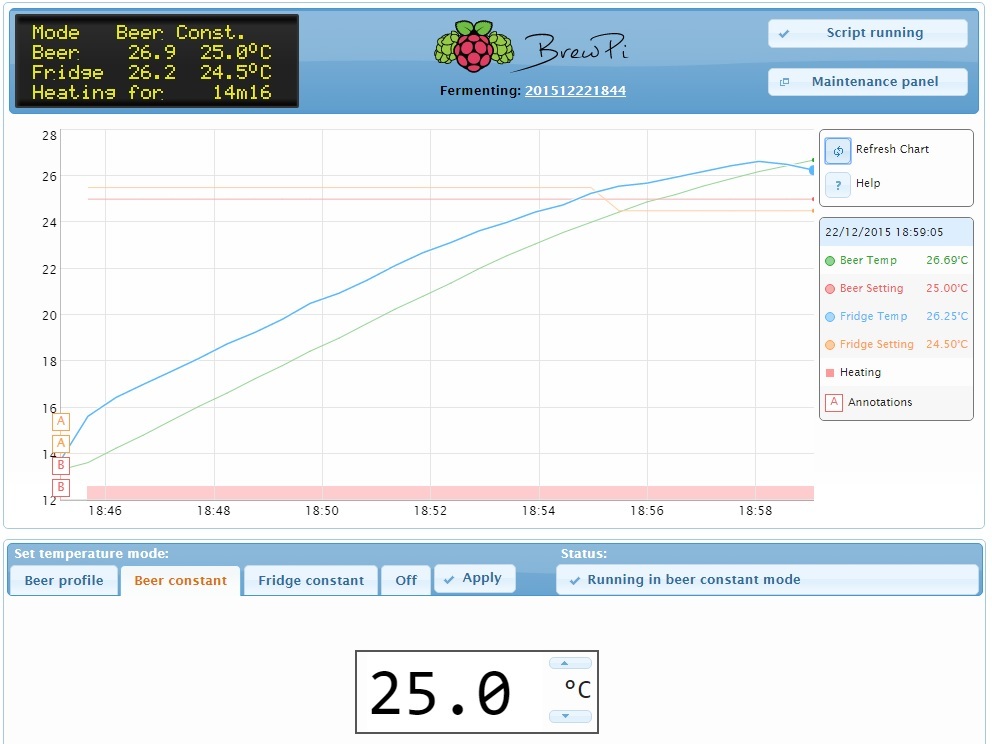
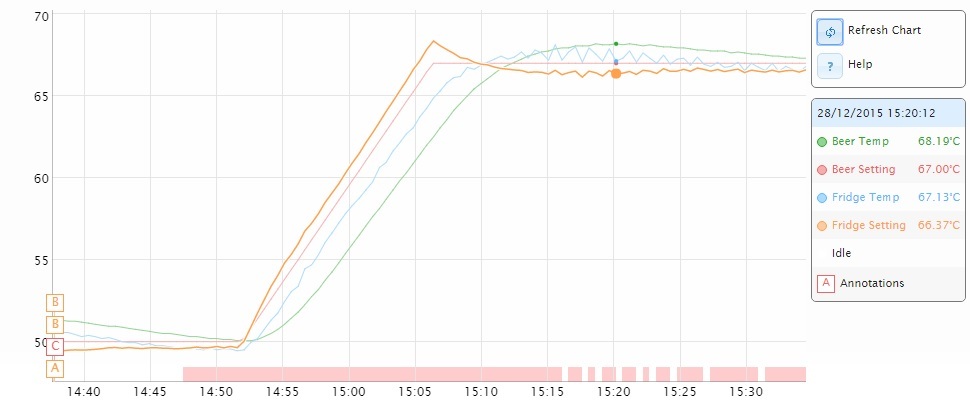
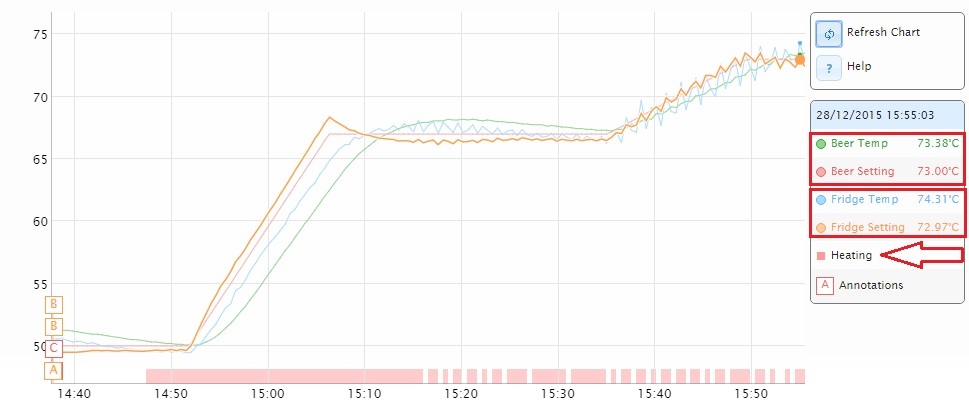
So I got my first mash nailed today, and evererything went pretty smooth.
There was a bit of overshooting, but not anything to worry about.
ORANGE is target temp, BLUE is temp sensor at pump, which is used to control the heating element, and GREEN is a sensor submerged in the grain bed.
The green spike at 14:50 was when I removed the sensor, for adding the grains, the blue spike at 16:05 was when I applied a gas burner as supplementary heating, and has nothing to do with the software.
Overall I am really pleased. Now I just need to figure out how to used the BrewPI for controlling the intensity of my boil also.
I noticed that I did not update the recommended settings for 0.4.1. I have updated them now.
Brian: uninstall your cooler when using for mashing, so it will not be activated.
HDTV devil: I think you’ll have better results with heater1 Kp set high, for example 50. Because with the proportional gain at 50, the actuator will clip to 100 faster and the integrator will not wind up while it is clipped to 100.
Also please take a look at the new recommended settings. To prevent overshoot you can also increase Td.
If you want to manually set the heater PWM value for boiling, this is supported by the controller.
The web interface just does not have a button for this yet. You can use this hack until it is implemented.
Set the mode to OFF. This will prevent the PIDs from setting a PWM value
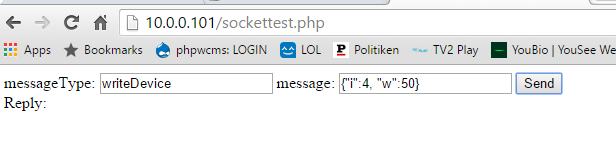
Go to /sockettest.php
Send a message with messageType = writeDevice, message = {“i”:, “w”:<0-100>}. You can refresh the device manager with ‘read values’ checked to verify that the PWM value was set.
I have released an update for the script that fixes the control algorithm tab not working properly. That will give you a bit more info on what the controller is doing.
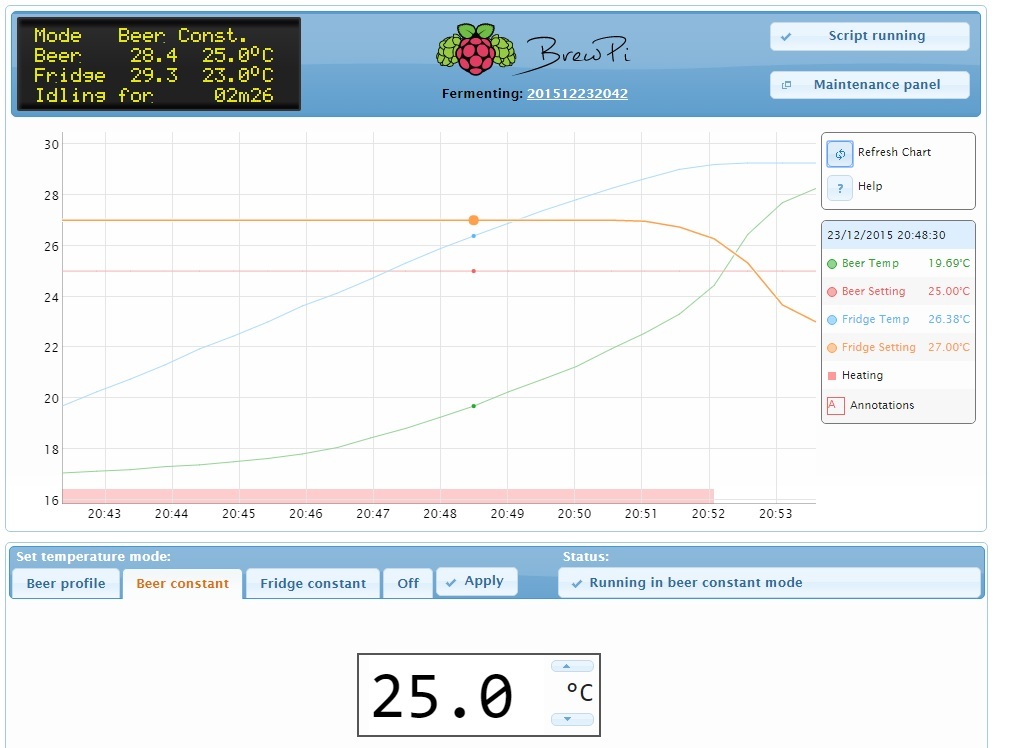
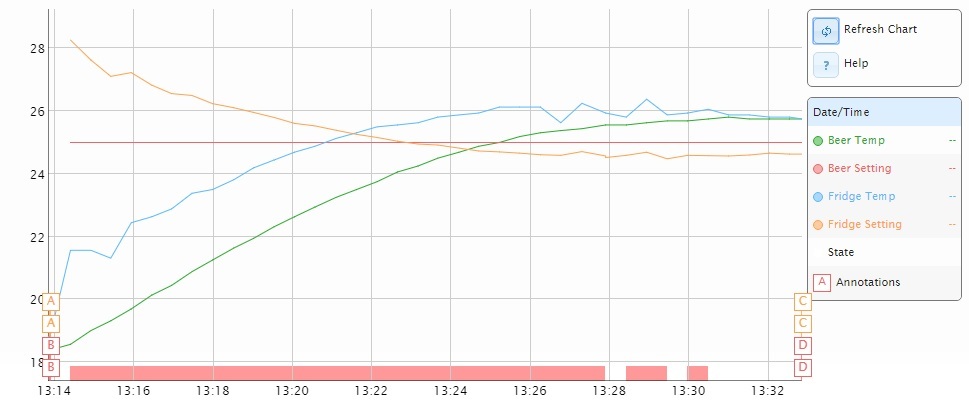
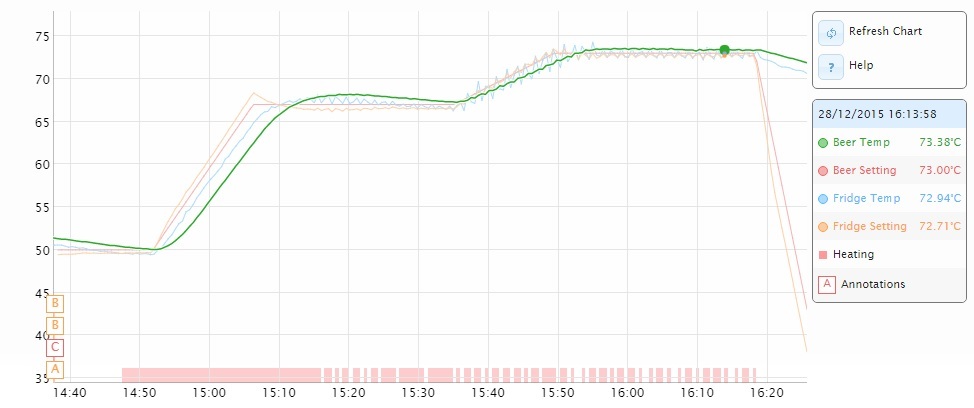
On larger heat increases, the overshoot is a lot more than on small differences. Here it overshoots 1.2C. Strangely enough, it decides that it still needs to heat although it is above the set temperature.
Observations: Heater 1 KP = 20 gives a smooth graph but overshoot a lot. Heater 1 Kp = is a more staggered graph but not much overshoot. Will see if I can do a wort test tomorrow.
If your kettle is at 65 degrees, you will have losses to the environment. It will still be heating to compensate that, even if it has reached the setpoint. The integrator does this.
What happens is that during the ramp, your actuator will be maxed by Kp. The integrator will be zero. When it reaches setpoint, the output is not maxed and the integrator is allowed to rise. The overshoot is because the integrator built up too quickly (during the last bit of the ramp). You will have better results if you increase Ti (so it takes longer for the integrator to build up, this reduces the buildup during the last bit of the ramp). And you will have less overshoot if you increase Td (further ‘lookahead’ which reduces output).
@elco I was copying and pasting from your instructions but I’ve worked out the issue. I reset all to factory defaults and then added just the PWM actuator and it worked! I then added a temp sensor and it continued to work but as soon as I added a second sensor it stopped working.