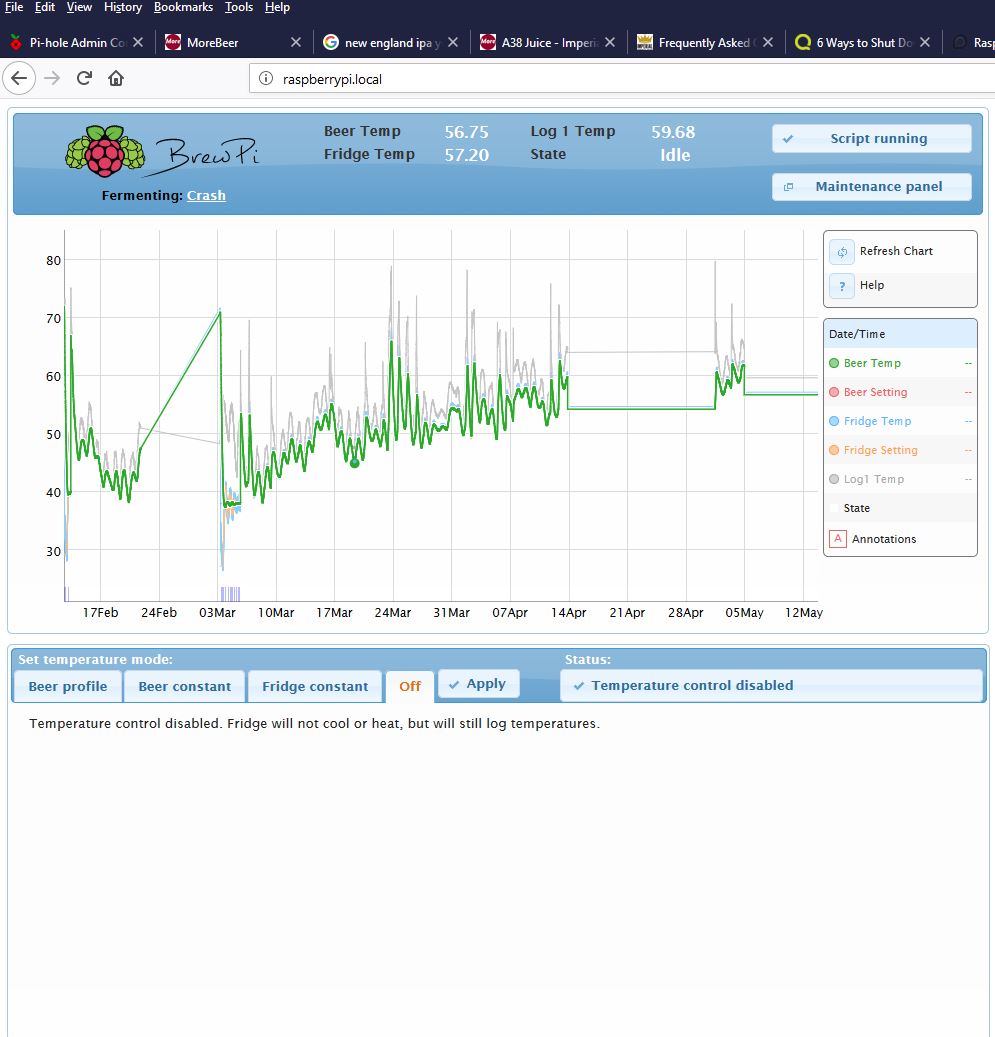
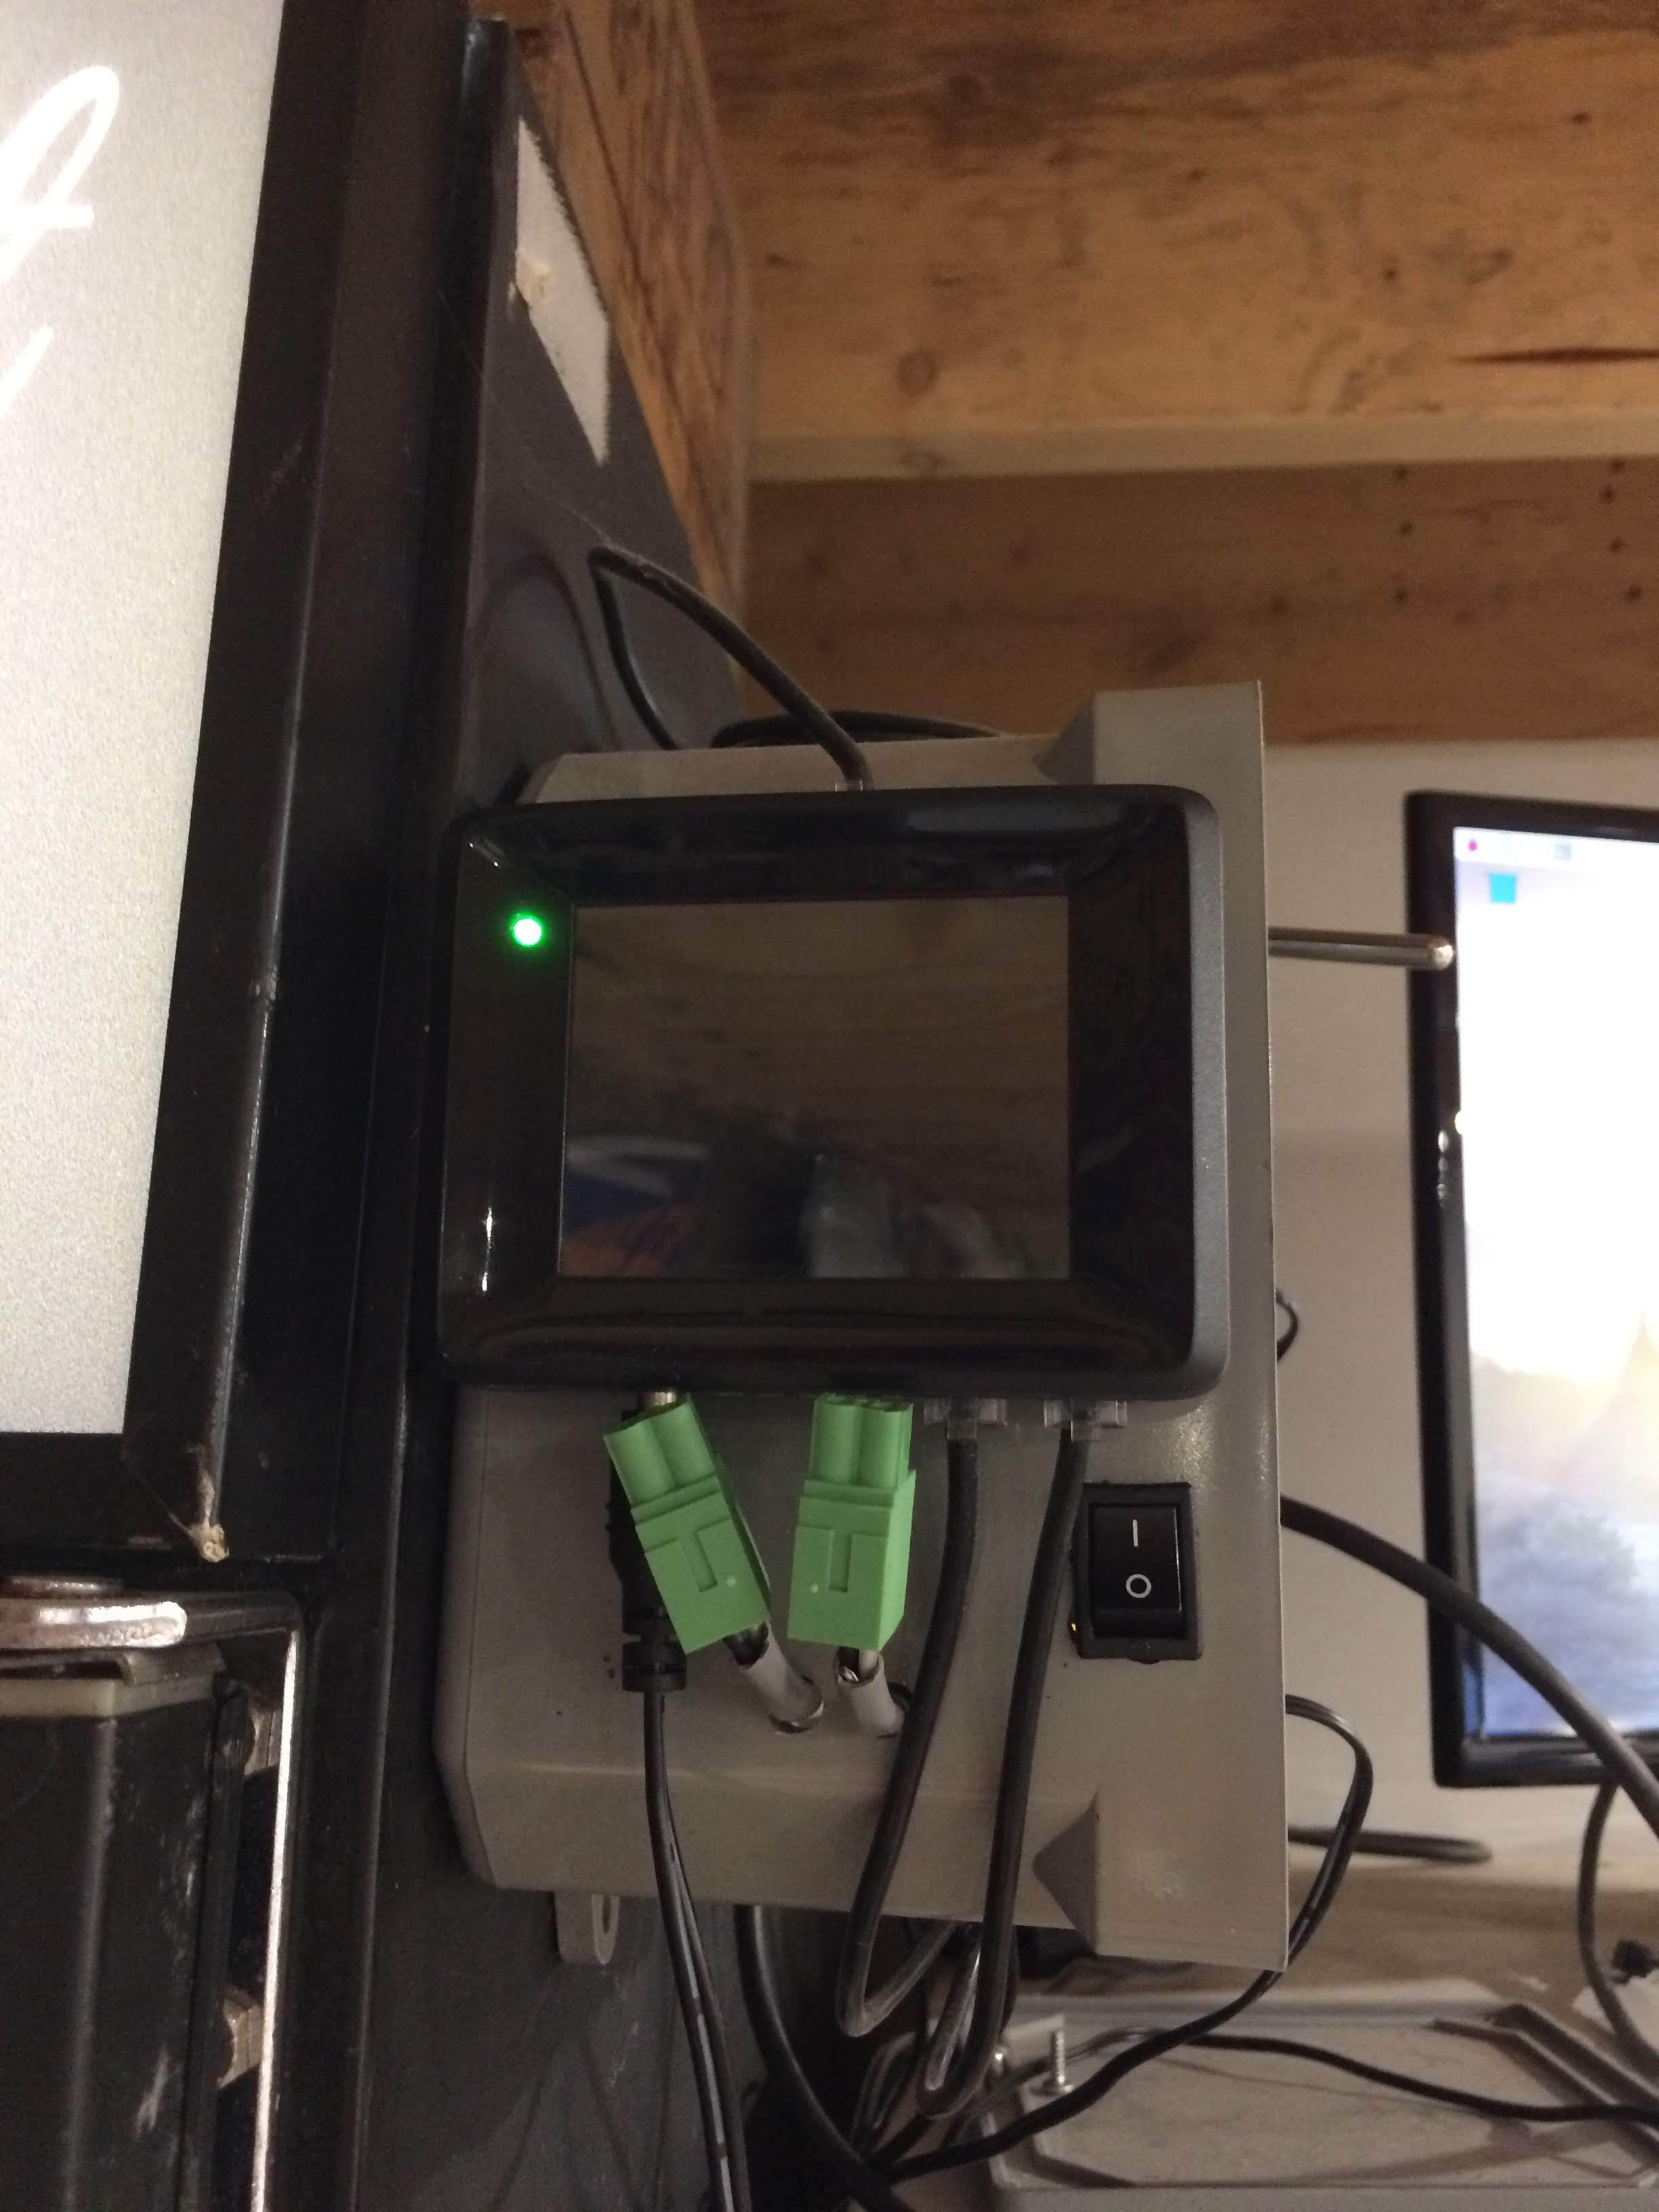
Yes, Using BrewPi, Spark is powered, monitor is “blank” backlit can be seen (monitor does work ). Can’t callup BrewPi using WiFi on my laptop either. Some pictures
Are you not using the web interface from another laptop? Most users don’t connect a screen to the pi and only log in remotely.
Did you enable ssh?
I must have, right ?? It has been running. I have four batches fermented using it. I have the monitor next to the fermenter just trending the profile. Don’t login with the laptop too often but when I noticed the monitor was dark I tried. I can’t ping it either so I guess unplug and keep my fingers crossed ???
Even back in Legacy, the RPi serves the web pages and allows you to configure the controller. Unless you are expecting a complex temp profile (where the RPi will have something to do) rebooting will not be an issue. The controller should do what it’s supposed to do.
So … without a screen. Try to SSH to it. If you need instructions on that, Googling it will give you a plethora of information. Hopefully you enabled SSH. If not and/or if it does not work you’re left will pulling the power and hoping for the best.
Powered down and did a full image of the SD card… only have the USB cable from the Spark and
power connected. Screen shot from my laptop over WiFi… Time will tell I guess.
I have seemed to have fixed the server from going dark on a connected monitor and keyboard by putting everything on a m2.SSD. Boots from the SSD, no more micro SD cards. As I am setting the SSD card I see the BrewBLOX is now the latest ?? If I were to setup a new SSD card with BrewBLOX could I go back to BrewPI by just switching SSD Cards ?? I’m a touch gun shy with the current system running well… Just use the Spark3 for fermentation running a refrigerator hack. Convince me I should make the step up !!
Here is what I added
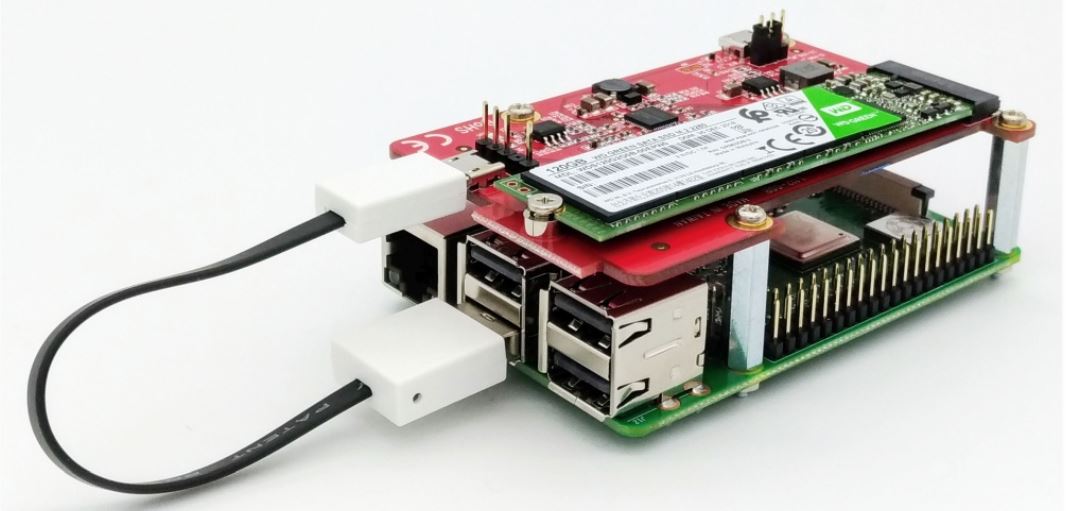
Nice setup. SD cards often are the first failure on a Pi.
Switching between BrewPi and BrewBlox is a matter of changing drives on the Pi, and reflashing the Spark.
BrewBlox is a significant upgrade from BrewPi, with a big focus on flexibility.
- Support for multiple fermenters controlled by a single Spark.
- Support for multiple Sparks controlled by a single UI.
- Built-in support for a wider variety of processes:
- Fridge fermentation (same as the classic BrewPi)
- Glycol-cooled fermenation
- HERMS
- RIMS
- Configurable dashboards, graphs, and sessions.
- Streamlined installation process. You can still manually tweak settings on your Pi, but you don’t have to.
- Regular updates. BrewPi is very much end of life, and will not receive any updates or bug fixes.
- The UI is a lot prettier =)
On the whole, you can do a lot more with it, but don’t have to. You can run a wizard to reproduce a BrewPi fridge setup, and then profit from the better quality graphs, sessions, and temperature profiles.
Thanks, that’s the info I needed to convince me to give it a go !!! Looks like my weekend project. Can I retrieve my fermentation profiles off of the BrewPi system and use them in BrewBlox ?? Thanks again !!
I’m afraid that’s not possible. The process for automated exports would be more cumbersome than manually copying values.
1 Like
Sooooo, got my new SSD card and tried to install Brew BLOX. setup of the SSD went without a hitch. So did the flash of the Spark, I think…
pi@raspberrypi:~/brewblox $ brewblox-ctl flash
Please press ENTER when your Spark is connected over USB
Running command:
** docker-compose down**
Removing network brewblox_default
WARNING: Network brewblox_default not found.
Running command:
** docker pull brewblox/firmware-flasher:rpi-edge**
rpi-edge: Pulling from brewblox/firmware-flasher
Digest: sha256:56e8240e02f41f37dd559ff79b30fb068710f1a4f85328f10fc96ab02bd5abae
Status: Image is up to date for brewblox/firmware-flasher:rpi-edge
docker.io/brewblox/firmware-flasher:rpi-edge
Running command:
** docker run -it --rm --privileged brewblox/firmware-flasher:rpi-edge trigger-dfu**
Running command:
** docker run -it --rm --privileged brewblox/firmware-flasher:rpi-edge flash**
Flashing P1…
Flashing System 1 file…
Flash success!
Flashing System 2 file…
Flash success!
Flashing Firmware file…
Flash success!
Then did
pi@raspberrypi:~/brewblox $ brewblox-ctl wifi
Please press ENTER when your Spark is connected over USB
Running command:
** docker-compose down**
Removing network brewblox_default
WARNING: Network brewblox_default not found.
Running command:
** docker pull brewblox/firmware-flasher:rpi-edge**
rpi-edge: Pulling from brewblox/firmware-flasher
Digest: sha256:56e8240e02f41f37dd559ff79b30fb068710f1a4f85328f10fc96ab02bd5abae
Status: Image is up to date for brewblox/firmware-flasher:rpi-edge
docker.io/brewblox/firmware-flasher:rpi-edge
Running command:
** docker run -it --rm --privileged brewblox/firmware-flasher:rpi-edge wifi**
IMPORTANT: answer ‘no’ when asked to scan for Wifi networks
? Should I scan for nearby Wi-Fi networks? No
? SSID asus_repeter
? Security Type WPA2
? Cipher Type AES+TKIP
? Wi-Fi Password XXXXXXXXX
Done! Your device should now restart.
The Spark didn’t reset and is now a dark screen with a flashing green LED
Any thoughts ???
Fast green blinks indicate it’s trying to connect. Expected would be that it blinks green for a bit, then purple/yellow as it downloads the bootloader from the cloud.
After that it should reboot, and show IP address and bottom text on-screen.
Some initial steps for fixing the problem:
- Your log has SSID as
asus_repeter. Shouldn’t this beasus_repeater? - Does your Wifi network have internet access?
- try resetting the device by unplugging/replacing the usb/power cable.
- Try resetting wifi credentials by holding down the setup button for 10 seconds, and then re-running the wifi command.
Repeater has been a misspelling that I’ve been to lazy to correct, I’m on this connection now writing this, the USB cable is the same one that was running Brew-Pi, so I’ll try the setup button and run the wifi command. Thanks for the help !!
Holding down the setup button and re-running the wifi command did it !!
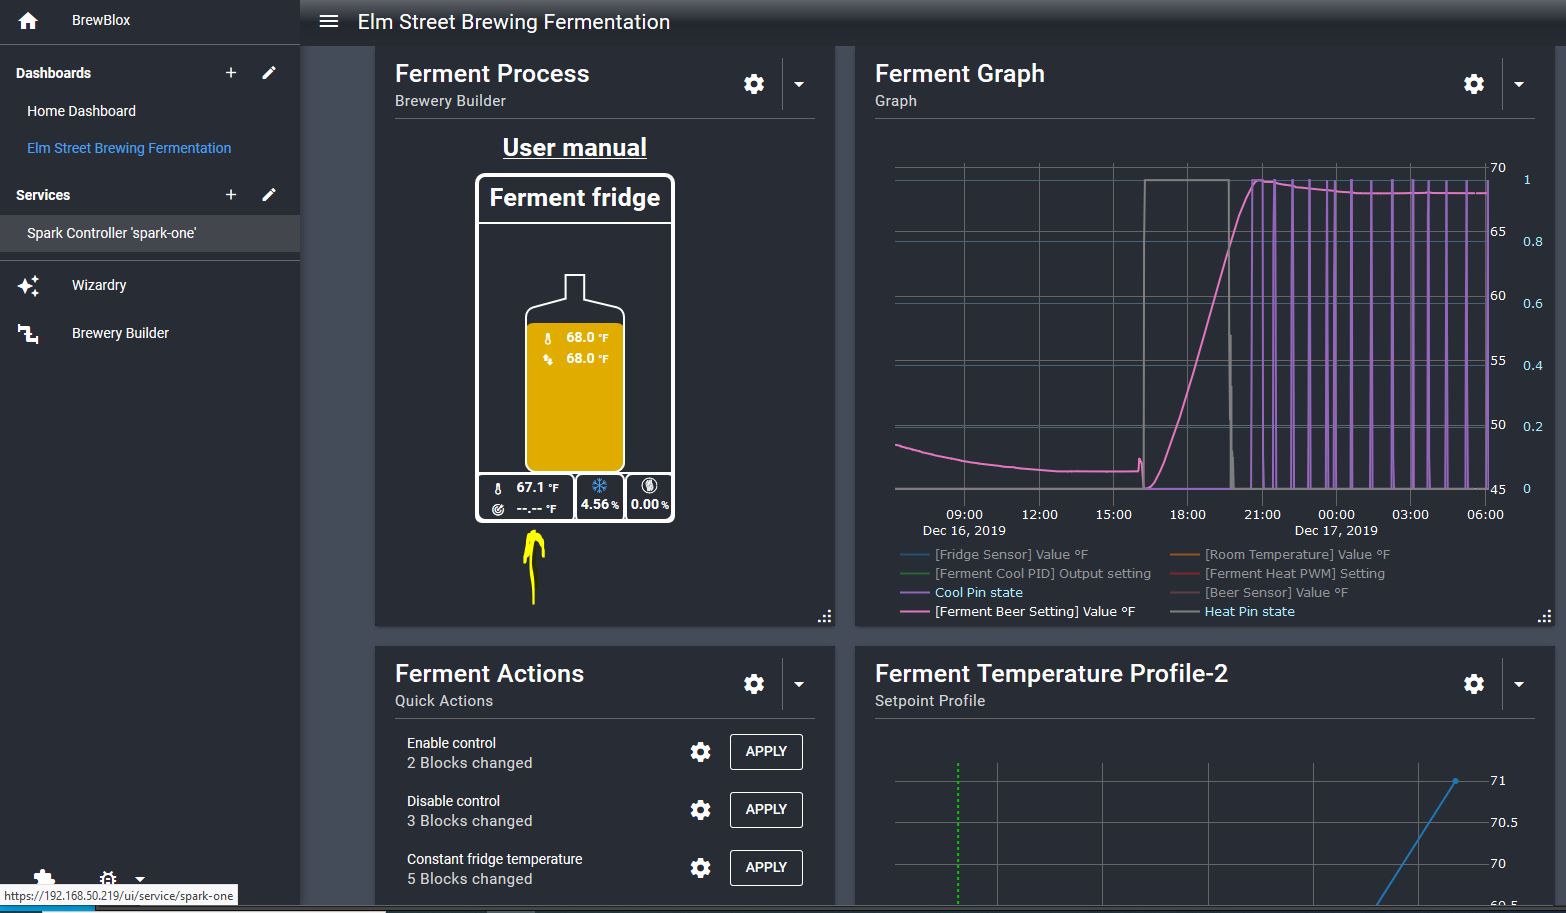
Next question… Getting started says " By default, temperature values are in Celsius. If you prefer Fahrenheit (or Kelvin), now is a good time to configure that. The unit settings can be found under the Actions button in the Spark service page."
The only ACTION button I see has these options…
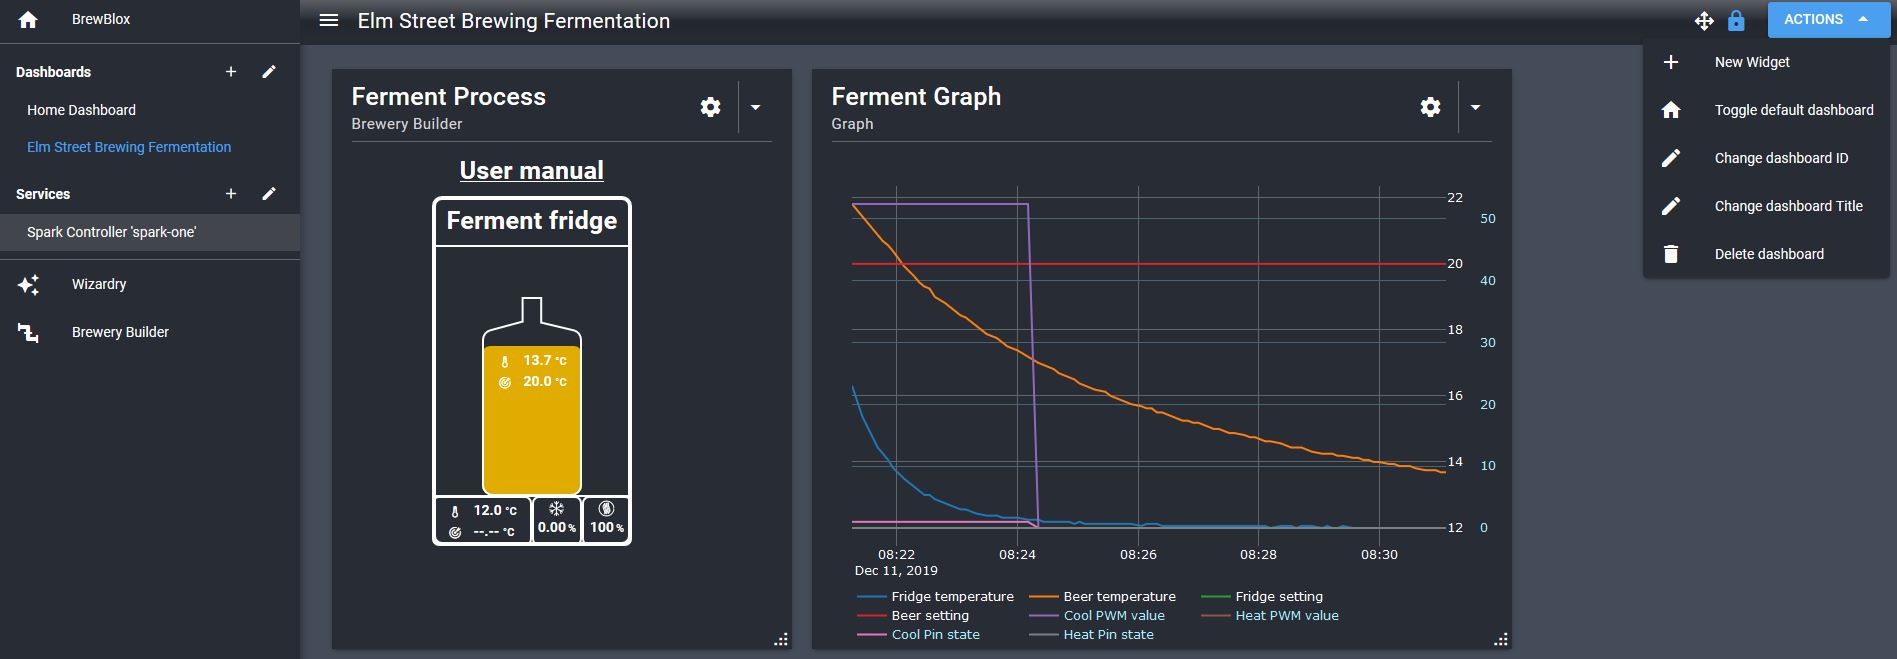
Service pages are under Services in the left side bar. Here that’s Spark controller 'spark-one'.
After setting that, you may want to remove your fermentation dashboard / blocks on the service page, and re-run the wizard. Right now it’s configured to use Celsius, and running the wizard again is likely less work than manually changing graph settings.
Okay, got that and now a new dashboard is now in degs F. Getting close !! I had a room temperature sensor that trended on the Brew-Pi UI. Does that get added using a widget ?? I only see Temp Sensor (mock) in the list.
And… The screen on the spark has empty blocks that say unassigned and to use the web interface to define. I must be dense, I don’t see where to do this…
On the Spark service page, top right menu, discover OneWire blocks.
Then rename the discovered block.
On this page you will also find the display block through which you can configure what is shown on the TFT screen of the Spark. I recommend adding your PIDs first, because they will show setpoint, sensor and actuator.
For sensors that do not have a PID associated like the room sensor, just add the sensor itself.
Okay, got the room temp added and the display setup.
One last question… Brew-Pi had an Idle Mode
Under Ferment Actions - Disable Control set to Active the same as Idle on the Brew-Pi ?? Thanks for all the help, the upgrade went very smooth with your help and Bob’s !!!
Yes, the Disable Control button will pause temperature management.
Happy to hear you liked the install process =) Do feel free to post any bugs or feature requests: we regularly release updates.
1 Like